- RetroScan-HD Universal Settings -
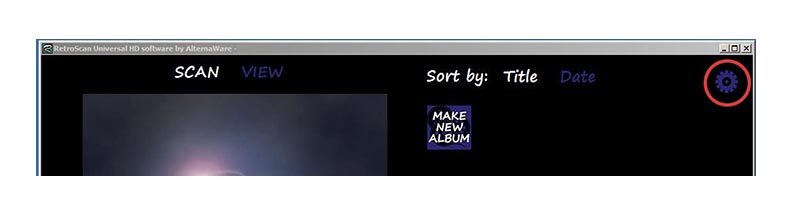
When you launch RetroScan-HD, click the Settings icon in the upper right hand corner. The following settings box will appear.

All choices are global and affect all captures and exports.
- DRIVE SELECTION -
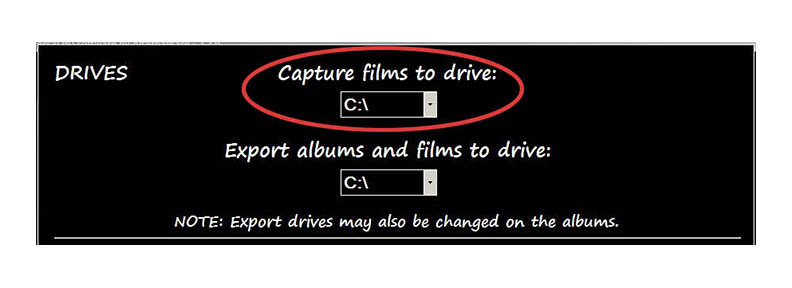
In this section, you select the drive that you wish to capture to. This ideally should be a fast, internal drive. Some people do capture to external drives but it is not something we recommend or support.
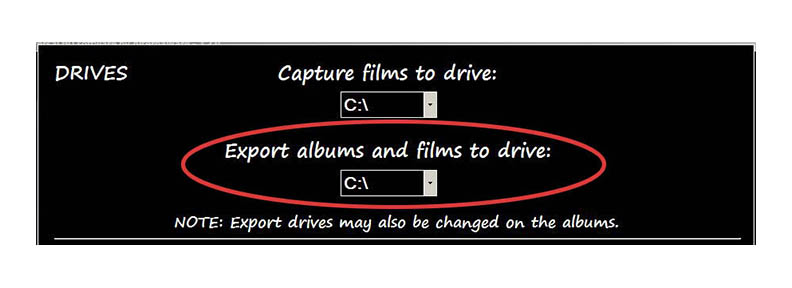
NOTE: All files must be exported.You also select the drive that you wish to export files to after capture. They can be the same as the capture drive or they can be different or external drives. Please note that the export destination drives can also be changed on the albums, themselves. You can also export via a network but it is not recommended due to slow render speeds.
You can not import the capture files into any edit program.
- CAPTURE SETTINGS -
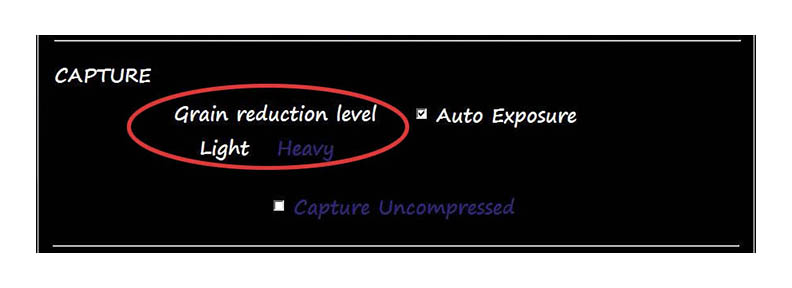
In this section, you choose the degree of grain reduction desired.
This can be previewed in the set up mode of the capture control panel.
NOTE: The RetroScan grain reduction is passive. Rather than apply grain reduction processing to the image, RetroScan simply reduces the degree of sharpening applied to each frame. So the higher the grain reduction, the lower the sharpening.
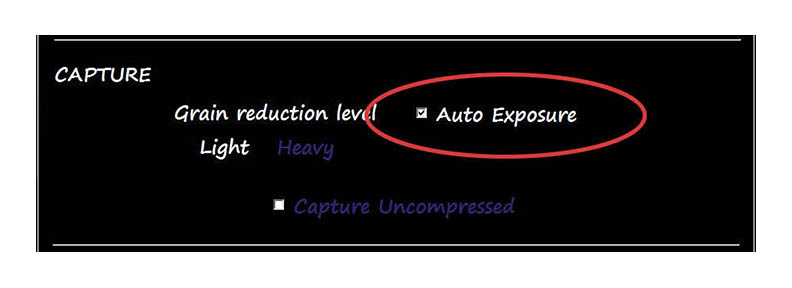
Here you activate the RetroScan Auto Exposure function.
(The software defaults to Auto Exposure when you first install it.)
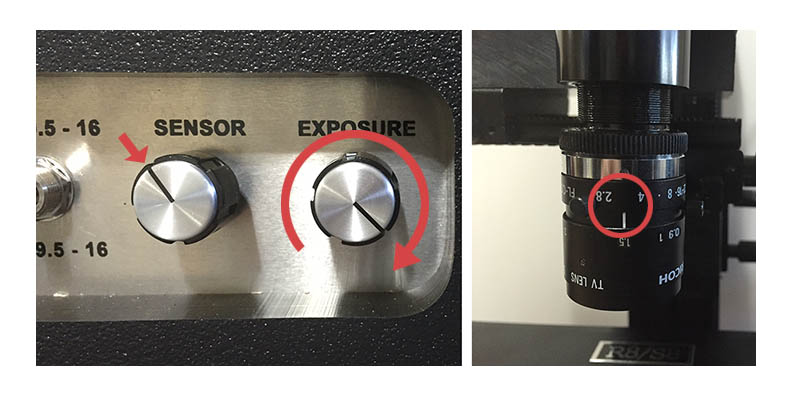
For using the auto exposure function on typical home movies, turn the exposure knob to full brightness. Make sure that the lens is set to between f2.8 and f4. The normal starting point for the sensor is about 11:00, which is a half turn back from full right. Adjust the sensor as needed for smooth transport of the film. (see Universal instructions)
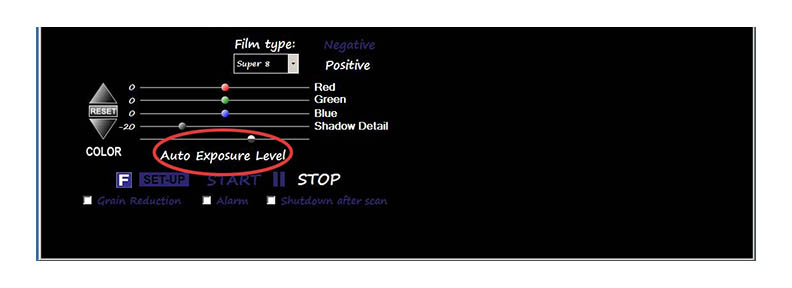
On the capture screen, the default starting point for the Auto Exposure level is between "Exposure" and "Level" but can be changed as needed. Shadow Detail is normally at -20 but can also be changed to suit the needs of the footage. In general, these settings are a good starting point that will work for Auto Exposure on most home movies with moderate over and under exposure. For radically under exposed or over exposed films, you may have better results using manual exposure.
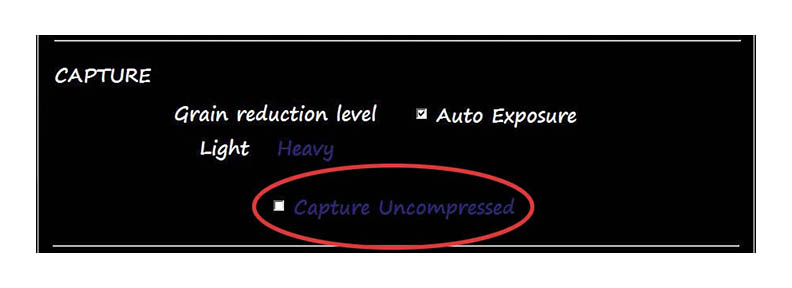
RetroScan-HD can capture in both compressed or uncompressed formats. The default setting is for compressed, where every frame is stored as a hi-resolution JPEG. Checking the box will allow you to capture uncompressed, where each frame is a BMP.
Please note: You must have a high speed, internal drive to capture in uncompressed. This can be a classic internal Raid-0 drive array or an internal solid state drive that has been tested and proven to sustain performance over long captures. While the Raid-0 array always works, not all solid states drives will provide acceptable performance for uncompressed, so you might need to test for best results. Uncompressed captures should be made only in the slow speed for best results.
- EXPORT SETTINGS -
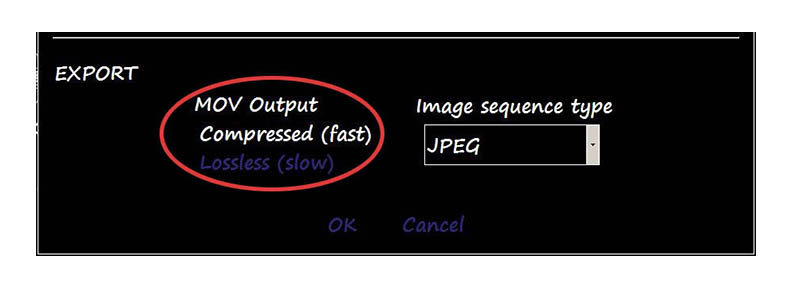
This section applies to EXPORT only. These settings do not affect your captures in any way and can be changed at any time before or after capture. You can export your .MOV video files as compressed in the MJPEG codec or you can also output lossless. While there is a quality difference, exporting as lossless can result in very long render times so should be used sparingly.
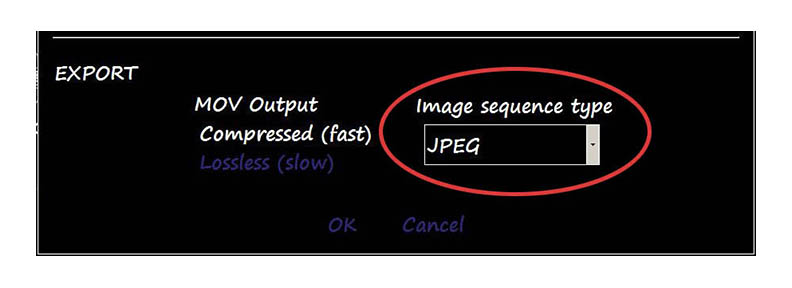
For highest quality, you can export as a numbered image sequence, which puts each frame of film on a separate digital still frame in a folder. A numbered image sequence can be imported into most any computer edit system which will automatically string the separate images together to create a video movie file. From smallest file size to largest, they are JPEG, PNG, BMP and TIF. Most people use JPEG. Just use the drop down menu to make your choice.
If capturing uncompressed and you wish to stay uncompressed, then you would need to export PNG, BMP or TIF.
If you have any questions, please feel free to email at
retrofix@swtexas.net or call us at 830-966-4664.
Click HERE to go back.
Click HERE to go on to Scan.
All information and imagery copyright 2016 MovieStuff, LLC
All right reserved.