-( SD mode )-
The following instructions are for the Sniper-Pro that has been upgraded to HD but is being used in the SD mode. If you are not using your Sniper-Pro upgrade for SD, then click HERE for the HD set up instructions.
For Velocity software instructions, please click HERE.
NOTE: For this unit, you will need to use a Manual Sync offset of -5.65 in the Settings Tab of the Velocity software.
Please read carefully before attempting to use your unit.
You will need the following:
Can of compressed air.
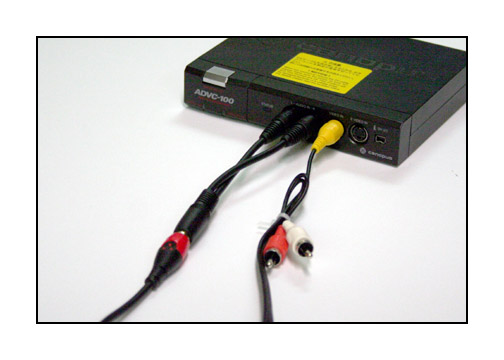
Canopus
ADVC55, 100 or 110 analog to digital converter
Sharp, bright Super 8 film with good sprocket holes
(this should be disposable film to practice with)
PC with minimum 1 gig of RAM
Level Pentium 4 processor or better
32 bit XP, Vista or Windows 7
Firewire port
Velocity
software
installed
Mainconcept
DV Codec installed
Scissors
NOTE: Do not plug in unit until directed by instructions.
If you are an international customer with 50 cycle, 220VAC
power,
you will not need a transformer. Just use an adaptor
to change the plug
to your local standard.
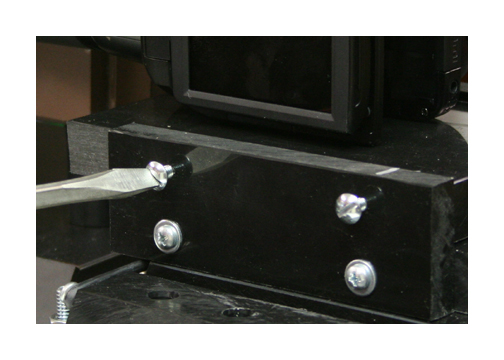
After unpacking the unit, align the marks on the camera
mount and gently lock into place with a screw driver.
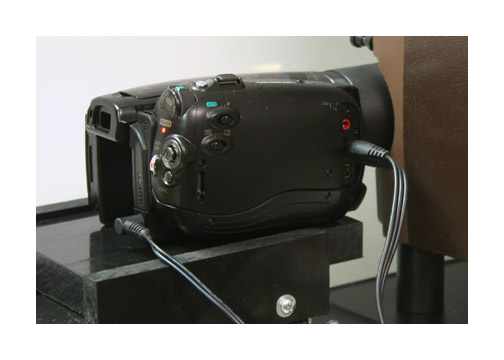
Attach the power cable and provided mini-pin analog video
cable to the camera.
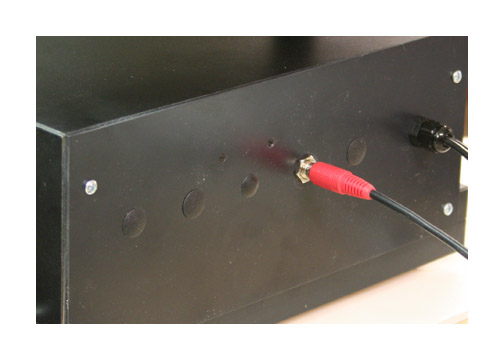
Attach the RCA audio sync cable to the lower box and the
"Y" cable and yellow video cable
to your Canopus ADVC 55, 100 or 110 converter as shown.
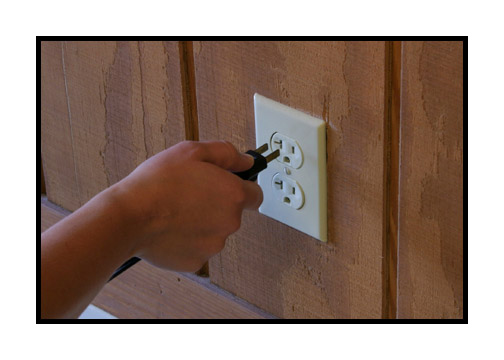
Plug unit into power.
If you are an international customer with 50 cycle, 220-240VAC
power,
you will NOT need a stepping transformer. Just use an
adapter
to change the plug to your local standard.
Turn on the power.
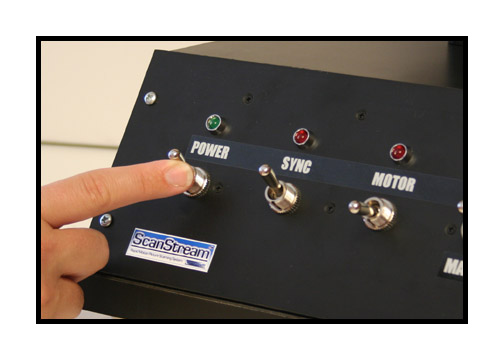
The camera is shipped in the "power on" mode but
may have been turned off during packaging. If you do
not hear the camera power up, just turn it on and leave
it on.
It will power up automatically when you turn on the unit
in the future.
NOTE: The camera has been pre-set internally for optimum
results. Please do not make adjustments to the camera.
Also, please do not attempt
to remove the camera from the mount nor remove the lens
from the camera. This camera should not be used for recording
to tape and the eject button should never be operated.
Doing any of the above may void your warranty or incur
additional fees to re-establish settings.
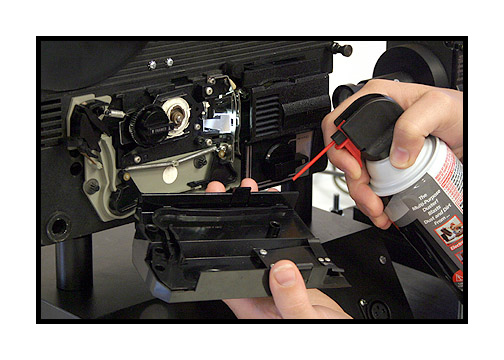
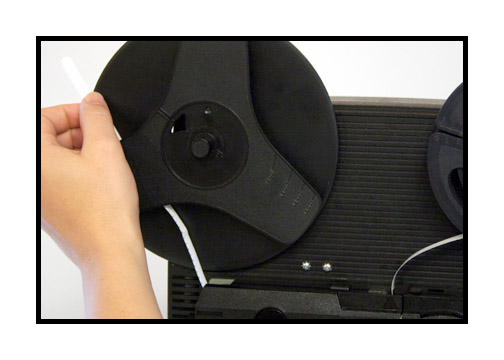
Before loading film, it is always a good idea remove
the side cover and blow out the gate and film path.
This is a manually loading machine. With the control
knob at the stop position,
load the film as shown in the photos below.
Make sure the reel slot seats fully on the small spline.
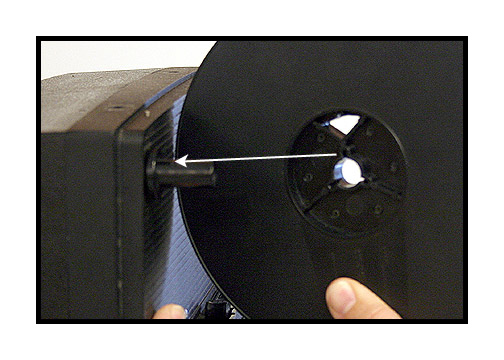
NOTE: There is a super 8 adaptor for use with super 8
film.
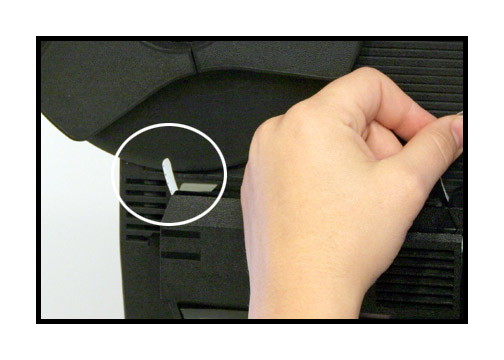
To use regular 8mm reels, please remove the adaptor.
To remove, do NOT press down on the silver metal clip.
Just grab the adaptor by the black plastic and firmly,
but gently, pull.

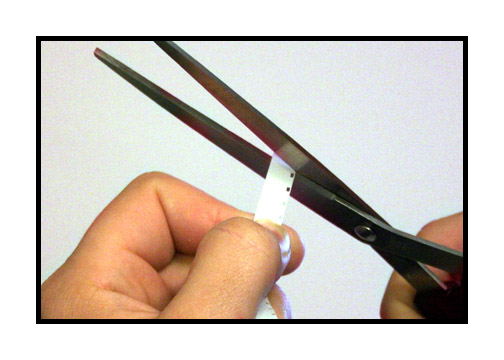
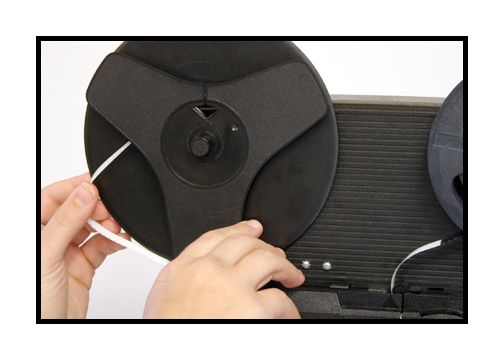
Cut the end of the film to a taper as shown.
Your leader should be straight without excessive curl.
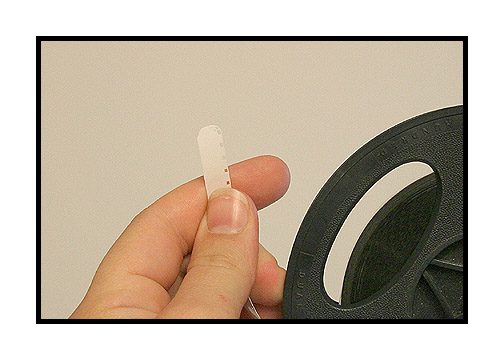
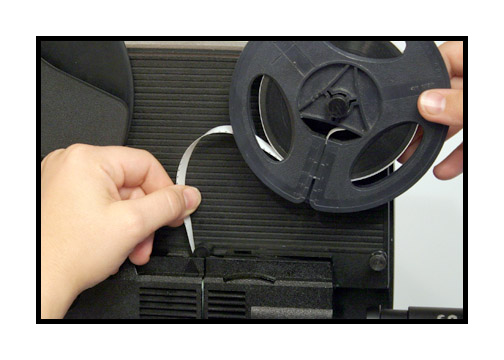
Insert the film and push through the unit until it appears
at the back end. If the film seems to get stuck, just
bump the
motor switch to make the claw retract.
NOTE: Never load or run the unit with the side cover off.
There are small hooks on some of the take up reels. Lay
the film on the reel and the hooks
will engage the sprocket holes of the film. Turn the
reel while maintaing tension on the film.
Close the gate by turning the control knob to play.
Seat the film by turning the motor switch on and off briefly.

Launch the Velocity software and follow the instructions
for appropriate settings for your computer.
NOTE: For this unit, you will need to use a Manual Sync offset of -5.65 in the Settings Tab of the Velocity software.
Once the software is launched, you should see an image
in the capture window.
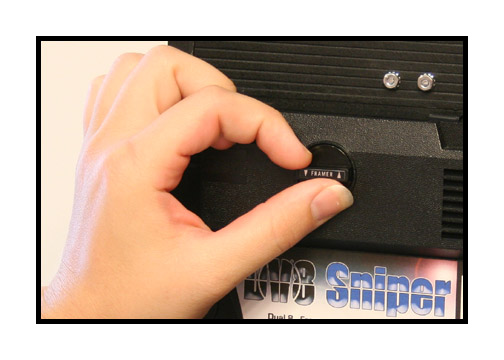
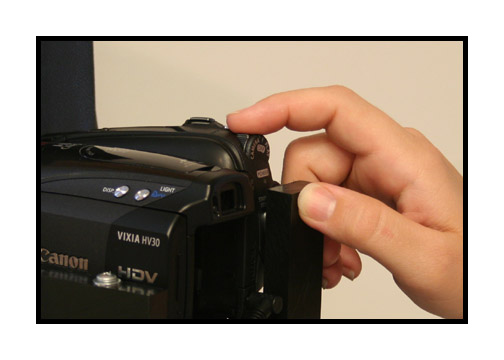
To adjust the vertical placement of the image, use the
framer knob
as seen in the photo below. This should only be adjusted
while the unit is running
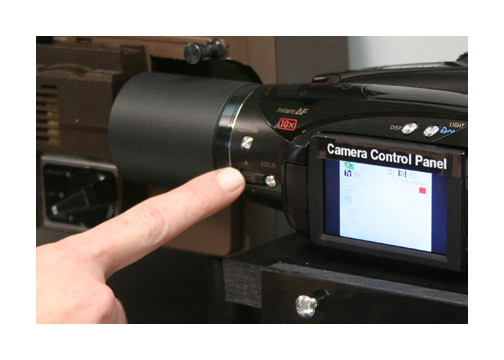
To adjust focus, use side roller on the camera.
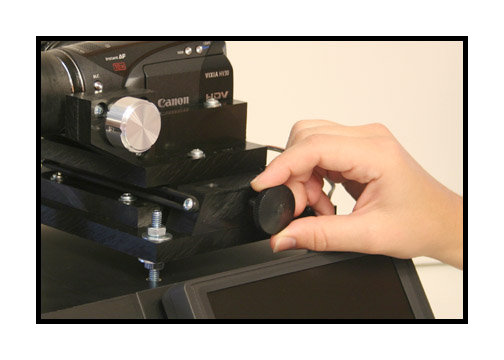
To adjust side to side position, use the black compound
knob.
To change the cropping of the image, use the zoom
control on top of the camera.
Always start the motor before starting the capture in
Velocity.
Leave the sync switch on unless you wish to skip a section
of film
while making a continuous transfer of a reel. Always
stop the
Velocity capture before stopping the motor.
At this point, you will need to launch your Velocity software.
For Velocity software instructions, please click HERE.
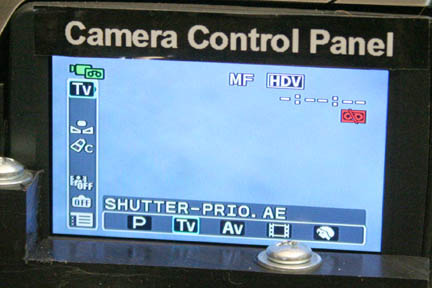
Manual Exposure Control
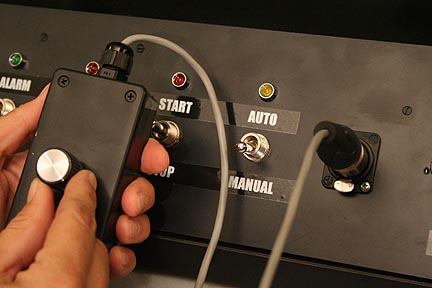
In the manual mode, you can make changes using the provided remote.
NOTE: The internal default mode for the camera is always
auto-exposure. Adjusting the remote will make fine adjustments in the overall
brightness and contrast of the picture but the camera will still be operating
in the auto mode. For greater control, you can put the camera temporarily
in a manual exposure lock as follows:

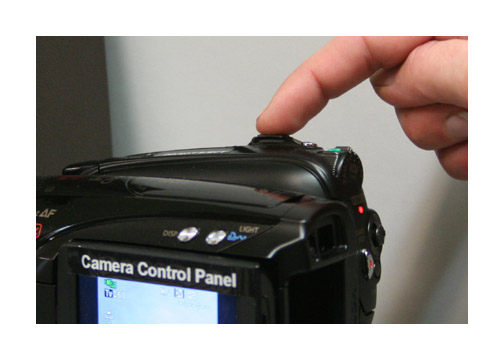
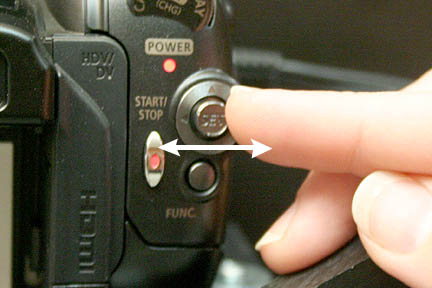
Gently press in on the joy stick ONE TIME ONLY.
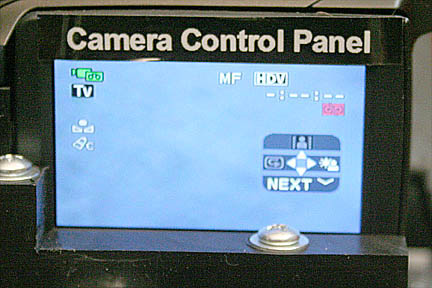
This will reveal a control icon in the lower right hand
corner of the camera control panel.
(For earlier HD units without this panel, look in the
viewfinder of the camera)
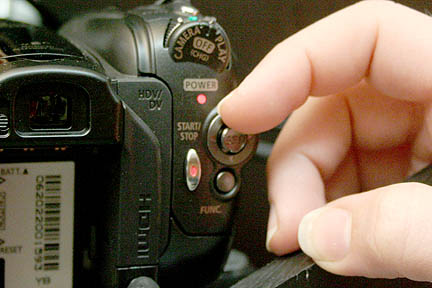
Next, gently press down on the joy stick ONE TIME ONLY.
This will put the camera in the manual exposure mode.
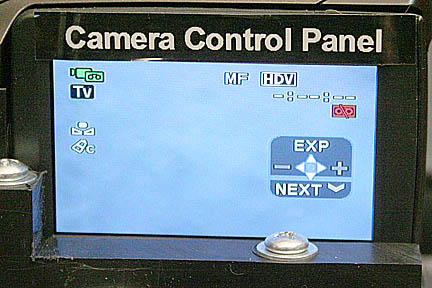
Next, gently press up on the joy stick ONE TIME ONLY.
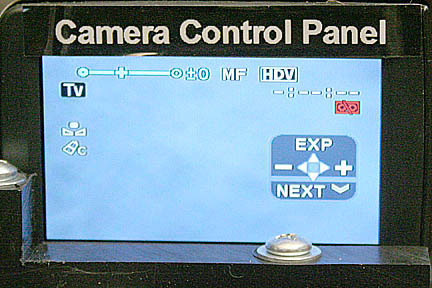
This will allow access to the camera's manual exposure
settings.
You can then use the joy stick for a fine adjustment of the overall exposure and/or use the Pre-Set knob on the Sniper front panel or the remote for a more coarse exposure control.
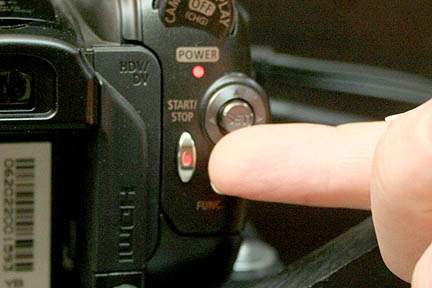
To reset the camera to full auto, just turn off the power to the Sniper or to the camera and then turn back on. It will automatically reset to all auto operation. Do not attempt to use the camera controls to reset to auto. Just turn the unit off and then back on to regain auto exposure capability.
Adjusting the white balance.
There may be times that it is necessary to adjust the white balance on the camera. For regular home movies, it is best to just white balance to the empty gate of the projector.
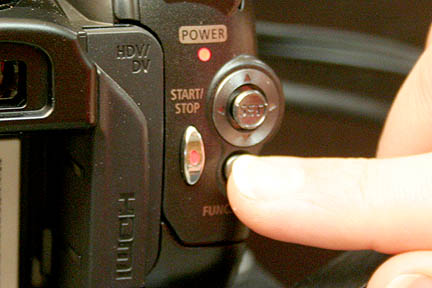
Gently press the function button ONE TIME ONLY.
This will reveal camera preference icons on the left and
bottom of the control panel.
Next, press down on the joy stick ONE TIME ONLY.
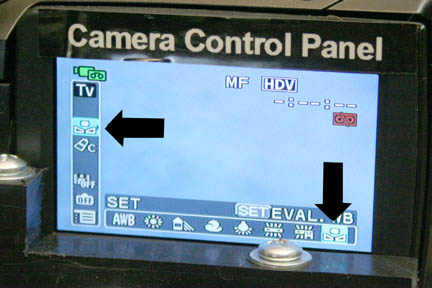
This will put the camera cursor onto the icon for manual
white balance.
Press the joy stick to reset the white balance.
Hold for about 2 seconds and then release.
Press the function button ONE TIME ONLY to lock the white
balance into place.
The camera will hold this white balance even after being
turned off.
Transferring Color Negative
Insert some color negative into the gate and then follow
the above white balance procedure.
Transfer your film in the silent mode.
Process with the "NEGATIVE" option in the settings tab.
IMPORTANT: Always reset your white balance to an empty gate after transferring color negative. Otherwise, your next home movie transfer will come out very very BLUE!!!!
For Velocity software instructions, please click HERE.
If you have any questions regarding set up or operation
of this unit,
please feel free to call me at 830-966-4664. We have
an operator on call
24 hours a day and I will get back to you as quickly
as possible.
Or email me at moviestuff_tek@swtexas.net.
Thanks!
Roger Evans