These instructions apply to the 26-March-2011 version of Velocity (standard definition).
This software and
updates are available only to MovieStuff customers that have received
their standard def
telecine units shipped directly from MovieStuff.
If you need to purchase
the Velocity software for your MovieStuff unit, please
email
us and we will send you a private purchase link for the Velocity software.
Your
request must include the customer name and email address
on
the order form used to purchase the Sniper unit.
To
maintain your warranty and customer support, we ask that you
please
do not post this purchase link publically on the web.
Thanks.
If you are a MovieStuff
customer and have a version of Velocity that you
purchased previous
to this date, you can upgrade to the 26-March-2011 version for free.
Just email
us with your registration key and we'll send you the current
standard definition
version of Velocity. We can not send the update without
the registration
key. No exceptions, sorry. Velocity is not a free
downgrade from Velocity-HD.
This software will
work on Windows XP, Vista and Windows 7.
All must be 32 bit
systems.
This software will
not install nor work properly on a 64 bit OS.
This software will
not work on a 64 bit OS in the 32 bit mode.
Your computer should
have two internal drives. One for your system
and a physically
separate, internal, fast 7200 RPM drive to record video on.
Do not record to
an external drive or you may get errors with this application.
You can process to
an external drive but not via a network.
Do not copy files
to another computer for processing.
Process on the same
PC that you captured on.
PLEASE READ THE FOLLOWING CAREFULLY AND DO NOT SKIP.
Before
attempting to install this software, please make sure that you have the
latest updates for Direct Show/DirectX and .NETframework 2.0 on your PC.
Also, it is highly recommended that you download and install the
MainConcept codec for best results as the free Microsoft codec is, well,
microsoft. :)
The
MainConcept codec should be the 2.4.16 version or simply the MainConcept
DV Encoder.
You can purchase the MainConcept DV Encoder HERE.
You
should be using the Canopus ADVC 55, 100 or 110 analog to digital for proper
results.
You
must use the AC adaptor with all Canopus units for consistent performance.
It
is advised to turn your Canopus off and then on once a day to reset its
internal timing.
Failure
to do this can lead to sync drift over long transfer times.
Disconnect
or disable any software that might be running in the background.
This
means no screen savers, no active network cards, no internet,
no
editing software minimized on your desk top and no automatic virus scanning
software
like Norton that might be constantly looking for updates, etc.
Basically,
this is a resource intensive application and if you want
it
to work properly, then this should be the only thing your computer is
working
on or dealing with during capture or operation.
And,
finally, look in your PC's Control Panel and make sure that your
"Regional
Settings" info is set to "English (United States)".
International
customers need to do this also.
Failure
to do so will result in application errors.
-Prelimary Set
Up for Velocity Software-
Make sure that the
Sniper camera is on and that you have the firewire output of your
Canopus ADVC 55,100
or 110 plugged into your computer. No other active fire devices should
be present.
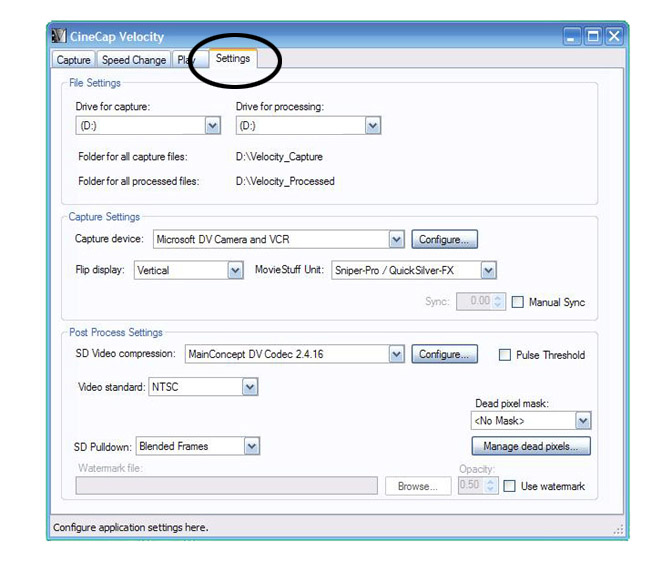
Launch the software
and click the "Settings" tab.
If you haven't done so already, fill in the fields for where you want Velocity to create seperate folders for "Captured Files" and "Processed Files".
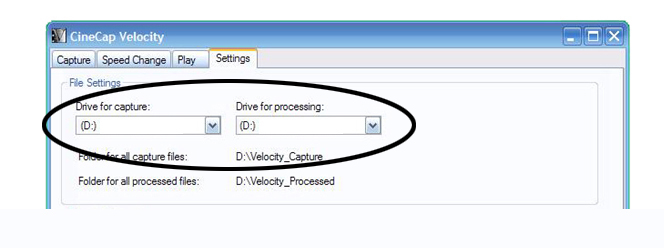
These can be on the same drive on on seperate drives. Velocity will remember where you put them. However, if you want the processed files to be on an external drive, that drive will need to be in place and active before launching or Velocity will not "see" the drive. All drives must be at least 7200 RPM.
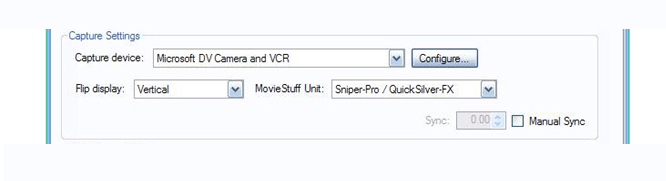
The software will
default to the "Sniper-Pro/QuickSilver-FX" as the MovieStuff Unit, which
will also work for the basic 1CCD Sniper units. But you can select the
"V-Box + WorkPrinter" option in the drop down menu if using the Velocity
Box with this software or if you are using the WorkPrinter-HD in standard
definition. In the Capture Settings, the Flip Display setting should be
on "Vertical" unless you are using the WorkPrinter-HD or Velocity Box with
a WorkPrinter, in which case you want "No Flip".
Use the drop down
menu to select the Main Concept DV Encoder or the Main Concept DV Codec
2.4.16 codec.
Either will produce
identical results.
Click on the "Configure"
button to the right of the SD Video Compression menu window.
Then click on the "VfW Config..." button.
If using the Main Concept DV Codec 2.4.16 codec, you will get windows like this:
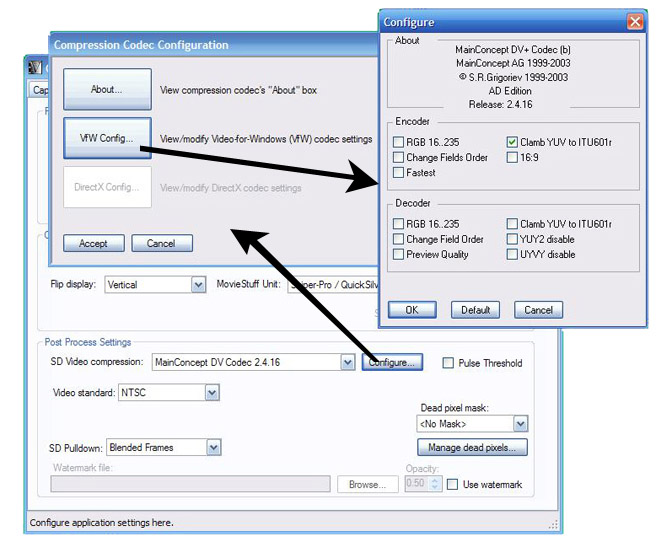
Make sure that the
only box that is checked is the "Clamp YUV to ITU601r".
Do NOT check the
"Fastest" box as that will degrade the final image. Click OK to save the
settings.
If using the Main
Concept DV Encoder, you will have a window that looks like this:

Make sure that the
only box that is checked is the "Clamp YUV to ITU601r".
Do NOT check the
"Fastest" box as that will degrade the final image. Click OK to save the
settings.
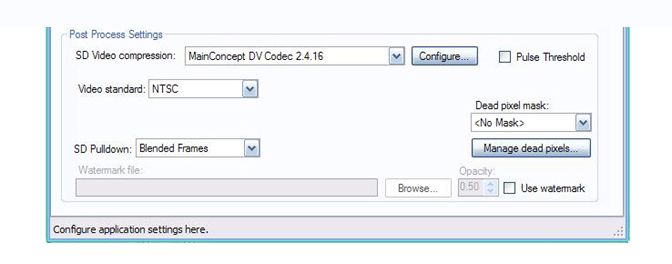
Set your video standard for NTSC or PAL, depending on the type of files you wish to produce.
You
will note that the default for this software is to produce standard defintion
files with blended (interlaced) frames. Blended frames look best on older,
regular CRT type of televisions while non-blended (progressive) frames
look best on progressive scan computer monitors and HD flat screens.
However,
you can use the drop down menu to select your preference for blended or
non-blended frames.
The
"Pulse Threshold" box should not be checked unless you get an
error
message in processing that sync pulses are too low.
If
that happens, you do not need to re-transfer. As long as the pulses
can
be heard on the original capture file, just check the
box
and re-process the files.
The "Dead Pixel Mask" function is used if your camera displays any dead pixels. Please contact MovieStuff for assistance with the Pixel Mask function if your camera starts to display dead (white) pixels. Also, the software has a watermark function that will allow you to superimpose artwork or logos on footage during processing. Contact MovieStuff for help with this function if desired.
If you have not already
done so, load some disposable film into the unit. While there is no expectation
of mechanical problems with the Sniper, it is always best to use non-client
film until you are completely familiar with all operations of the Sniper
unit.
Click on the "Capture"
tab.
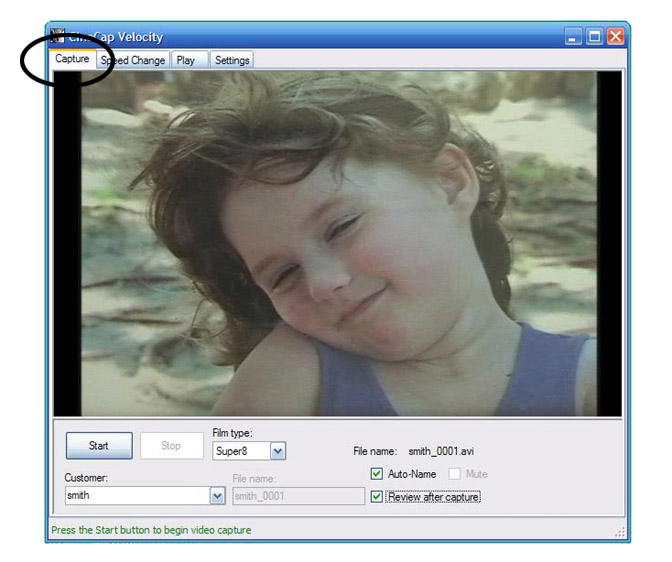
Type a file name into
the "Customer" field near the bottom left and then hit the "tab" key. Doing
this will automatically create a "Capture" folder with that name on your
video drive. Note that the file name will be followed by the number "_0001".
The software will automatically use the next number "_0002" for the next
capture using that file name, then "_0003" and so on. This numbering will
start over when you enter a new file name. All file names will remain on
the convenient customer drop down menu for future use and the software
will keep track of the last number used and automatically update to the
next file number. If you prefer to give your files a custom name, simply
uncheck the "auto-name" box.
This will let you
add a custom suffix to the client name.
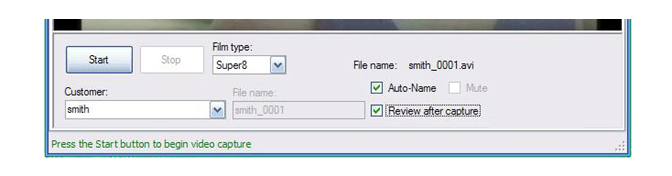
Before you may begin a capture, you must tell the software what type of film you are working with. This is important so that the automatic footage or meter counter will measure your capture correctly.
To begin a capture, always start the projector first with the sync switch already "on". After you hear the pulses coming from the computer and the projector speed stabilizes, click the "start" button and your capture will begin. When you complete your capture of that section of film, click the "stop" button first and then stop the projector, in that order.
NOTE: If you do not hear the sync pulses, please adjust the computer audio settings accordingly. If you do not record the pulses, then the file will not process correctly.
If
the picture freezes, make sure that your drive is not too full or fragmented.
It
is best to maintain about 30% empty drive space when performing streaming
capture.
However,
even a drive that is only 50% full can freeze if it is fragmented.
So
drive maintanence is important and should be defragged or emptied regularly.
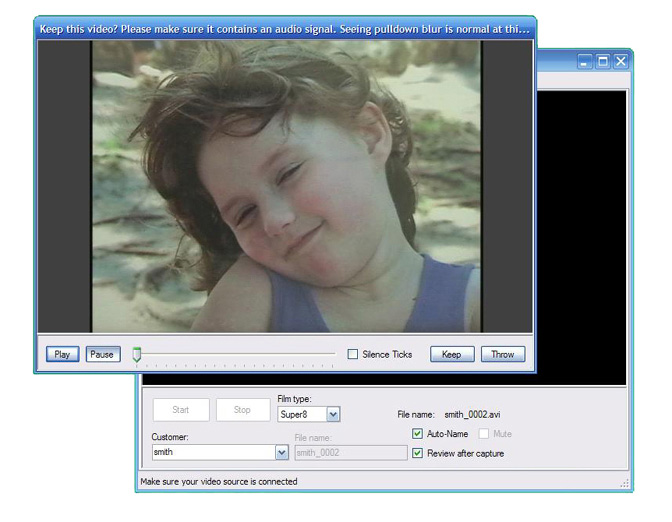
After capture, a review screen will automatically pop up as seen below. It is best to take a quick look at the file to confirm capture and that the sync pulses are present. Once you are confident with the procedure, you can use the box to silence the pulses (ticks) but it is a good idea to occasionally check to make sure the pulses are present. I recommend simply turning them down on the computer speakers to a less annoying level that can still be heard.
If you are satisfied with the capture, then click on the "KEEP" button and the software will automatically cycle to the next file number for the next capture using that file name. If you wish to discard the capture (hair in the gate, bad exposure, etc), then click on the "THROW" button and that file will be deleted and the same file number will be used again for the next capture under that same file name.
NOTE: a vertical pulldown blur will always be visible during capture and on review of the original captured file. This is normal. This pulldown blur will not be present on the processed file.
Click on the "Speed Change" tab.
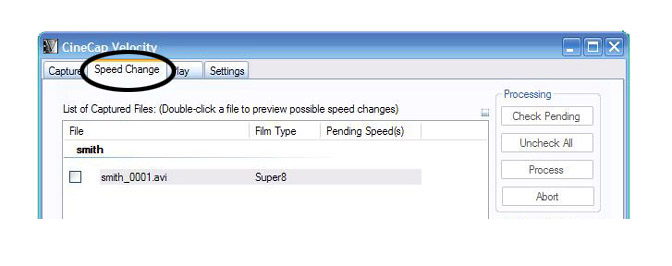
All the captured files will be present.
Any file can be moved or deleted from this section.

If not already selected, use the drop down menu to choose the film type. You can hi-lite and apply changes to an entire group of files, as well.
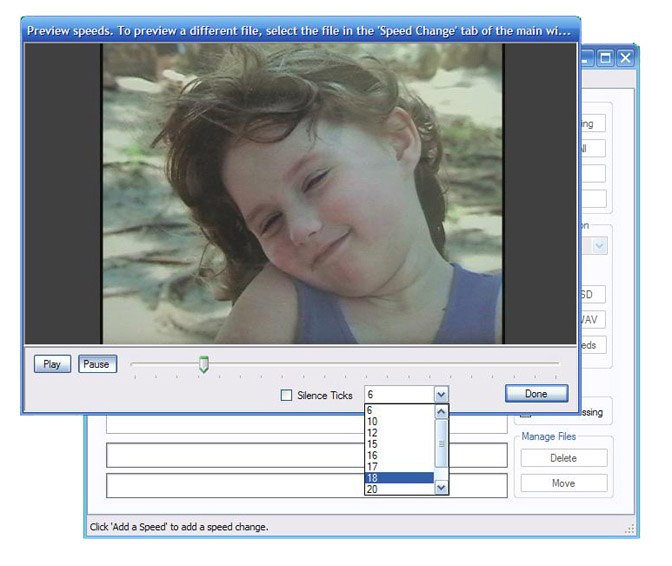
If you do not know the speed you wish to use for processing, double click the file in question and a speed preview screen will pop up. You do not have to watch the entire file. Just look for people walking around and select a speed that seems to produce normal motion. Again, it is normal to see pulldown blur in this preview. Just look at the motion of the people walking or moving about and make a note of the desired speed.
Close the speed preview window and continue.
-Speeds and Video Files-
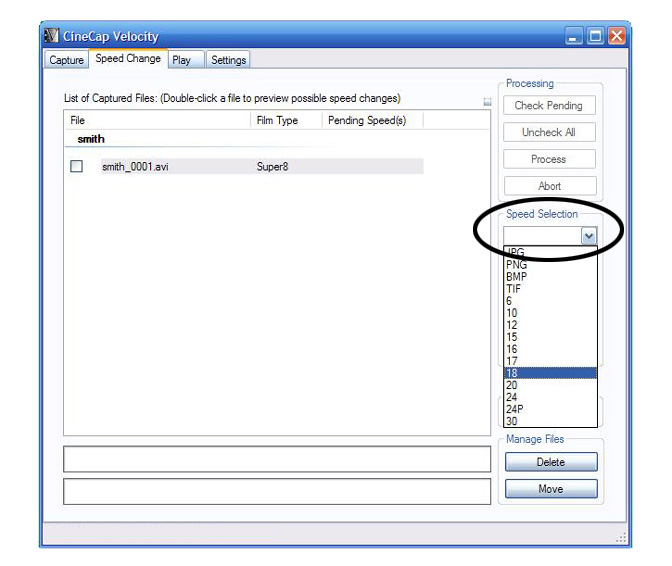
Single click to hi-lite
the file and select the desired speed from the "Speed Selection" drop down
menu.
You have a choice
of a variety of playback speeds, all of which can have blended or non-blended
frames, depending on your choice in the settings tab. However, it should
be noted that the "24P" option will result in a 1:1 file that plays at
precisely 24fps with no blended frames, regardless of whether the settings
tab specifies blended or unblended frames. This file will only play correctly
on an NLE system capable of handling true 24P files. The "24" selection
will actually play at 23.97fps and can have blended or non-blended frames.
-Numbered Image Sequences-
Velocity will also produce a numbered image sequence. This means that every frame of film will be on a separate digital still frame numbered sequentially in a folder. This is handy when providing files that need to be archived for use many years down the line when current video codecs might not be viable -or- if files need to be universally applicable across a variety of editing platforms that all use different codecs. Since a numbered image sequence is codec-free, the NLE (Premier, Final Cut, Vegas, etc) will build the desired movie file in whatever codec that particular NLE uses. This is much more desirable than trans-coding from one codec to another.
The drop down menu will let you choose from JPG, PNG, BMP or TIF.
Generally speaking, the files increase in size as follows:
(smallest) JPEG > PNG > BMP > TIF (largest)
There
are over 3,600 frames in 50 feet of film and over 28,000 frames in a 400
foot roll.
So
pay attention to your hard drive space if using numbered image sequences!
Also,
a single folder can only hold 65,000 frames. That is plenty for each 400
foot roll.
Any
16mm reels that go beyond 65,000 frames will cascade into another folder
automatically.
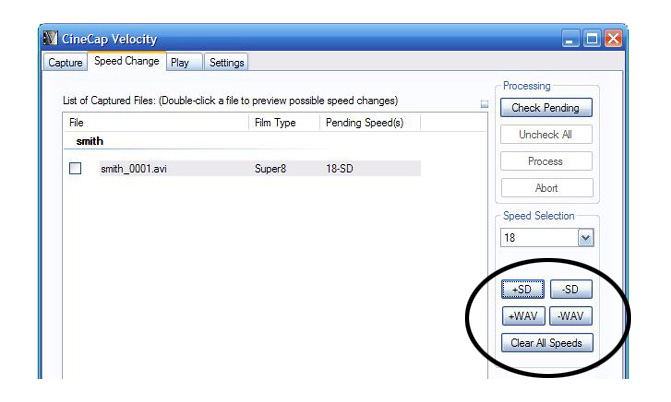
To apply the speed,
use the small buttons as shown.
"+SD" will add a standard
defintion file at the selected speed.
"+WAV" will add a
wav file at the selected speed (if you have sound film on a sound Sniper).
Choosing a speed and then clicking "-SD" or "-WAV" will remove that speed.
NOTE: Video files will have a sound track built-in, if using one of our HD sound units. But if outputting sound film as a numbered image sequence, you can also produce a corresponding WAV file. Just choose the correct playback speed and click "+WAV".
NOTE: You do NOT need to produce a WAV file if you are producing a video file, though you can if you simply wish to have a separate sound track for future use.
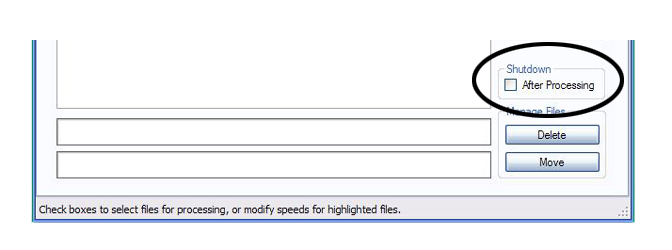
To prevent computer wear, Velocity can automatically shut down the PC.
This box can be checked or unchecked before or during processing as needed.
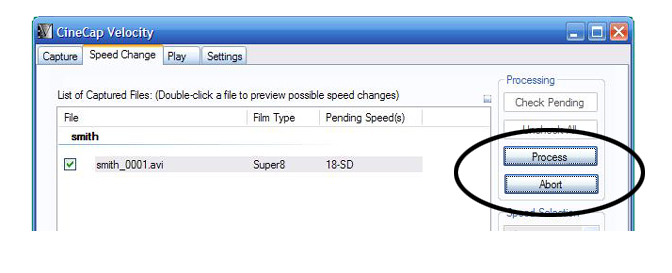
Click the "Process"
button to begin processing.
Click the "Abort"
button to stop processing.
Any files not completely
processed will start over when you click "Process" again.
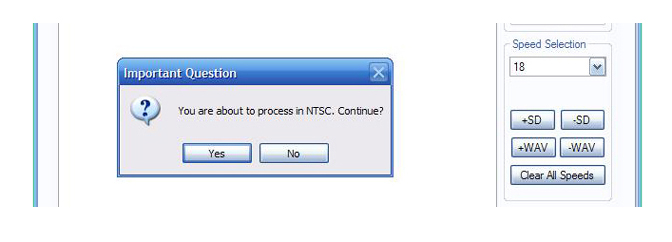
A prompt will pop up reminding you that you are about to process in either NTSC or PAL.
This is important as the Velocity software is capable of producing both NTSC or PAL files.
This prompt will remind you to check the format that you have chosen if you regularly do both. If necessary, click "no" and change the format in the settings tab. You will then need to re-apply all the required speeds, so be sure about the desired output format before making your speed selections.
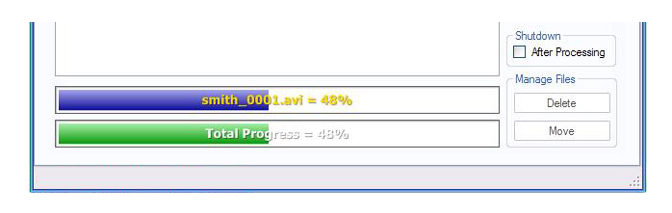
Once processing starts, progress bars will appear across the bottom of the control panel. It is normal for the progress bars to slow down once the bottom bar reaches 50%.
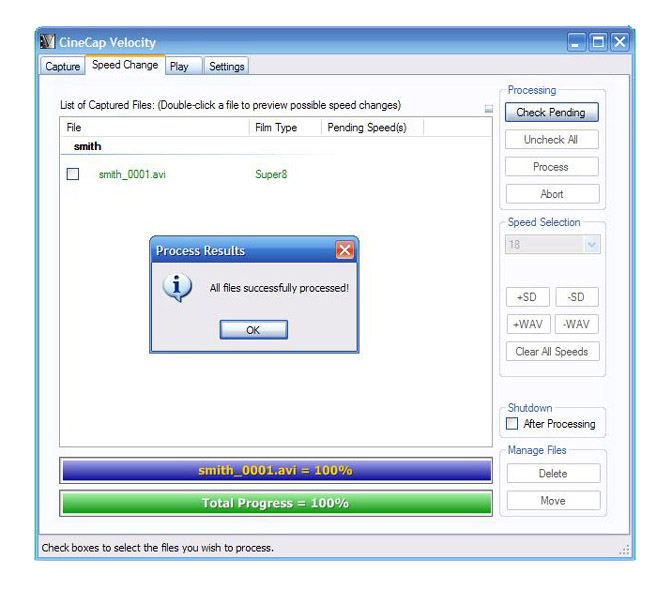
When finished, you will see a prompt that tells you processing has completed.
NOTE: If you get an error at the 50% mark that says "Sync Pulses Too Low", make sure that the audio pulses can be heard on the capture file and then check "Pulse Threshold" box on the settings tab. You will not have to re-transfer. Just re-process your files. If there are no audio pulses heard, then you will need to re-transfer. Make sure that all connections are secure and that your sync switch is "ON" before re-transferring.
After processing has completed, click on the "Play" tab.
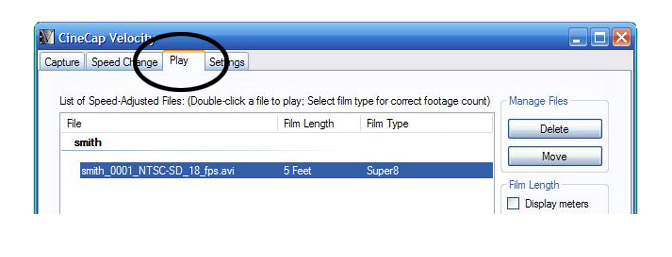
All the processed files will be present.
Any file can be moved or deleted from this section.
Also, you can hi-lite a single file or group of files
and the total length will be displayed to the right.
Meters can be selected by checking the "film length" box.
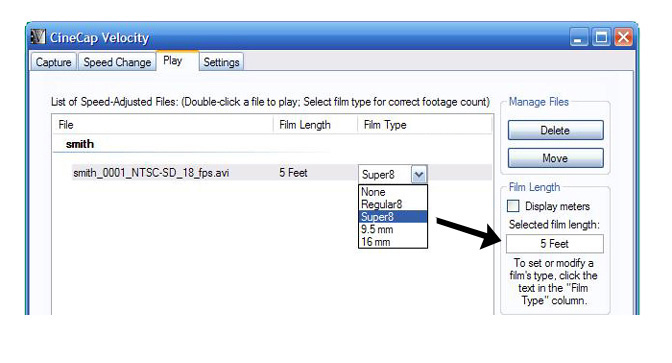
If you made an error in your film type, you can change it
after the fact by using the drop down menu.
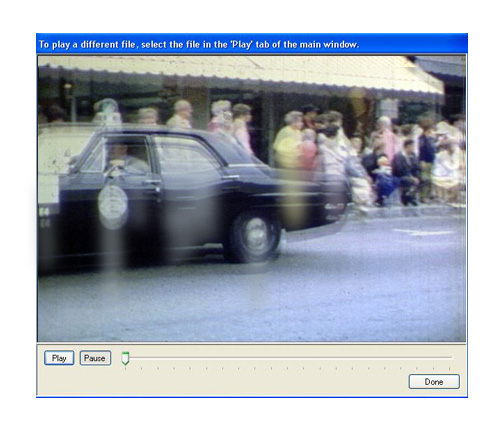
To review your processed
files, just double click and a play window will pop up as seen below.
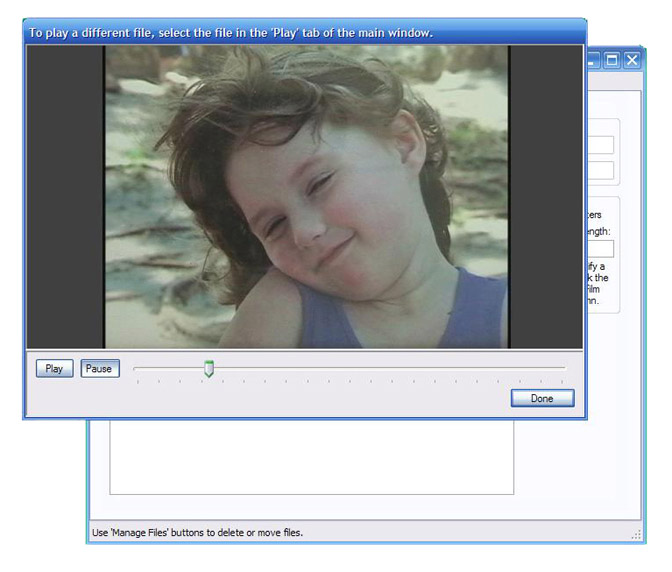
Your processed files
should play back smoothly with no vertical blur, ghosting or smearing.
NOTE: If you chose "Blended Frames" in the settings tab, you will see lines throughout the image if viewed on a dedicated progressive display, such as a computer monitor, even if that monitor claims to be an HD/TV monitor. To check the true image quality of the file, always view the file via a true HD or CRT television monitor that can handle both interlaced as well as progressive display. A PC display should only be used to view for content, not quality.
Your completed files will be found in their respective folders in the "Velocity Processed" folder on the drive designated on the "settings" tab. These are standard .AVI files in the DV codec and can be edited on most any contemporary video editing program.
All Sniper units should produce files free of artifacts or pulldown blur.
WorkPrinter-HD units or WorkPrinters + Velocity Box units may require additional tweaking to establish sync.
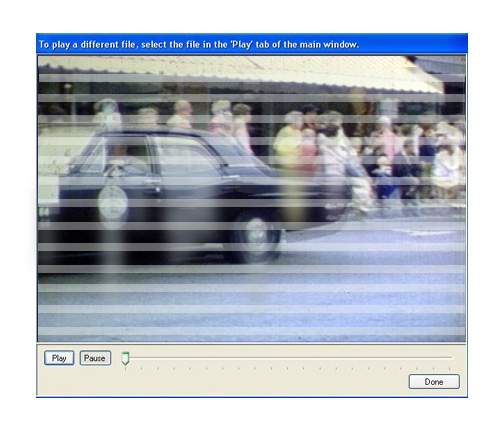
If your playback of the processed files looks similar to the above examples, then you will need to
make some adjustments on the settings tab.
First, double check
to see if you have selected the correct MovieStuff Unit.
If you had the incorrect
unit selected, correct the selection and then reprocess your footage.
If that does not
clear up the problem, then you will need to set the sync manually.
Check the box marked
"Manual Sync" and experiment with different sync offsets until the processed
footage is clear of all vertical pulldown artifacts.
You
do NOT need to recapture your footage!
Just
reprocess with different manual sync values
until
the footage plays back clearly.
Manual
Sync adjustment is generally only required when using the Velocity Box
or WorkPrinter-HD units.
The
Sniper setting should always result in clear playback.
Make a note of any
settings in case you need to reload
your software at
a later date.
Again, your completed files will be found in their respective folders in the "Velocity Processed" folder on the drive designated on the "settings" tab. These are standard .AVI files in the DV codec and can be edited on most any contemporary video editing program.
If you have any questions,
please feel free to contact Roger Evans at 830-966-4664.
Or, EMAIL
me and I will respond as quickly as possible.