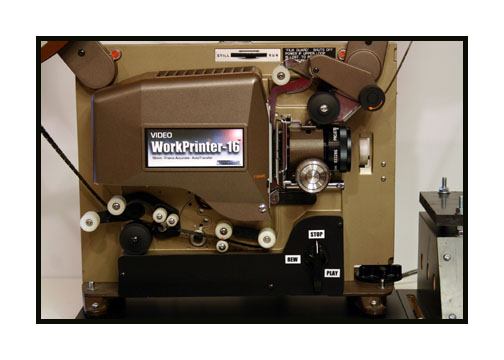
WorkPrinter-16
HD Instructions
For use with a PC or Intel Mac with Windows
NOTE: If international on 220VAC
at 50 cycles, you will need a
transformer that outputs 110-120VAC
at 250 watts.
For HD captures using the Velocity-HD software, you
will need a system with three internal drives. One drive will be your system
drive and the other two must be SATA-II Raid Edition (server grade) drives
in a Raid-0 drive array. All drives must be internal for proper operation.
You will also need the BlackMagic Intensity Pro or Decklink HD Extreme
card. You must use XP Pro or Vista Ultimate. Contact us for specific
computer specs for this application.
It is highly recommended that you install the Mainconcept
DV
encoder.
This will be used by Velocity-HD when down-converting
your HD files.
Velocity-HD software is available only to MovieStuff
customers that have received their WorkPrinter units shipped directly from
MovieStuff. Please email
us with the name and email address that was on the order form used to purchase
the WorkPrinter unit and we will email you the private purchase link for
software. To maintain your warranty and customer support, we ask that you
please do not publically post this purchase link on the web. Thanks.
And, finally, look in your PC's
Control Panel and make sure that your "Regional Settings" info is set to
"English (United States)".
International customers need
to do this also. Failure to do so will result in application errors.
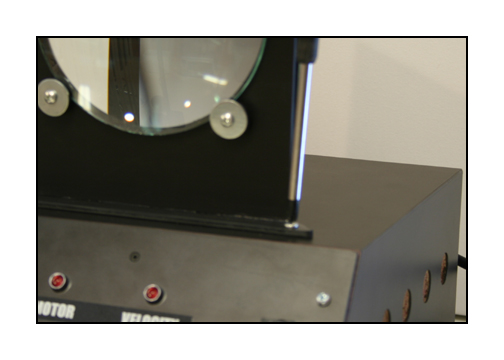
After unpackaging the
unit, place on a sturdy and stable surface.
The end with the condenser
lens should allow for a tripod to be placed
about a meter or less
from the unit with clearance enough
for the tripod legs.
The tripod should have an adjustable height via
a column and the head
should allow for seperate horizon and tilt functions.
Ball-head tripods
should be avoided.
First, install the
condenser lens.
(glass should be cleaned
with non-alcohol products and a clean, cotton cloth)
Next, connect the cables
as shown.
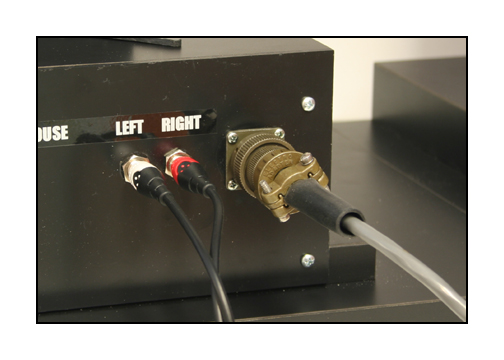
The large multi-pin
cable is found coiled in the back of the projector.
Plug the provided
cables into the LEFT and RIGHT outputs.
The other end of the
cables should feed into the audio inputs
of your BlackMagic
card on your capture PC or Intel Mac.
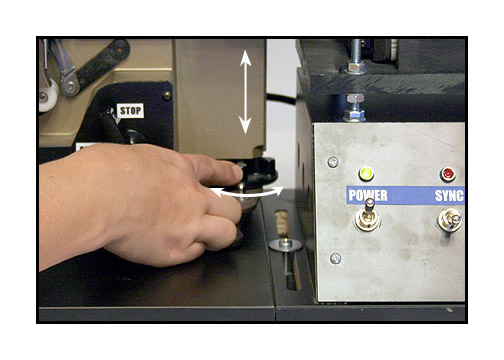
Next, load some film
into the unit as shown and
switch on the power.
With the motor switch
"off", turn the control knob
to the play position
to close the gate.
Run the motor switch
briefly to seat the film and to proceed to a
bright, well exposed
frame.
Make sure the selector switch on the WorkPrinter is
in the middle (off) position.
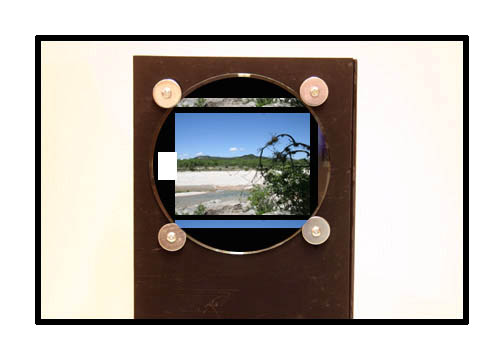
Make sure the camera is mounted on a tripod (column
type is best) and is level and centered in approximate height with the
condenser lens. Also, make sure that you can see the resulting, live image
on a large monitor. Using the tiny LCD monitor on the camera will make
critical adjustments tough. Use of a broadcast underscan monitor is ideal
because it will let you see the edges of the video frame for proper cropping
of the image. Consumer TV monitors do not let you see the entire video
frame, which can result in improper cropping and unlevel images. As a substitute
for an underscan monitor, you can use the capture window of your favorite
video editing program, which usually shows about 99% of the video image.
NOTE: For HD cameras with CMOS chips, you will need
to set your shutter speed to 1/500th of a second or higher
to overcome the latency inherent in CMOS imaging chips.
Avoid using progressive scan or "frame mode". Just
the normal interlaced video mode is needed. Best results and best registration
is achieved if your film has been freshly cleaned and lubed with good splices
and no torn sprocket holes. Supply reels should be inspected for warpage
or anything that will impede the even feed of film from the reel. Feed
reels that bind or grab the edges of the film may cause registration problems
or even film damage. Head leader should be fairly straight without a lot
of "curl memory" that will impede proper loading.
Various films have
different frame line placements. To make minor adjustments
in the vertical positioning
of the frame, use the adjustable foot at the front of
the projector as shown.
Position the camera
about 2.5 feet from the lens. Look at the monitor
for distortion of
the image. If there is curvature of the image top and bottom
then you need to adjust
the focus knob of the projector to correct. This will make the image
go out of focus, which
is normal. Always reclaim your focus using the camera lens.
Never use the projector
focus knob to adjust focus. The projector
focus knob should
only be used to correct for distortion.
NOTE:
It should be noted that the focus can be adjusted
in two different ways: your camera and the projector. In fact, because
there is no screen, the lens of the projector, the condenser lens and the
camera lens are all working as one, big lens. Moving elements to different
positions will create different results. If you zoom in and find that you
can fill the frame but can not focus at all or evenly via the camera, set
the camera focus as best you can and then adjust the focus of the projector.
Ultimately, there is little I can tell you here about
how to set your focus as every camera is different. You will have to experiment
with your set up until you get it right. I can tell you that you should
be able to get it sharp edge to edge with no chromatic aberrations and
no distortion or pin cushion. Just remember that you have several ways
to attenuate the image by using the projector focus and camera focus in
combination. Once you feel you have achieved the desired result, zoom your
camera in to rid the image of the edges of the gate and refocus. The image
should be sharp edge to edge and corner to corner with no hot spot nor
any chromatic aberrations. If the edge of the frame goes dark when you
zoom in, just adjust the placement of the camera side to side (not panning,
but actually moving the camera) ever so slightly until you restore even
illumination.
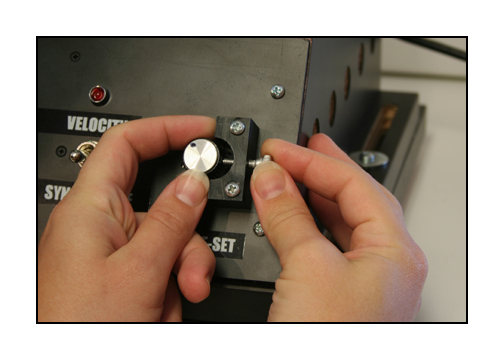
Exposure can be adjusted
using the PRESET knob.
If you need, you can
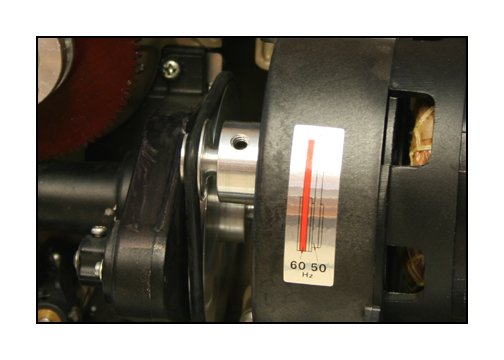
reduce the speed of the WorkPrinter by changing belt position.
To lower the speed,
remove the back cover and locate the motor drive pulley.
Use the same hex head
wrench to loosen the set screw.
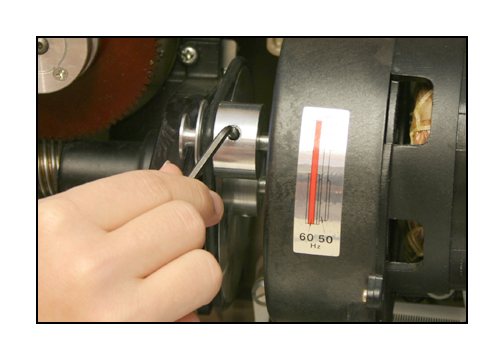
Slide the pulley toward
the motor and move the belt
to the smaller groove.
Make sure the belt is straight and gently,
but firmly, tighten
the set screw.
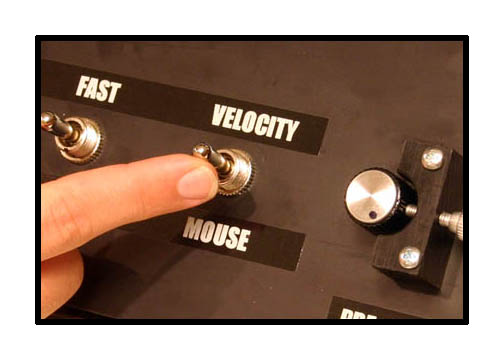
To use this unit with the Velocity software, make
sure the sync
selection switch is on "Velocity".
NOTE: Always move the selection switch to the middle
(off) position to stop each
capture in the Velocity software. You can also use
this to skip sections of a running
film that you do not wish to capture. Any sections
transferred with the switch in the
middle (off) position will be left out of the processed
files.
At this point, you will need to consult the Velocity-HD
instructions for capture and processing.
The instructions can be found HERE.
That covers the basic set up for the WorkPrinter16-HD
. Let me know how it works out and if you have any problems that need trouble
shooting. If necessary, you can email
me with questions or call me at 830-966-4664 and I will be glad to talk
you through any difficulties.
Hope you have spectacular results!
Roger Evans