Unpack the unit but do NOT plug it in.
You will need the
following:
Can of compressed
air.
SVHS cable of appropriate
length
Canopus
ADVC55, 100 or 110 analog to digital converter
Sharp, bright 9.5mm
film with good sprocket holes
(this should be disposable
film to practice with)
PC with minimum 512
megs of RAM
Level Pentium 4 processor
or better
Windows XP Home or
Pro
Firewire port
Velocity
software
installed
Mainconcept
DV Codec installed
Scissors
If
you are international on 220VAC at 50 cycles,
you
do not need a transformer for this product.
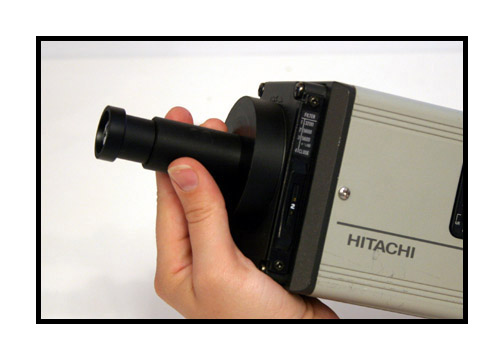
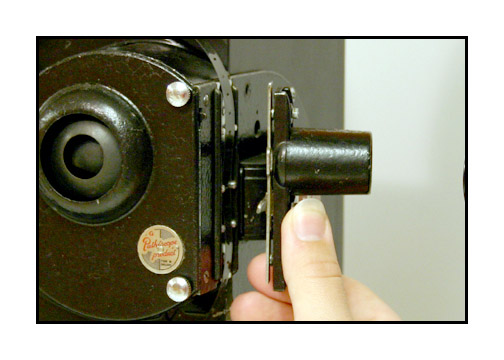
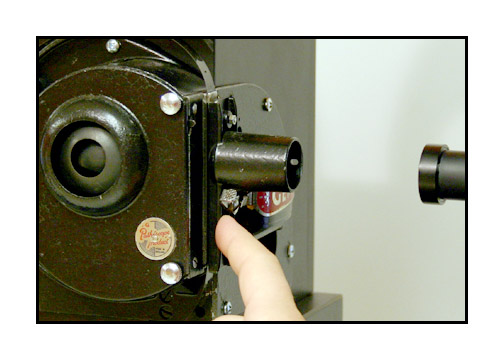
Step 1. Screw lens
tube into camera.

Step 2. Set camera
in cradle.
Step 3. Hold camera
in position
and lightly tighten
side screws until firmly held
in place.
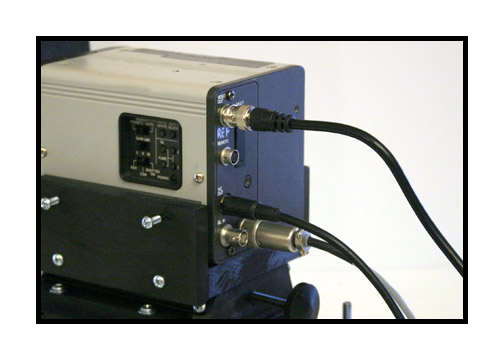
Step 4. Install camera
cables as shown.
(SVHS, BNC reference
and power)
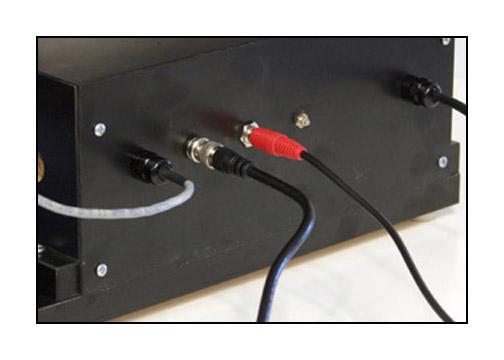
Step 5. Install control
box cables as shown.
(BNC reference and
RCA audio)
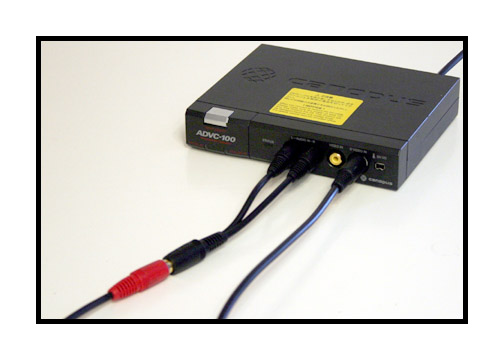
Step 6. Plug SVHS
cable into Canopus box.
Plug RCA cable into
Y connector as shown.
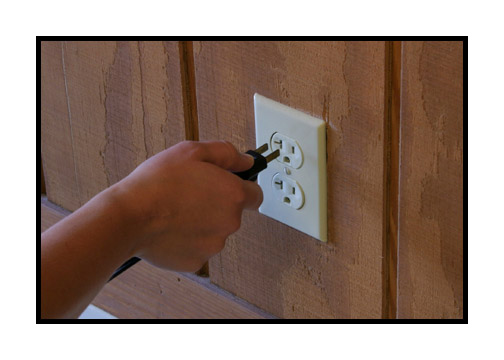
Step 7. Plug in unit.
Step 8. Turn power
on.
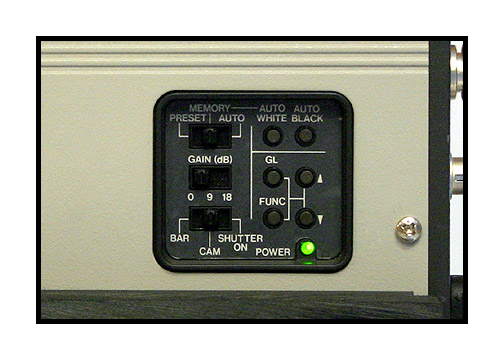
Step 9. Verify that
camera settings are as shown.
(white balance on
memory, 0db Gain and selector on "cam")
Verify that power
light is on.
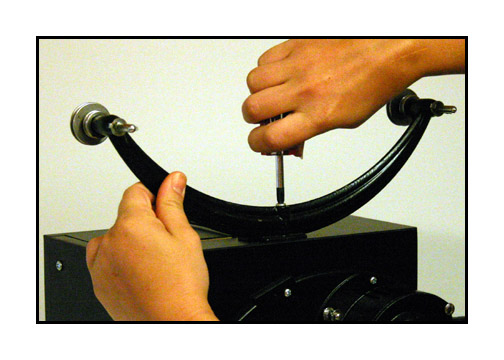
Step 10. Attach the
take up arms and secure
with provided screw.
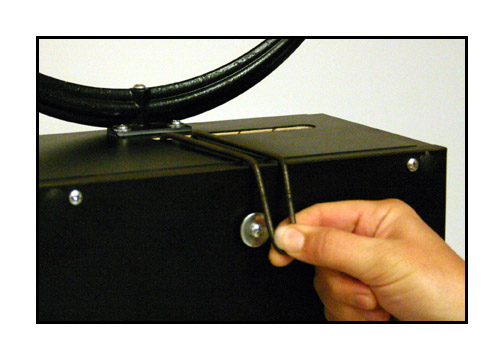
Step 11. Keep tension
on metal take up belt as
you remove it from
the storage post used
for shipping.
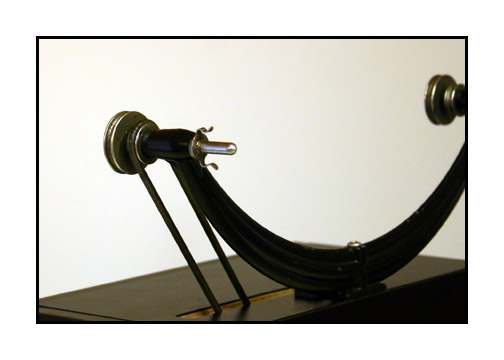
Step 12. Place belt
on small pulley during the following
threading procedure.
The small pulley is loose and
allows the take up
reel to turn freely during threading.
NOTE: Use the larger pulley when transferring film!
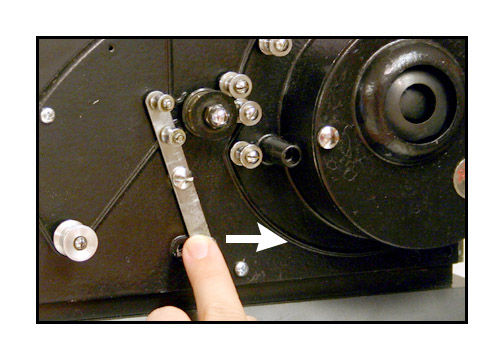
Step 13. Push the
sprocket guide away from
the central sprocket
as shown. It should click
into place firmly.
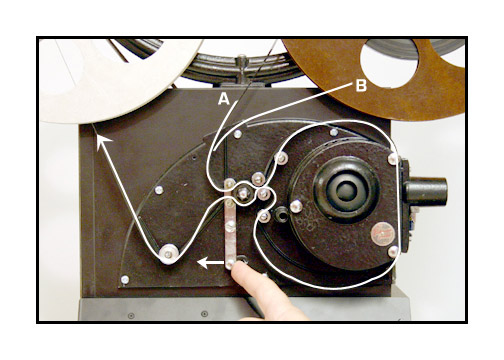
Step 14. Place your
empty take up reel on the left
and your source reel
on the right spindles. Follow the
film path as shown.
The front gate swings open to
allow positioning
of the film. Be careful when you
close the gate so
that you do not crimp the film
at the edges. Click
the sprocket guide back into place
upon completion of
threading.
It should be noted
that, because
9.5mm film has a
centered sprocket hole, film often comes
from the client with
the image backwards due to
improper rewinding.
You can let the film feed
off the left side
of the source reel as seen by
path "A" or you can
use path "B" to reverse the
image during transfer.
Both paths work just as well.
Also, make sure that
all film is cleaned and prepped.
All sprocket holes
should be in good shape and
the film should be
projectable for a stable image.
We recommend using
Edwals
AntiStat film cleaner.
Step 15. Seat the
film in the gate by turning
the motor switch
on then off one time briefly.
Make sure that there
is slack in the film
above and below the
gate as shown in Step 14.

At this point, you
need to launch the Velocity
software and verify
that you have an image on the
computer monitor.
The image will most likely
be out of focus and
off centered. This is normal.
If you do not see
an image, make sure that your
Canopus box is set
to "analog" input
and that all settings
on the bottom of the Canopus
box are set for NTSC
video, even if you intend
to output PAL for
your final video files.
Make sure that your
Velocity settings are adjusted
according to the
drive you wish to capture to and
the drive you wish
to process the files to.
Make sure that you
have chosen the Mainconcept codec
in the dropdown menu
of the settings tab for best results.
For Velocity instructions,
click HERE.
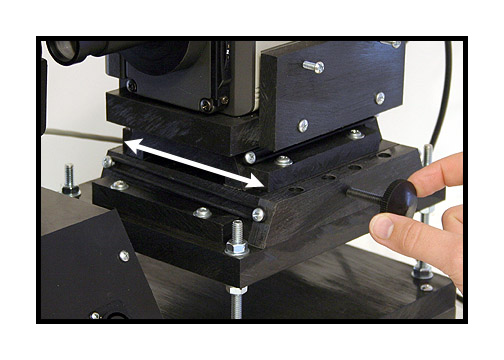
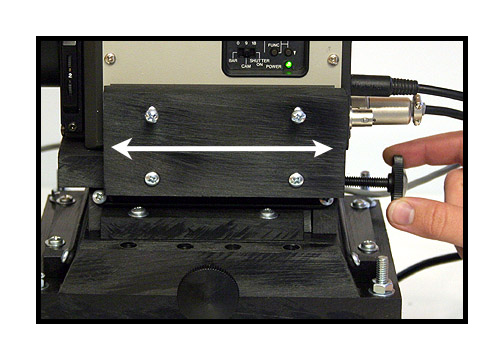
Step 16. Watch the
Velocity monitor and adjust the
camera side to side
using the knob as shown.
Step 17. Focus the
camera using the knob at the rear.
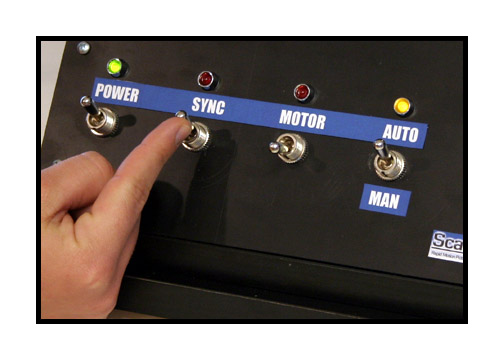
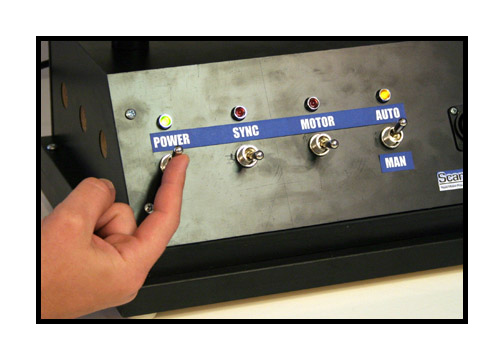
Step 18. Turn the
sync on and leave it on.
The sync can be turned
off during transfer momentarily
if there are parts
of a reel that you want to skip.
Anywhere in the reel
that the sync is turned off
will be left out
of the final file.
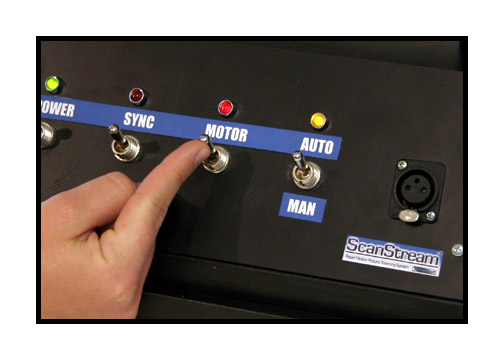
Step 19. Start your
transfer by turning on the motor first.
You should hear a
repeating pulse from your computer speakers.
Then click the start
button on the Velocity software.
Stop your transfer
by clicking the stop button on Velocity
followed by turning
off the motor button.
It is best to do
it in this order each time.
After transfer, process
your file(s) using Velocity and
inspect the transfer
to make sure that the image
is clear and free
of artifacts such as pulldown blur
and that the image
is sharp and level.
For Velocity instructions,
click HERE.
After transfer, use
your bench rewinds to rewind the film
as this unit has
no built-in rewind function.
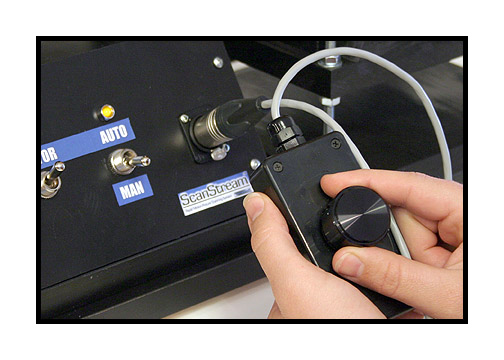
For manual exposure,
plug in the remote and switch to manual.
Adjust the knob until
you see the exposure you desire.
If you have any questions,
please feel free to call
Roger Evans at 830-966-4664.