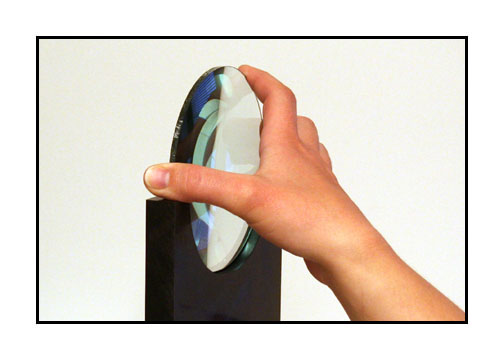
Place the lens in the lens holder. Make sure that
it is firm.
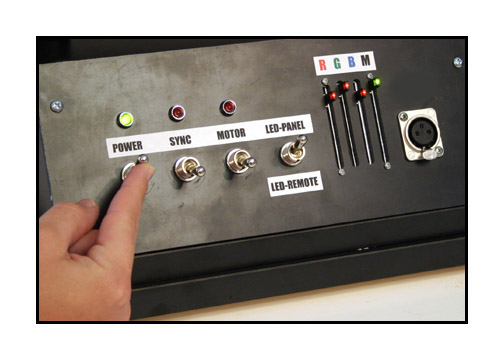
Turn on power to the unit.
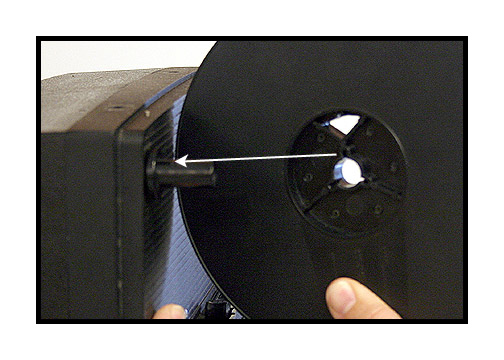
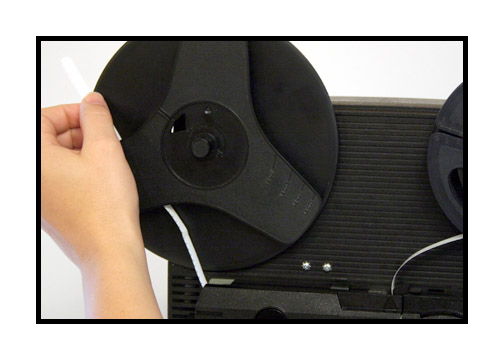
Install reel, making sure that the fin on the spindle
aligns with one of the slots in the reel.

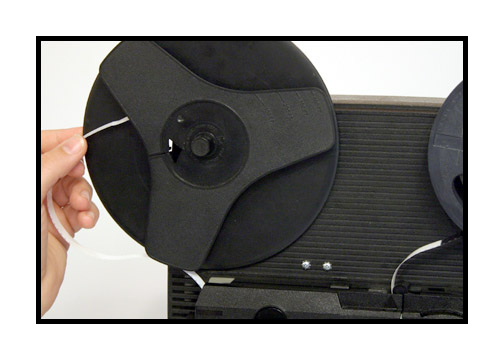
Cut the tip of the film as shown to prevent jamming
during the loading process.
Remove the side panel by squeezing the tabs on the
top and bottom of the cover.
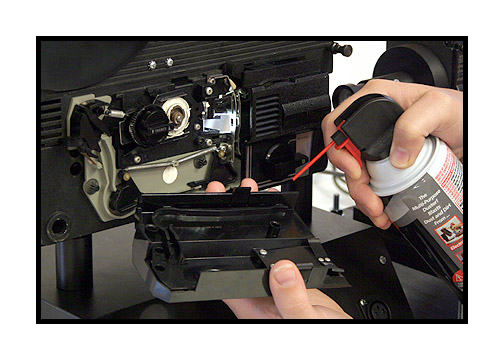
Blow with air and/or dust with brush.
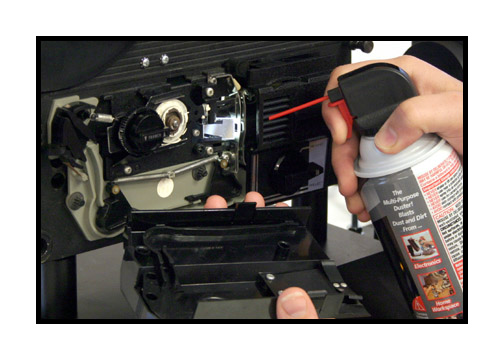
Also clean the gate using air and/or brush.
Replace the side panel.

NOTE: There is a super 8 adaptor on the feed spindle.
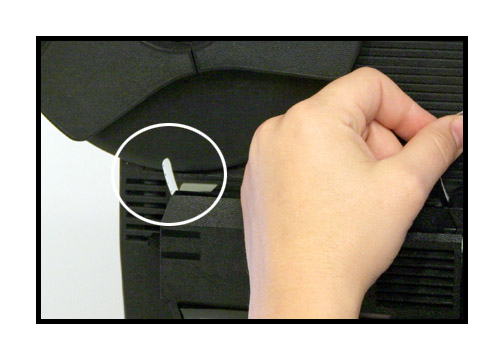
If using regular 8 reels, remove the spindle adaptor
by grabbing
the black plastic (do not press the silver metal clip)
and firmly but gently pull.
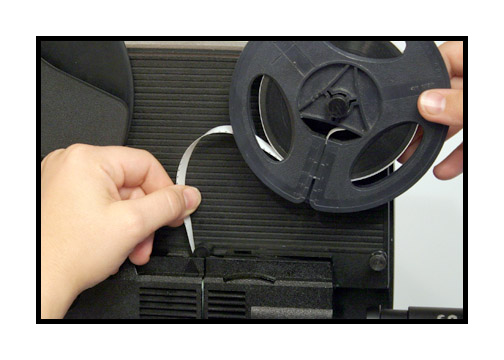
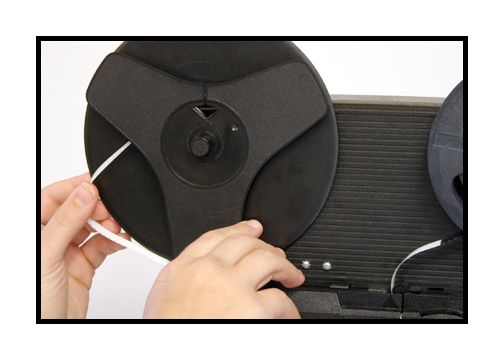
Put the reel of film on the feed spindle
Using your left hand, push the film into the projector.
(I know this is odd but we have found it easier to load with your
left hand, even if you are right handed.)
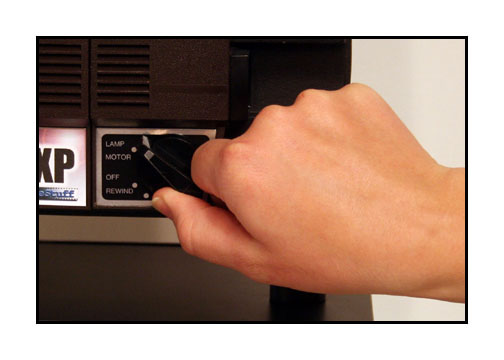
NOTE: There is no "auto feed" on these units.
Make sure the control knob is in the off position
when loading.
If the film catches in the first inch or so, the advance
claw
may be engaged. Bump the motor switch on and off to
retract the advance claw.
If the film catches at the bottom, turn the control
knob to rewind temporarily.
This will retract the pressure plate more and make
loading easier.
After clearing the first turn, put the control knob
back to stop.
Push the film until it appears at the back of the
projector.
Pull the film to achieve some slack in the leader.
Lay the film onto the reel.
Manually turn the reel to take up slack while keeping
tension on the film.
Close the gate by turning the knob clockwise as far
as it will go.
Some units will say "project" and others will say
"play" or "forward".
Seat the film by turning the motor on and then off.
Then run the film a bit until you get to a target
frame and stop.
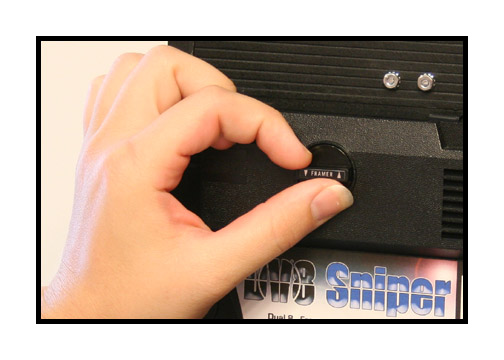
Vertical adjustments can be made while the film is
running by adjusting the framer knob.
This knob will only work when the film is advancing.
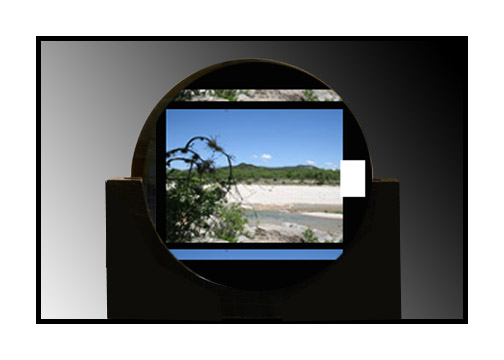
If aligned correctly, you should see an image similar
to this. The camera will need to be about 36-42 inches or so from the condenser
lens, which is about a meter or so if you are in Europe. The distance will
be different for each camera so there is no set rule here. You will simply
need to move the camera around until you get the results you desire. Cameras
with a 14x or better zoom are ideal. Shorter zooms may need a Hoya +1 close
up filter to make focusing easier. Because there is no mirror to rectify
the image, you will need to use the "horizontal flip" function in the capture
software. The software will flip the image on display for convenience but
the recorded image will still be reversed. After processing, the image
will be permanently corrected for left to right orientation.
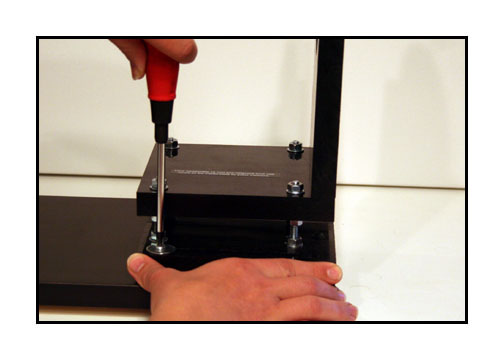
Move the condenser lens away from the projector by
loosening the screws on the base.
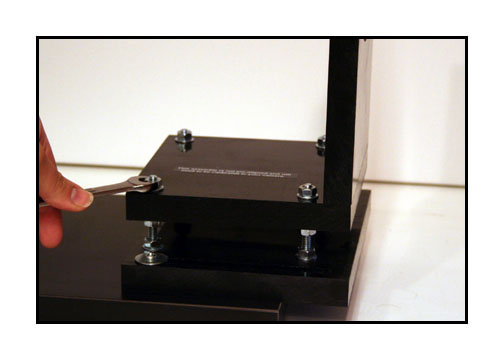
Change the height of the lens by making adjustments
to the threaded posts.
If the image looks distorted on the edges of if you can not achieve equal focus across the film plane, then you may need to move the camera back a bit. Also, al focusing should be done with the camera lens. The focus lever on the projector should only be used to adjust barrel distortion or pin cushion. Always focus with the camera lens.
Because there is no screen, the lens of the projector, the condenser lens and the camera lens are all working as one, big lens. Moving elements to different positions will create different results. If you zoom in and find that you can fill the frame but can not focus at all or evenly via the camera, set the camera focus as best you can and then adjust the focus lever of the projector to remove distortion. If the projector focus seems to be at its limit, remove the knob from the side of the projector by pulling on it and that will reveal a small philips screw. Remove that screw and that will let you remove the plastic bonnet covering the lens. This covering is not necessary for the projector to operate and removing it will allow greater freedom on the focus lever though, nominally, it should really be close to center.
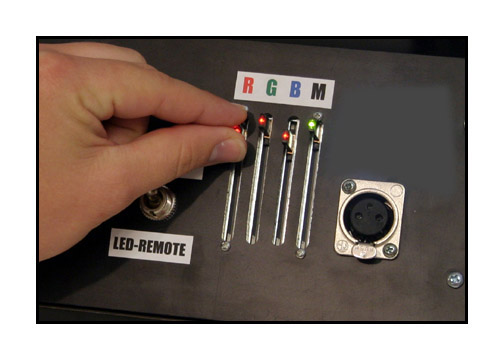
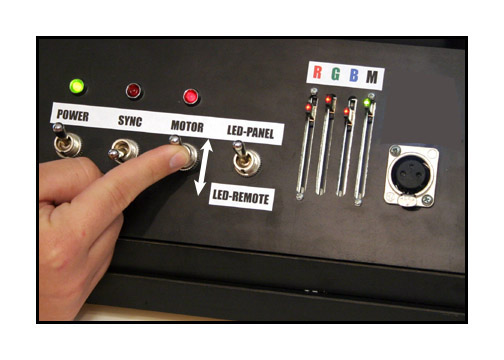
The color of the transfer can be adjusted by using
the sliders on the control panel.
R = Red, G = Green, B = Blue and M is the master slider
for all.
Again, make sure that your camera's white balance is
locked or it will try to change the color as you adjust the RGB sliders!
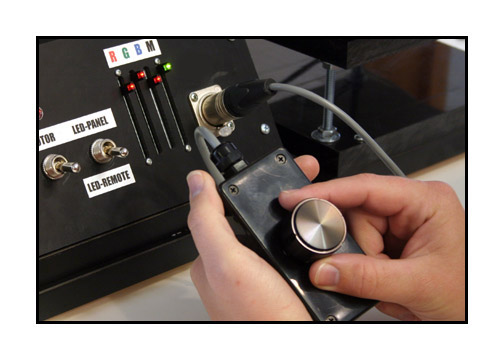
You can also use the remote to control exposure for
convenience.
Large changes in the master or remote light levels
will usually require changes in the color mix.
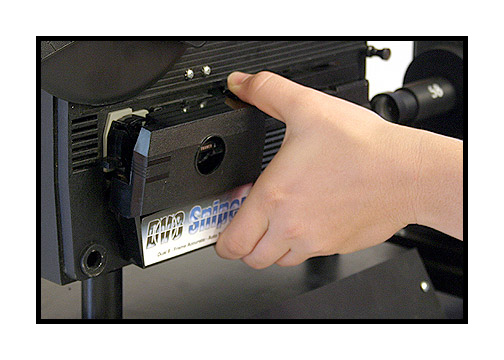
Do a test transfer.
Use the CineCap or CaptureMate program to capture a few seconds of film. Make sure that you click off the first frame manually to prime the software for capture. Leave the cursor on the capture button. Start the projector running and turn on the sync switch. The capture button on screen should start automatically capturing each frame and the numbers should start to go up on the software capture window. To stop capture, turn off the sync switch first and then the motor switch.
If using Capturemate for the Mac, do not capture in the
Quicktime mode.
Use the DV stream mode and set the mouse/frame delay
to "0".
Use the timing disk inside the Workprinter if timing
adjustments are required.
After capture, play back the footage and look for vertical pulldown blur or streaking of the whites. This will indicate that the timing disk in the back of the unit will need to be adjusted, which is normal. Here is why: All DV cameras take about 1/3 of a second to compress what they see into a DV stream. That means the target frame will not arrive at the computer until about 1/3 of a second later. But the mouse command meant for that frame has no such delay unless you create one artificially using the timing disk so that the capture command will arrive at the same time as its target frame. Unfortunately, every camera/computer combination has a different timing delay so there is no way for me to "preset" the timing disk before shipping. Trial and error is the only way to figure this out. All tests should be viewed on a normal, full size video monitor and not a computer monitor. Computer monitors can sometimes leave out fields during playback and will not give you a true indication of what your footage looks like. Use super 8 film to do your initial alignment and testing because the timing for super 8 is more critical than regular 8mm film.
To adjust the timing:
Remove the back cover of the projector. Inside you will find a black round disk with the words "timing disk" written on it. There will be an arrow pointing at a small hole on the hub of the disk. In that hole is a set screw that holds the timing disk in position. Use a small allen wrench (also called a hex wrench) to loosen the set screw. Then turn the timing disk to a new position and gently retighten the set screw. I recommend moving the timing disk in about half inch increments until you see better results, then use smaller increments to fine tune the timing. Perform another capture, review the footage, and repeat until you achieve clear playback for an entire roll of super 8 film. Once this is set, you should never need to readjust the timing disk again for that camera/computer combination.
It should be noted that you will always see pulldown blur during capture. This is normal. But the playback on a regular television set should be clear of any pulldown or smearing artifacts. If the artifacts come and go, then you are not in the right spot on the timing disk. Some experimentation will be required until you find the right spot.