Unpack the unit but do NOT plug it in.
You will need the
following:
Can of compressed
air.
SVHS cable of appropriate
length
Canopus
ADVC55, 100 or 110 analog to digital converter
Sharp, bright Super
8 film with good sprocket holes
(this should be disposable
film to practice with)
PC with minimum 512
megs of RAM
Level Pentium 4 processor
or better
Windows XP Home or
Pro
Firewire port
Velocity
software
installed
Mainconcept
DV Codec installed
Scissors
If
you are international on 220VAC at 50 cycles,
you
do not need a transformer for this product.
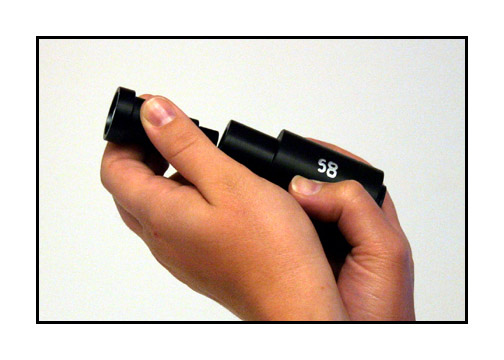
Step 1. Insert the
lens into the Super 8 tube.
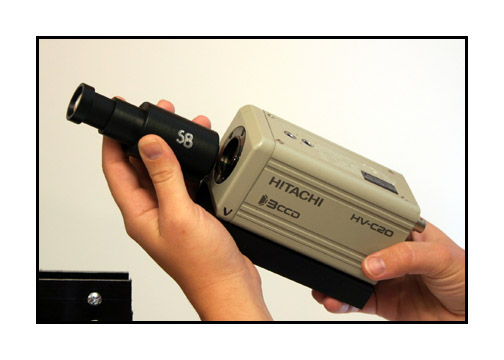
Step 2. Screw tube
into camera.

Step 3. Set camera
in cradle. Hold camera in position
and lightly tighten
side screws until firmly held
in place.
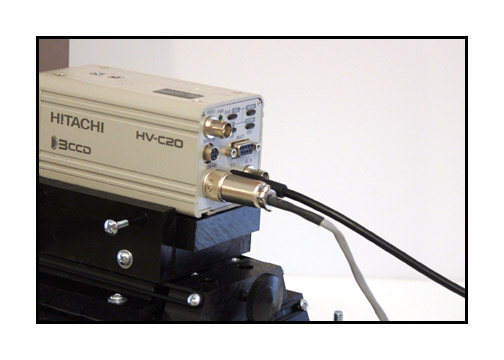
Step 4. Install camera
cables as shown.
(SVHS and power)
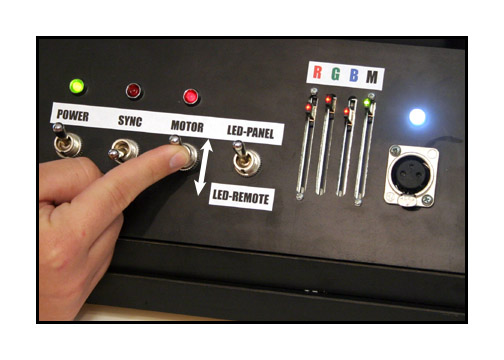
Step 5. Install control
box cables as shown.
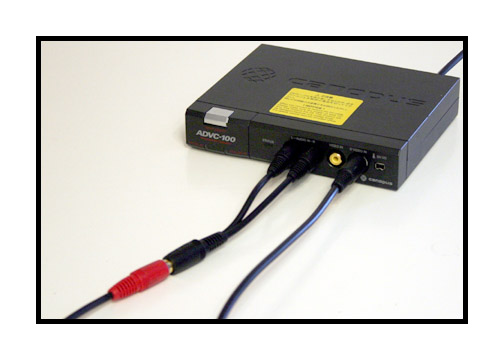
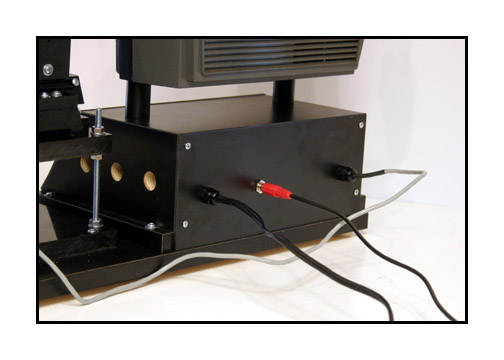
Step 6. Plug SVHS
cable into Canopus box.
Plug RCA cable into
Y connector as shown.
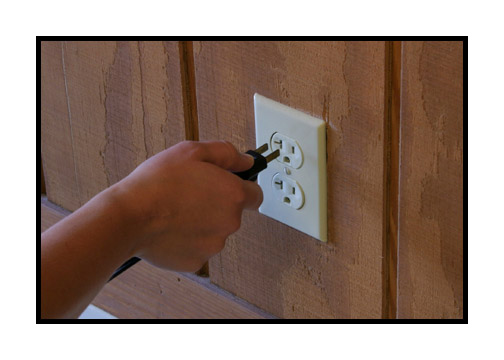
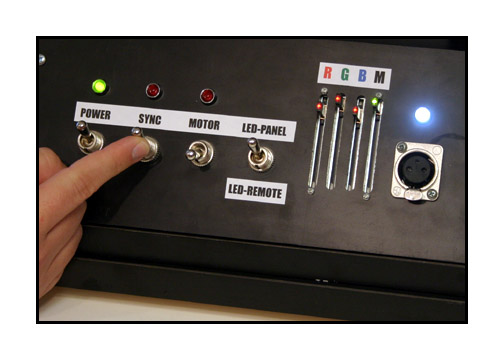
Step 7. Plug in unit.

Step 8. Turn power
on.

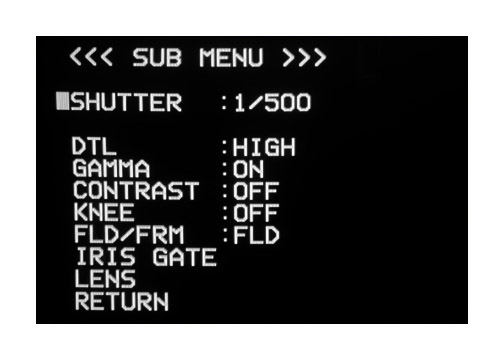
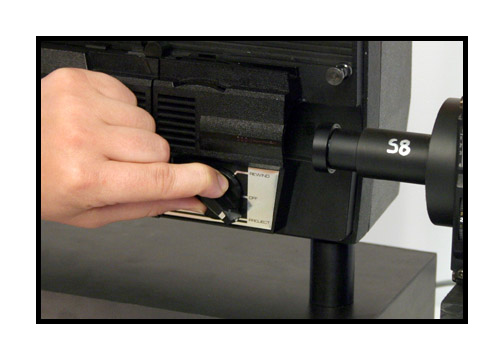
Step 9. Verify that
camera settings are as shown.
These are pre-set
before shipping but sometimes
cameras lose their
settings over time. Use
the menu button to
navigate through the settings.
(most likely the settings are fine. You can go
ahead and proceed with a transfer
and review this section only if necessary)
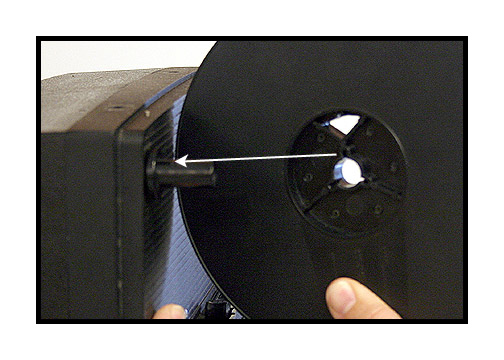
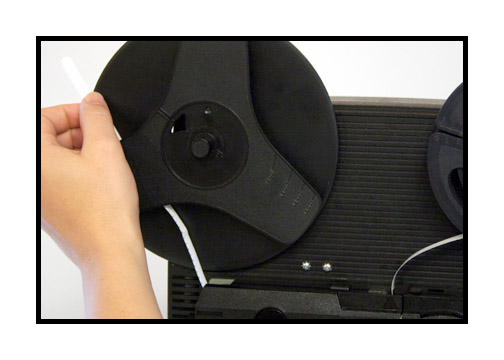
Step 10. Put take
up reel on back spindle. Make sure
that the slot of
the reel is on the small "fin"
found on the spindle
hub.
NOTE: This reel is
critical to the balance
and tension of the
system. Always use this take up
reel for proper performance.
Also, your source
reel should be lightweight and balanced.
Avoid heavy metal
reels with small hubs (the part the film
wraps around). Use
reels that are very much like the
take up reel for
best performance: Lightweight, balanced
and open so that
the reel does not bind the edges of the film.
Also, make sure that
all film is cleaned and prepped.
All sprocket holes
should be in good shape and
the film should be
projectable for a stable image.
We recommend using
Edwals
AntiStat film cleaner.
Do not use FilmGuard
on these units.
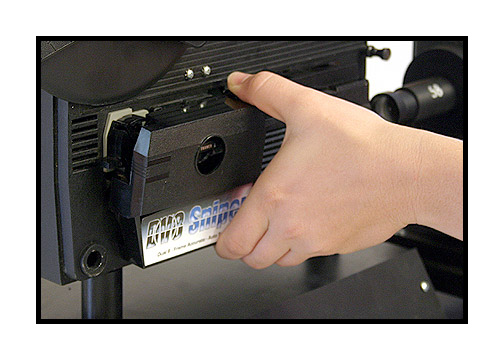
Step 11. Remove side
cover by squeezing the top
and bottom of the
panel and gently pulling loose.
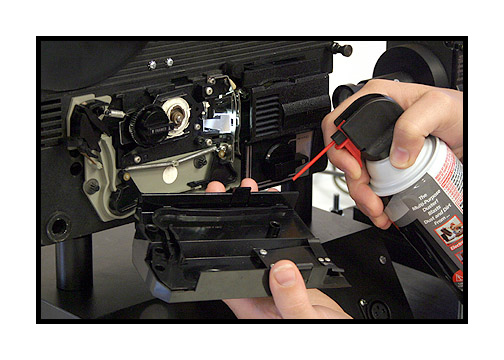
Blow out film channel
on inside of cover.
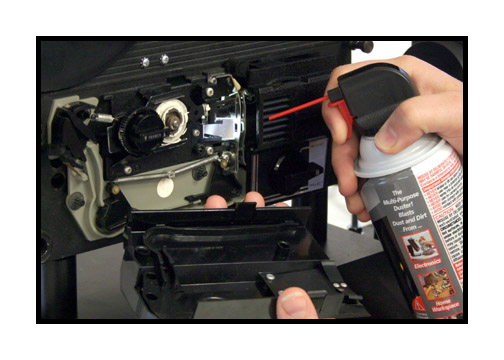
Step 12. Blow out
film gate.
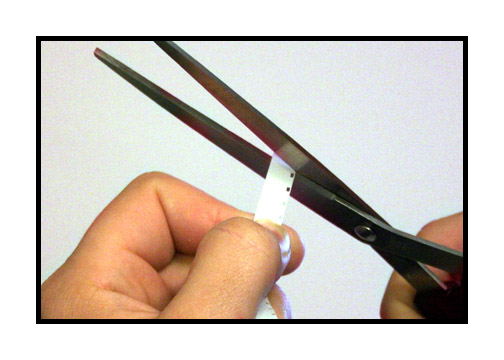
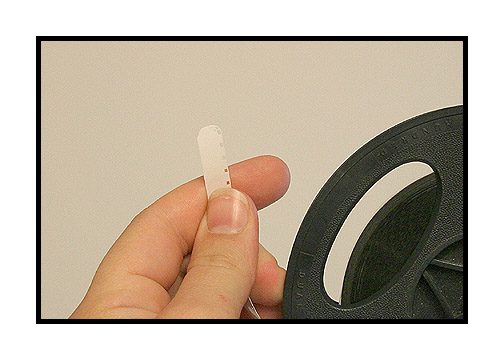
Step 13. Cut tip
of film leader in a curve.
Step 14. Step to
right of unit and use
your left hand to
push film into the gate.
Only push about an
inch at a time.
If you feel resistance
after about an inch,
the film may be hitting
the advance claw. Turn the motor
on and off quick
one time to retract the claw.
Repeat if necessary
until the film will feed easily.
DO NOT TURN ON THE
PROJECTOR AS THIS UNIT HAS NO AUTOFEED.
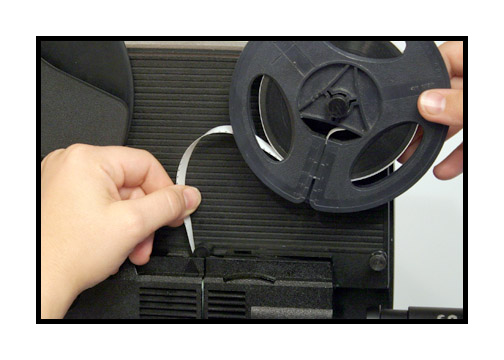
Keep pushing the
film until it exits the back of the projector.
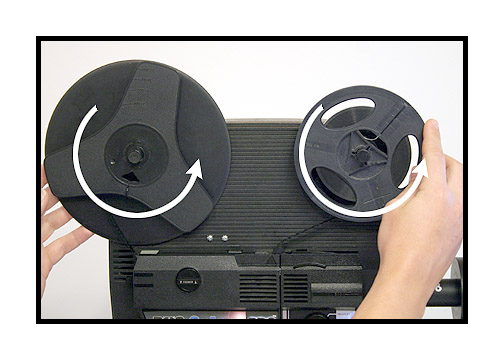
Step 15. Pull film
through projector.
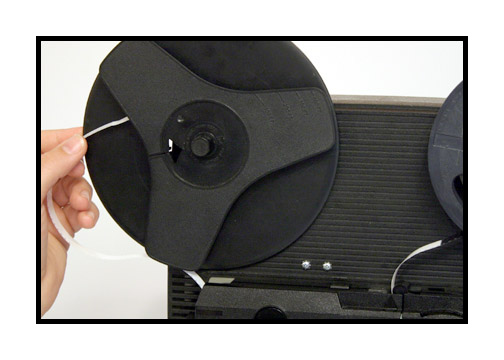
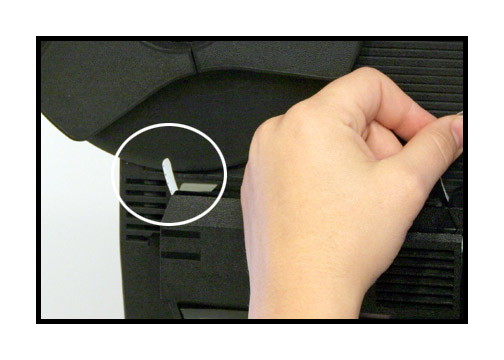
Lay film on reel
and let sprocket holes catch barbs on hub.
(some reels may not
have the barbs, in which case use the slot)
Turn reel while keeping
film tension and take up slack.
NOTE: Never try to
load the film by taking the side cover off.
You can unload in
mid-roll but do not attempt to load in that fashion.
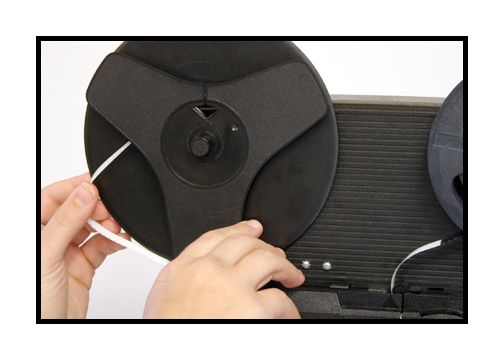
Step 16. Close gate
by turning knob to "project".
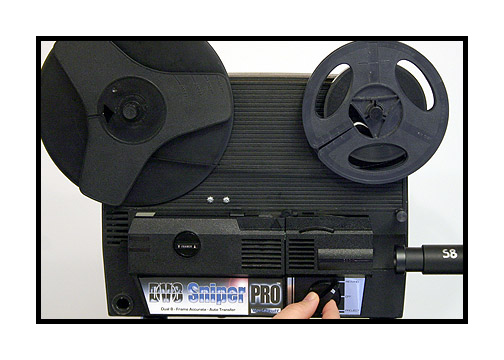
Step 17. Seat the
film in the gate by turning
the motor switch
on then off one time briefly.

At this point, you
need to launch the Velocity
software and verify
that you have an image on the
computer monitor.
The image will most likely
be out of focus and
off centered. This is normal.
If you do not see
an image, make sure that your
Canopus box is set
to "analog" input
and that all settings
on the bottom of the Canopus
box are set for NTSC
video, even if you intend
to output PAL for
your final video files.
Make sure that your
Velocity settings are adjusted
according to the
drive you wish to capture to and
the drive you wish
to process the files to.
Make sure that you
have chosen the Mainconcept codec
in the dropdown menu
of the settings tab for best results.
For Velocity instructions,
click HERE.
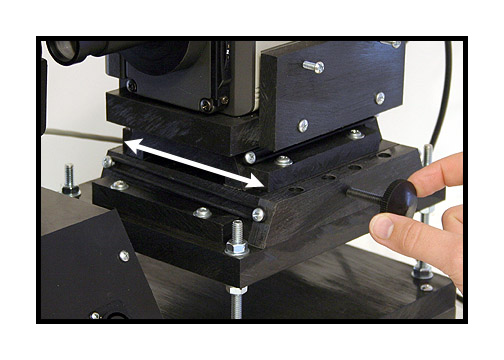
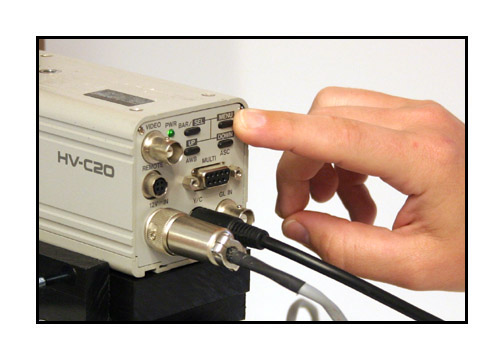
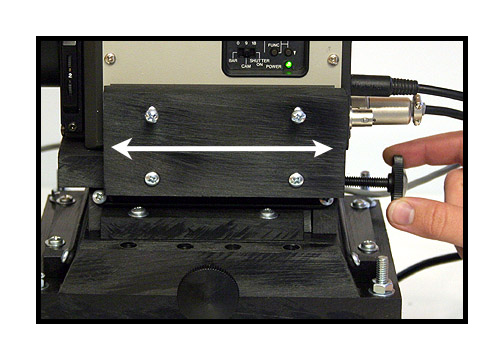
Step 18. Watch the
Velocity monitor and adjust the
camera side to side
using the knob as shown.
Step 19. Focus the
camera using the knob at the rear.
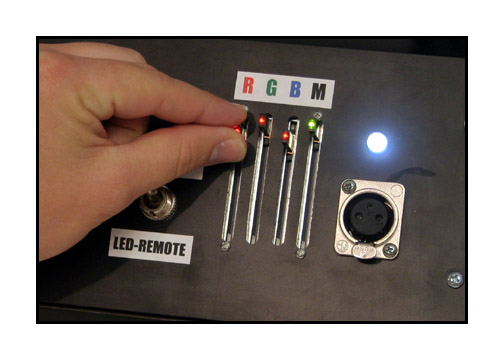
Use the sliders to
adjust red, green and blue
of the picture as
desired.
"M" is the panel
mounted master control for the LED.
Radical changes in
exposure will require retuning
of the RGB color
balance.
It is best to set
the exposure and then the color
for any given section
of film.
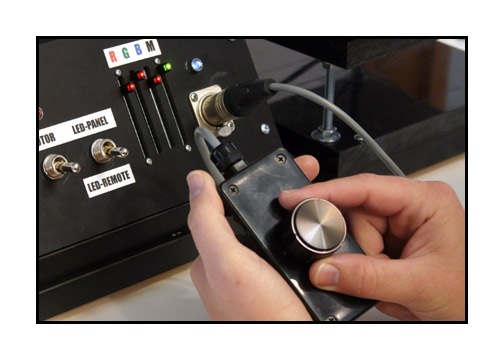
For remote operation,
plug in the remote and
switch to "LED-Remote".
Adjust the knob until
you see the exposure you desire.
Step 20. Turn the
sync on and leave it on.
The sync can be turned
off during transfer momentarily
if there are parts
of a reel that you want to skip.
Anywhere in the reel
that the sync is turned off
will be left out
of the final file.

Step 21. Start your
transfer by turning on the motor first.
You should hear a
repeating pulse from your computer speakers.
Then click the start
button on the Velocity software.
Stop your transfer
by clicking the stop button on Velocity
followed by turning
off the motor button.
It is best to do
it in this order each time.
After transfer, process
your file(s) using Velocity and
inspect the transfer
to make sure that the image
is clear and free
of artifacts such as pulldown blur
and that the image
is sharp and level.
For Velocity instructions,
click HERE.

During set up, if
you need to rewind the film a bit
to a previous section,
switch the motor off and open the
gate by turning the
control knob to off.
Manually move the
film forward or backward
but turning the reels
in the appropriate direction
at the same time,
to relieve tension.
If the film is caught
on the advance claw, just turn
the motor switch
on and off briefly to retract the claw.
After transfer, always
rewind between reels
outside the projector
mechanism to prevent film damage.
For efficiency, rewind
using seperate crank winders.

For regular 8mm film,
remove the super 8 adaptor.
Grab by the black
plastic only. Do not press down
on the silver metal
clip. Firmy but gently pull.
There is an 8mm spindle
underneath.
If you have any questions,
please feel free to call
Roger Evans at 830-966-4664.