POWER: This unit has an internal switching power supply.
It is designed to run on 110-240 VAC at 50/60 cycles.
It does not require a transformer for international
use.
The plug is standard for North America but can be adapted
to local international standards using adaptors found
in most hardware stores.
You will need to set your shutter speed to 1/60th of
a second for NTSC or 1/50th of a second for PAL.
Image stablization or steady shot should be turned
off.
Avoid using progressive scan or "frame mode".
Just the normal interlaced video mode is needed, even
if using HD.
NOTE: Some HD cameras have CMOS sensors instead of CCDs. CMOS sensors use a "rolling shutter" while CCD sensors use a "global shutter". While global shutters work best, rolling shutters will also work well with this unit but you may occasionally detect an anomaly from the CMOS sensor as it scans from top to bottom. This is very, very rare but is a product of the CMOS rolling shutter and would be seen as a very, very light band that makes its way from the top of the screen to the bottom and would be visible on only the lightest of images such as open sky. Again, this is very rare and is not a defect in the CineMate unit but, rather, a product of the CMOS sensor of some cameras. CCDs will never produce this effect and not all CMOS sensors will and, even if present, should not prevent you from creating quality transfers.
Best results and best registration is achieved if your film has been freshly cleaned and lubed with good splices and no torn sprocket holes. Always use the take up reel provided as the unit has been tension calibrated or use with that reel. Supply reels should be inspected for warpage or anything that will impede the even feed of film from the reel. Feed reels that bind or grab the edges of the film may cause registration problems or even film damage. Head leader should be fairly straight without a lot of "curl memory" that will impede proper loading.
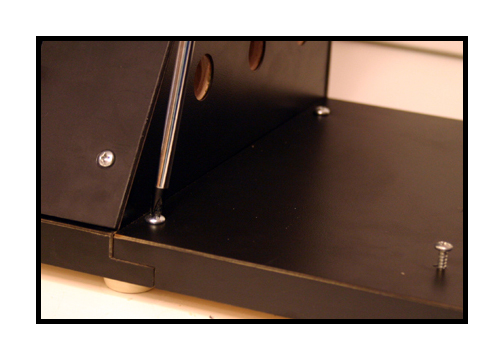
Attach the lens panel to the base using a Phillips
screw driver.
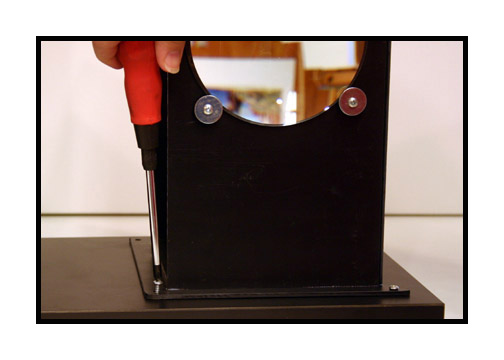
Attach the condenser
lens to the panel as shown.

Turn on power to the unit.
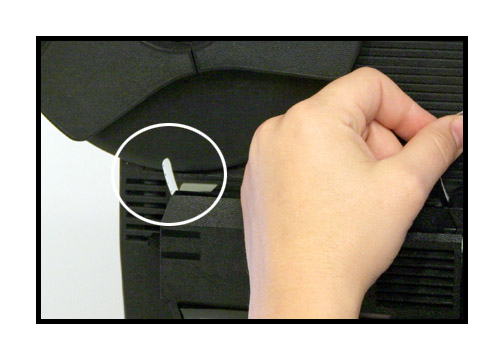
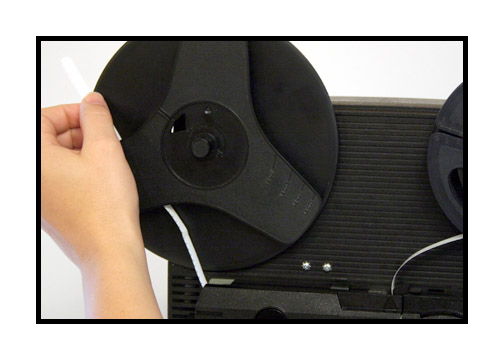
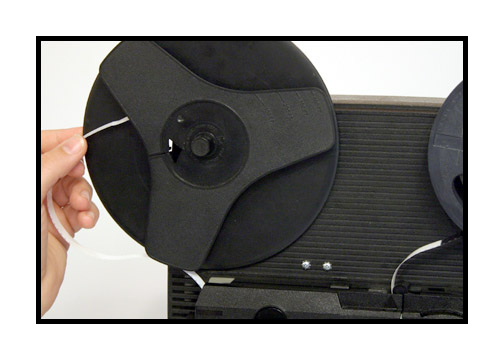
Install reel, making sure that the fin on the spindle
aligns with one of the slots in the reel.

Cut the tip of the film as shown to prevent jamming
during the loading process.
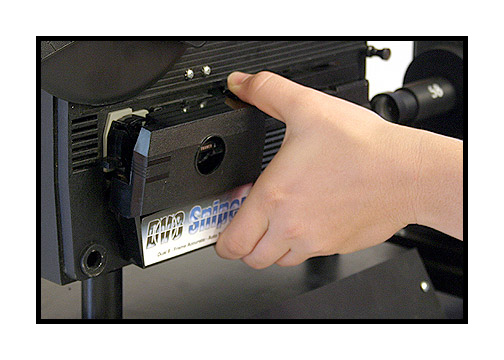
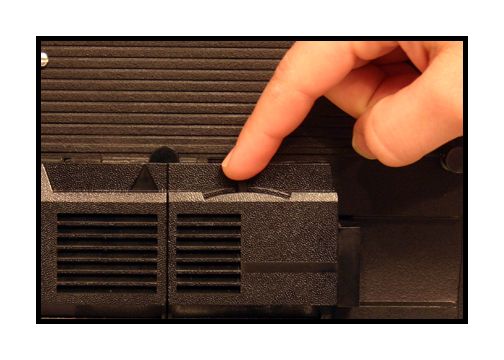
Remove the side panel by squeezing the tabs on the
top and bottom of the cover.
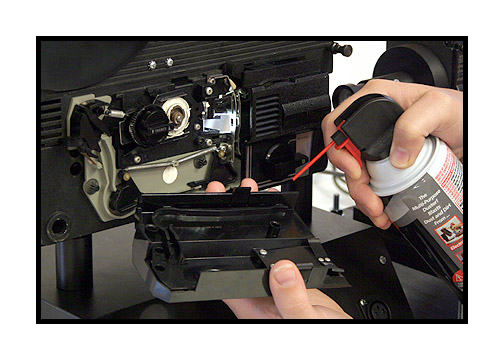
Blow with air and/or dust with brush.
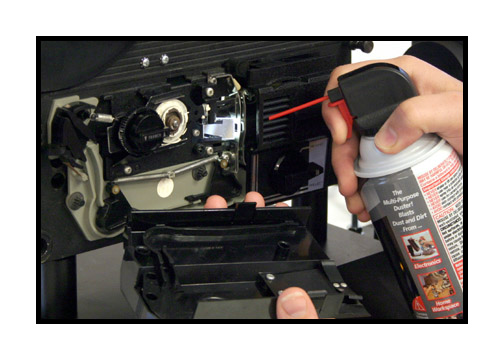
Also clean the gate using air and/or brush.
Replace the side panel.

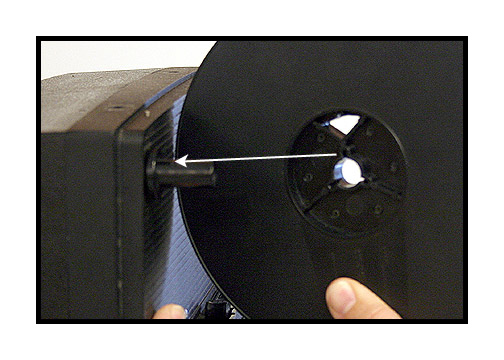
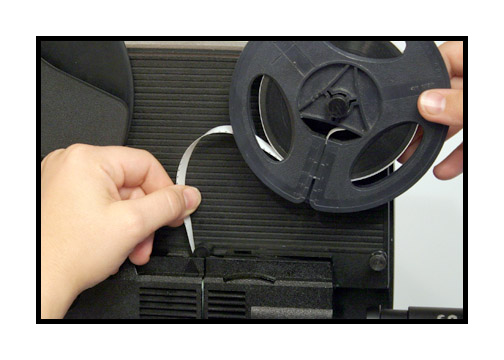
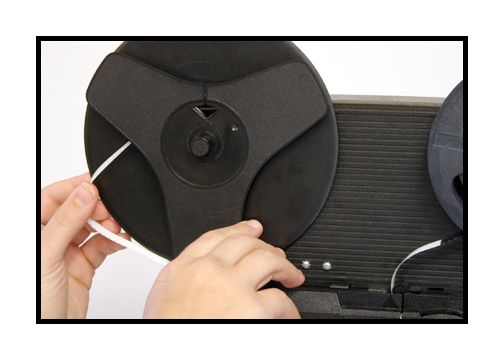
NOTE: There is a super 8 adaptor on the feed spindle.
If using regular 8 reels, remove the spindle adaptor
by grabbing
the black plastic (do not press the silver metal clip)
and firmly but gently pull.
Put the reel of film on the feed spindle
Using your left hand, push the film into the projector.
(I know this is odd but we have found it easier to load with your
left hand, even if you are right handed.)
NOTE: There is no "auto feed" on these units.
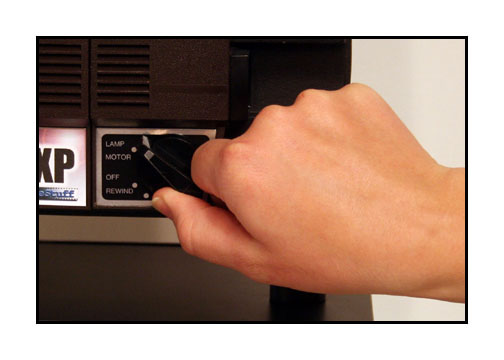
Make sure the control knob is in the off position
when loading.
If the film catches in the first inch or so, the advance
claw
may be engaged. Bump the motor switch on and off to
retract the advance claw.
If the film catches at the bottom, turn the control
knob to rewind temporarily.
This will retract the pressure plate more and make
loading easier.
After clearing the first turn, put the control knob
back to stop.
Push the film until it appears at the back of the
projector.
Pull the film to achieve some slack in the leader.
Lay the film onto the reel.
Manually turn the reel to take up slack while keeping
tension on the film.
Close the gate by turning the knob clockwise as far
as it will go.
Some units will say "project" and others will say
"play" or "forward".
Seat the film by turning the motor on and then off.
Then run the film a bit until you get to a target
frame and stop.
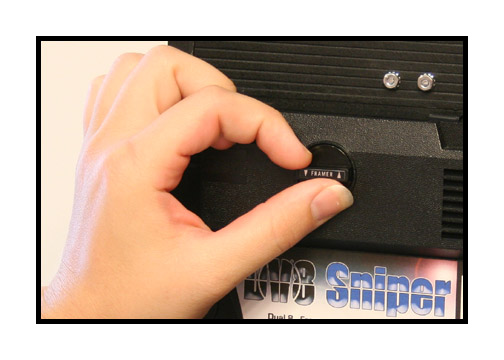
Vertical adjustments can be made while the film is
running by adjusting the framer knob.
This knob will only work when the film is advancing.
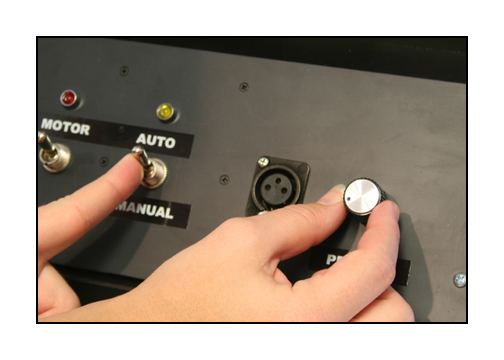
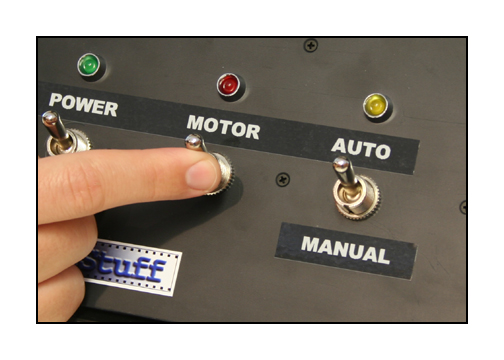
The internal LED for the film can be controlled in
two ways. In the "AUTO" position,
you can adjust the preset of the LED intensity.

In the "MANUAL" position, the LED can be adjusted
using the provided remote.
NOTE: When you stop the projector,
make sure that the internal shutter blade does not block the light. If
the unit stops with the shutter blocking the light, then bump the motor
switch on-off until the shutter moves out of the way. It should also be
noted that this unit no longer "projects". You will not see any light coming
from the projection lens as the super-bright projection lamp has been removed
and replaced by a low intensity LED backlight. So if you hold your hand
in front of the lens looking for a projected image, you will not see it.
You will only see an image in the condenser lens.
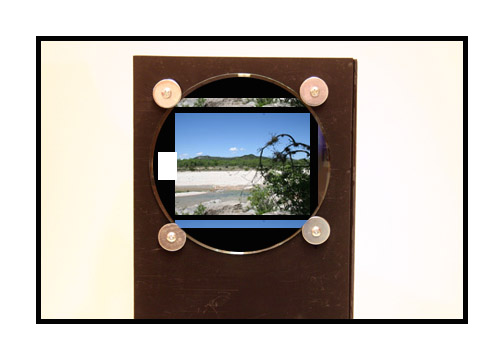
If aligned correctly, you should see an image similar
to this. It is normal for the left side of the gate to fall off the left
side of the condenser lens. This is because the film frame is not really
center on the film. As long as you can see the usuable area of the film
frame in the condenser lens, that is all that matters.
The camera will need to be about 36-42 inches or so
from the condenser lens, which is about a meter or so if you are in Europe.
The distance will be different for each camera so there is no set rule
here. You will simply need to move the camera around until you get the
results you desire. Cameras with a 14x or better zoom are ideal. Shorter
zooms may need a Hoya +1 close up filter to make focusing easier. HD cameras
with shorter zooms may need to use a bit of the digital zoom to crop into
the image. This is okay as there is an abundance of pixels in the HD sensor
to work with. Even if you use the digital zoom, you will still have an
excess of resolution to carry the HD image of the 8mm frame.
If the image looks distorted on the edges of if you
can not achieve equal focus across the film plane, then you may need to
move the camera back a bit. Also, all focusing should be done with the
camera lens.
The focus lever on the projector should only be used
to adjust barrel distortion or pin cushion. Always focus with the camera
lens.
Because there is no screen, the lens of the projector,
the condenser lens and the camera lens are all working as one, big lens.
Moving elements to different positions will create different results. If
you zoom in and find that you can fill the frame but can not focus at all
or evenly via the camera, set the camera focus as best you can and then
adjust the focus lever of the projector to remove distortion. If the projector
focus seems to be at its limit, remove the knob from the side of the projector
by pulling on it and that will reveal a small philips screw. Remove that
screw and that will let you remove the plastic bonnet covering the lens.
This covering is not necessary for the projector to operate and removing
it will allow greater freedom on the focus lever though, nominally, it
should really be close to center.
Do a test transfer. To capture, just turn the motor switch on and let the unit run! Your transfer should be flicker free and steady. Make sure that your feed reel is lightweight and does not bind. Always use the provided take up reel.