The following instructions are for the Sniper-HD unit set up.
For Velocity-HD software instructions, as well as the
connections
and set up for BlackMagic, please click HERE.
Please read carefully before attempting to use your unit.
NOTE: Do not plug in unit until directed by instructions.
If you are an international customer with 50 cycle, 220VAC
power,
you will not need a transformer. Just use an adaptor
to change the plug
to your local standard.
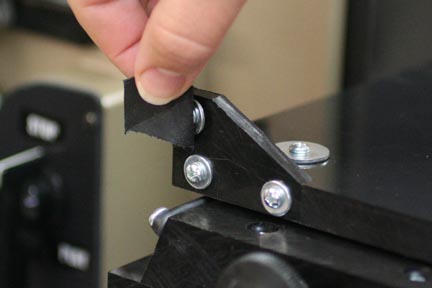
Remove the tape holding the two cradle pivot screws.
Place the camera cradle into the cradle yoke, aligning the holes as shown.
Gently, but firmly, tighten the pivot screws on both sides.
Note: The screws should be tight enough to prevent side
to side movement in the cradle but should not bind.
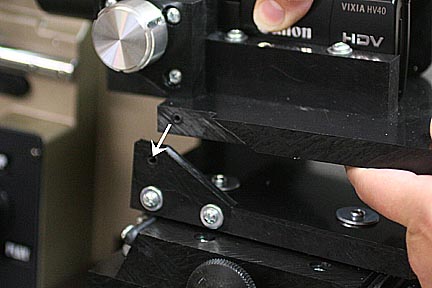
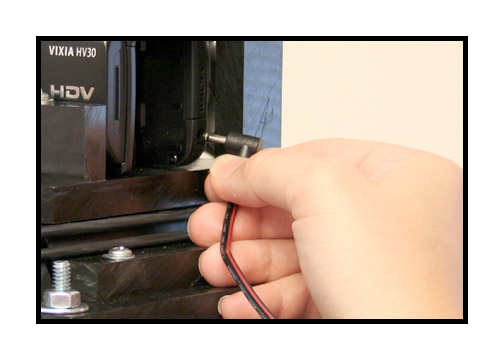
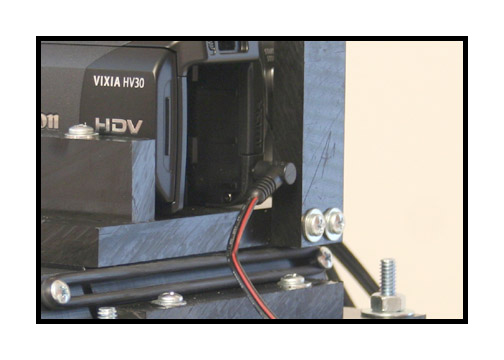
Plug camera power cable into camera as shown.
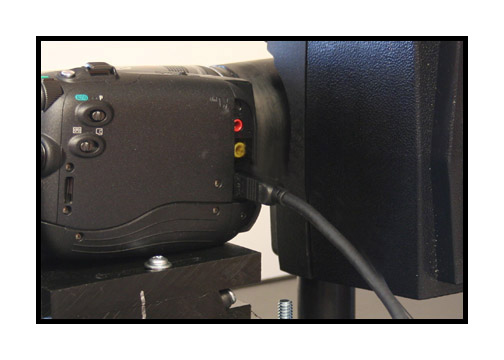
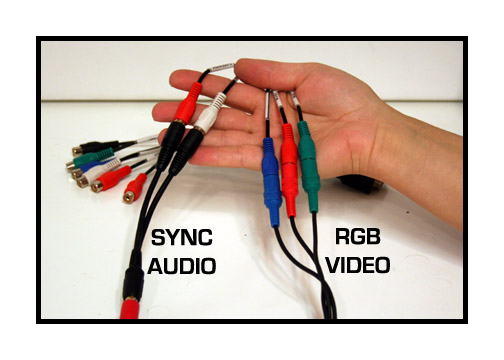
Attach the provided RGB Component Video
cables to the camera.

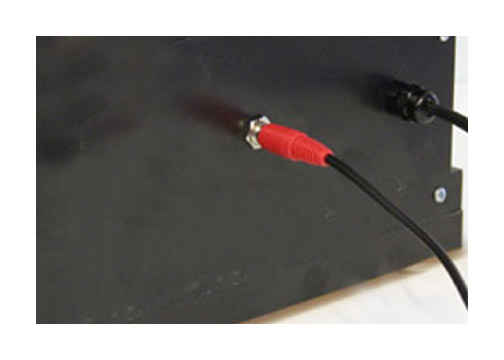
Attach the audio sync "Y" cable and Component cables
to your Intensity Pro or Decklink input harness as shown.
Attach input harness to computer.
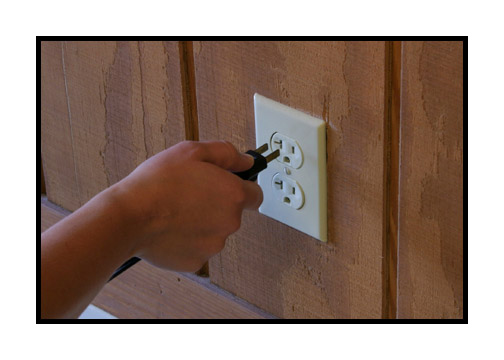
Plug unit into power.
If you are an international customer with 50 cycle, 220-240VAC
power,
you will NOT need a stepping transformer. Just use an
adaptor
to change the plug to your local standard.
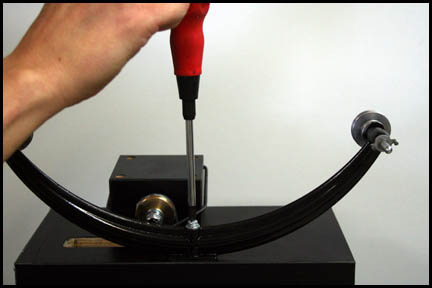
Attach the take up
arms and secure
with provided screw.
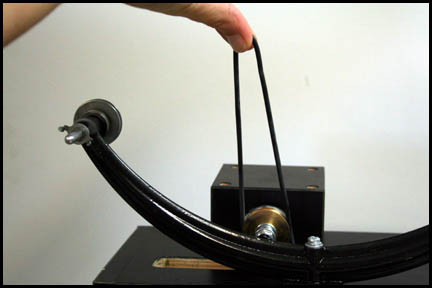
Keep tension on the
take up belt as
you remove it from
the storage position used
for shipping.
Place belt on
small pulley during the following
threading procedure.
The small pulley is loose and
allows the take up
reel to turn freely during threading.
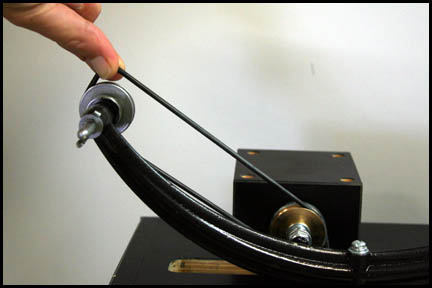
NOTE: Use the larger pulley when transferring film!
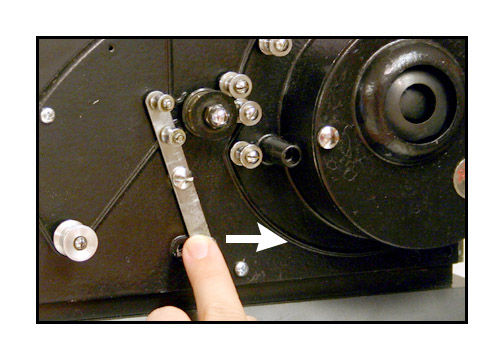
Push the sprocket
guide away from
the central sprocket
as shown. It should click
into place firmly.
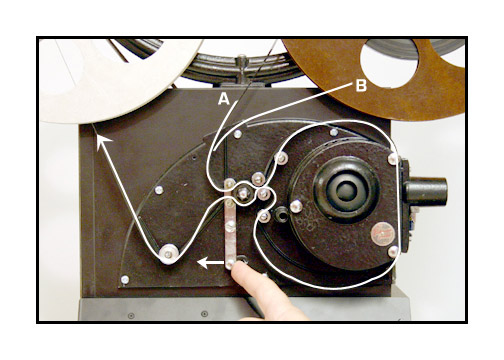
Place your empty take
up reel on the left
and your source reel
on the right spindles. Follow the
film path as shown.
The front gate swings open to
allow positioning
of the film. Be careful when you
close the gate so
that you do not crimp the film
at the edges. Click
the sprocket guide back into place
upon completion of
threading.
It should be noted
that, because
9.5mm film has a
centered sprocket hole, film often comes
from the client with
the image backwards due to
improper rewinding.
You can let the film feed
off the left side
of the source reel as seen by
path "A" or you can
use path "B" to reverse the
image during transfer.
Both paths work just as well.
Also, make sure that
all film is cleaned and prepped.
All sprocket holes
should be in good shape and
the film should be
projectable for a stable image.
We recommend using
Edwals AntiStat film cleaner.
It may be hard to
find overseas, so contact Urbanski
about Solvon film
cleaner, which can be shipped internationally.
Seat the film in the
gate by turning
the motor switch
on then off one time briefly.
Make sure that there
is slack in the film
above and below the
gate as shown in the threading diagram.
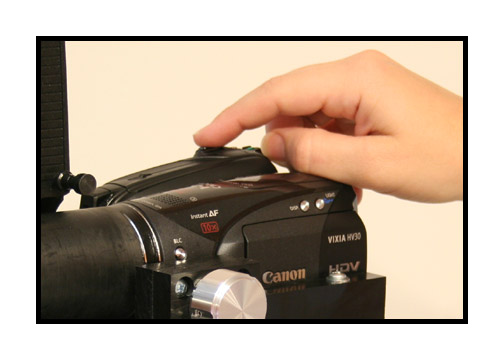
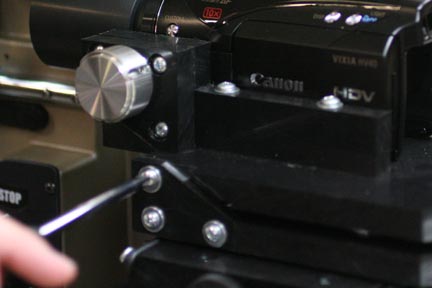
To change the cropping of the image, use the zoom
control on top of the camera.
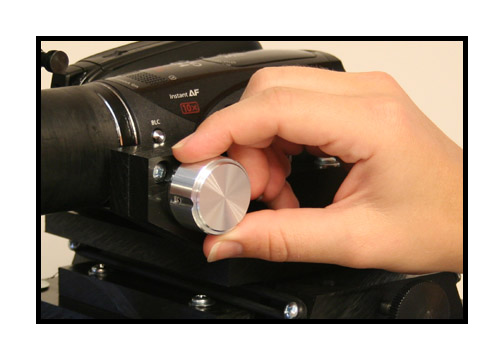
To focus, use the large silver knob on the side of the
camera.
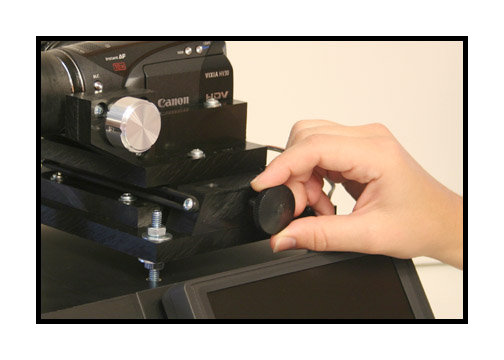
To adjust side to side position, use the black compound
knob.
NOTE: For best results, always start the motor before
starting the capture in Velocity HD. Always stop the
Velocity HD capture before stopping the motor.
At this point, you
need to launch the Velocity
software and verify
that you have an image on the
computer monitor.
The image will most likely
be out of focus and
off centered. This is normal.
If you do not see
an image, make sure that your
Canopus box is set
to "analog" input
and that all settings
on the bottom of the Canopus
box are set for NTSC
video, even if you intend
to output PAL for
your final video files.
Make sure that your
Velocity settings are adjusted
according to the
drive you wish to capture to and
the drive you wish
to process the files to.
Make sure that you
have chosen the Mainconcept codec
in the dropdown menu
of the settings tab for best results.
For Velocity-HD instructions,
click HERE.

Manual Exposure Control
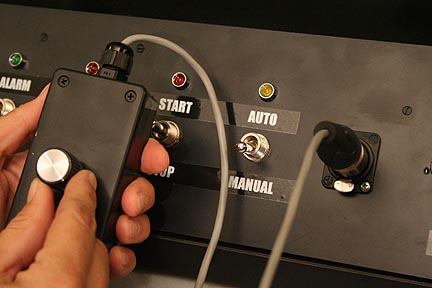
The units exposure can be adjusted to a desired level
by adjusting the plug-in remote.
NOTE: The internal default mode for the camera is always
auto-exposure. Adjusting the knob will make fine adjustments in the overall
brightness and contrast of the picture but the camera will still be operating
in the auto mode. For greater control, you can put the camera temporarily
in a manual exposure lock as follows:
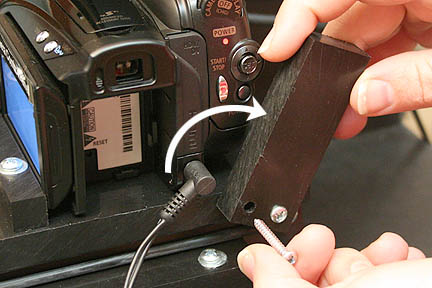
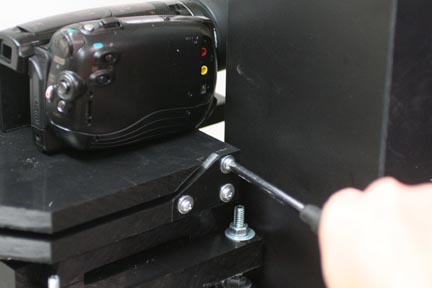
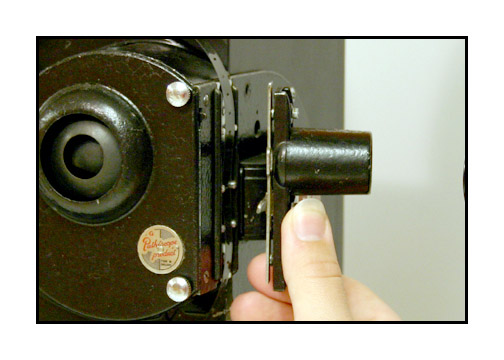
On 8mm units, remove one of the screws holding the rear
control guard in place and rotate the guard out of the way.
(On 16mm and 9.5mm units, you will need to remove both
screws to clear the guard.)

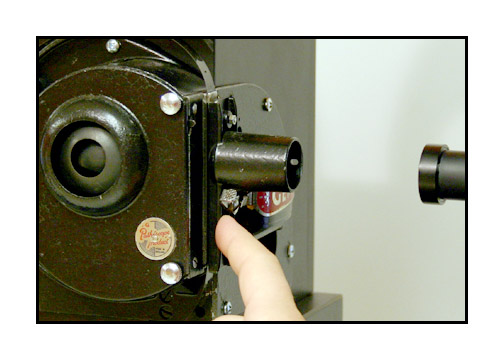
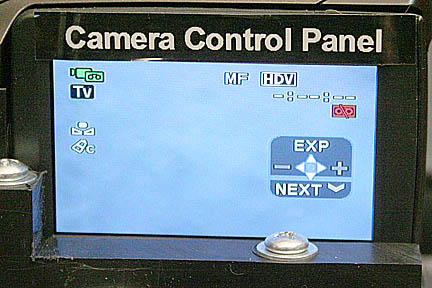
Gently press in on the joy stick ONE TIME ONLY.
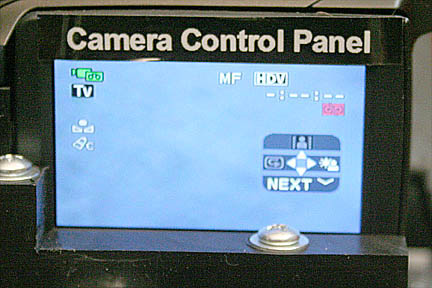
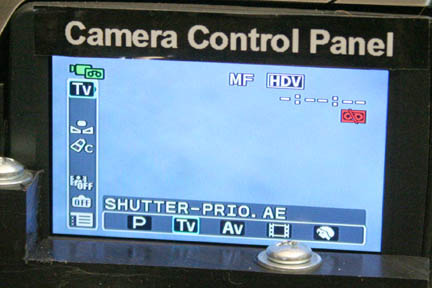
This will reveal a control icon in the lower right hand
corner of the camera control panel.
(For earlier HD units without this panel, look in the
viewfinder of the camera)
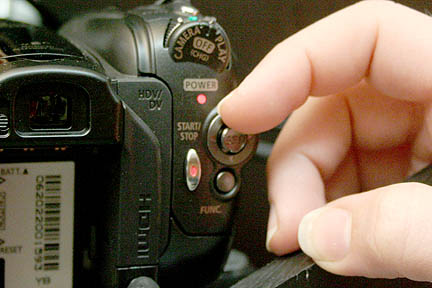
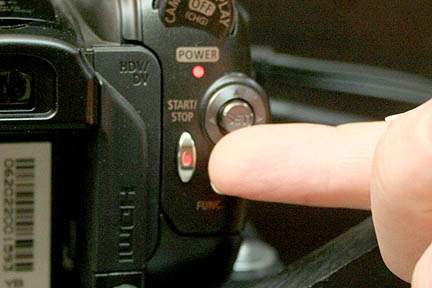
Next, gently press down on the joy stick ONE TIME ONLY.
This will put the camera in the manual exposure mode.
Next, gently press up on the joy stick ONE TIME ONLY.
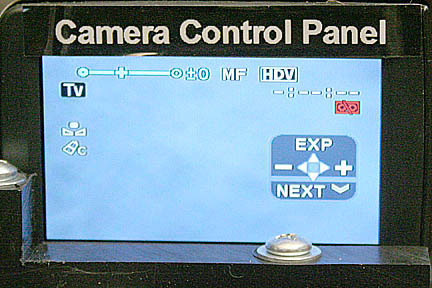
This will allow access to the camera's manual exposure
settings.
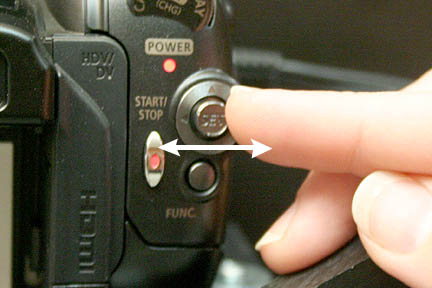
You can then use the joy stick for a fine adjustment of the overall exposure and/or use the remote for a more coarse exposure control.
To reset the camera to full auto, just turn off the power to the Sniper or to the camera and then turn back on. It will automatically reset to all auto operation. Do not attempt to use the camera controls to reset to auto. Just turn the unit off and then back on to regain auto exposure capability.
Adjusting the white balance.
There may be times that it is necessary to adjust the white balance on the camera. For regular home movies, it is best to just white balance to the empty gate of the projector.
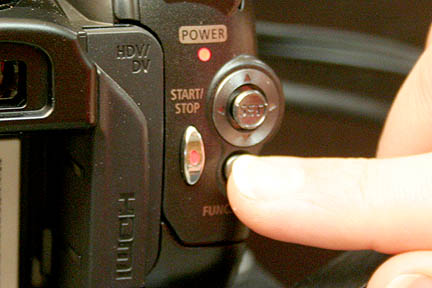
Gently press the function button ONE TIME ONLY.
This will reveal camera preference icons on the left and
bottom of the control panel.
Next, press down on the joy stick ONE TIME ONLY.
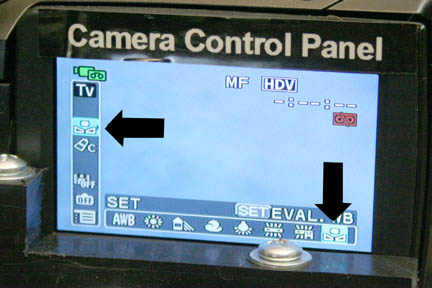
This will put the camera cursor onto the icon for manual
white balance.
Press the joy stick to reset the white balance.
Hold for about 2 seconds and then release.
Press the function button ONE TIME ONLY to lock the white
balance into place.
The camera will hold this white balance even after being
turned off.
Transferring Color Negative
Insert some color negative into the gate and then follow
the above white balance procedure.
Transfer your film in the silent mode.
Process with the "NEGATIVE" option in the settings tab.
IMPORTANT: Always reset your white
balance to an empty gate after transferring color negative. Otherwise,
your next home movie transfer will come out very very BLUE!!!!
If you have any questions,
please feel free to call
Roger Evans at 830-966-4664.