This unit has an internal universal power supply and
does not need a transformer.
If you are an international customer, you can simply
use an adaptor to change the plug to your local standard.
Do not plug into a UPS (universal power supply).
However, a power surge protector is advised to protect
internal components.
IMPORTANT: To prevent digital interference, keep all cell phones a minimum of 10 feet from this unit.
Make sure that all film is free of bad splices and
torn sprocket holes.
Make sure that the source reels and take up reels
are not warped.
Reels that bind or rub against the edge of the film
will affect sound quality.
Do NOT over-lubricate your film. This means no silicon
or FilmGuard.
Over-lubricated film will affect sound quality by
preventing the flywheel from operating correctly.
Over-lubricated film will affect sound quality by
clogging the sound heads.
The audio output is a line level audio that can be recorded with a standard RCA cable (not included).
After unpacking the unit, please use compressed air
to blow off any dust and debris.
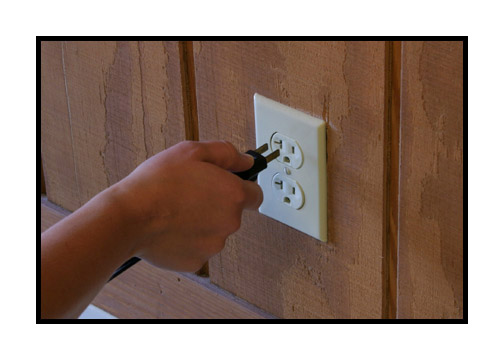
Make sure the unit is off and then plug into the wall
outlet.

Connect to audio input using standard RCA cable.
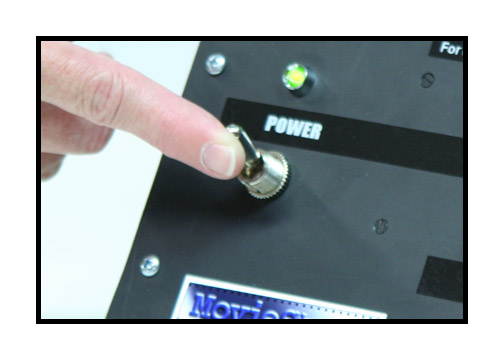
Turn on unit.
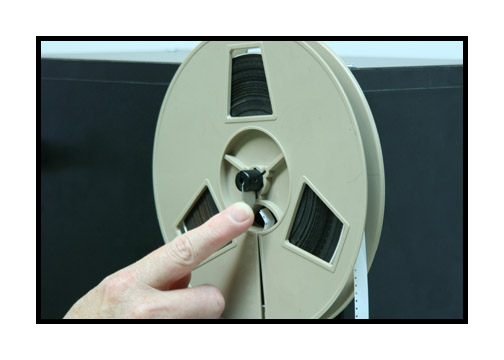
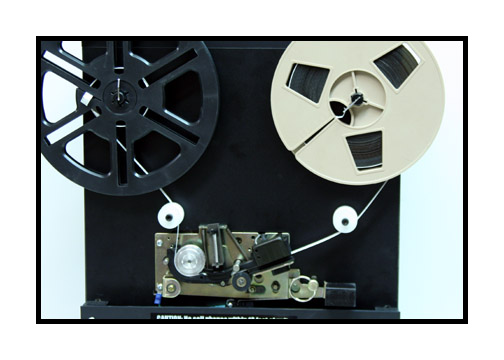
Place reel of film on spindle and secure.
Note the sprocket holes should be to the outside of
the reel.
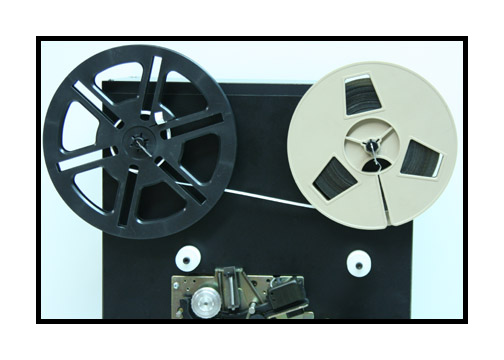
Thread film to the take up reel as shown (not included).
This unit has a maximum capacity of 600 feet.
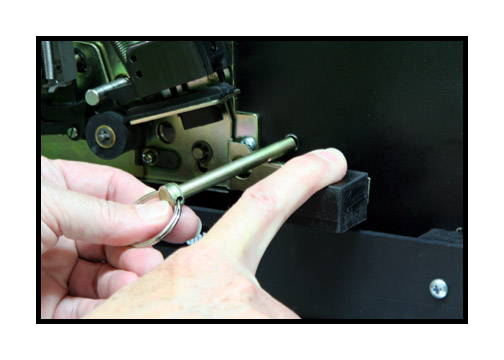
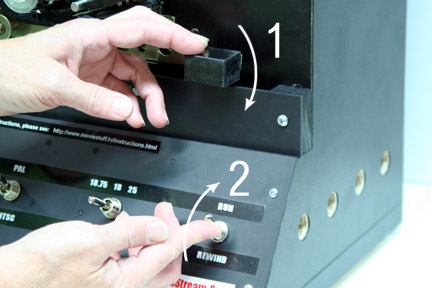
If not already in place, pull down sound head lever
arm and insert pin as shown.
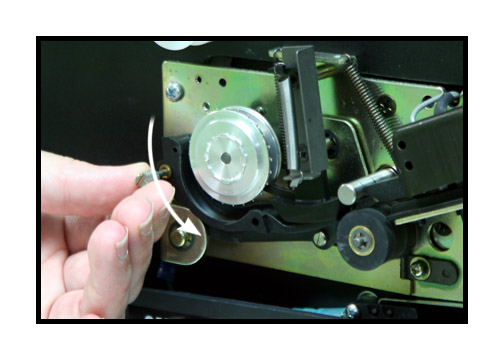
Unscrew and swing down sprocket film guide.
Push up on film damper with one hand and insert film
as shown.
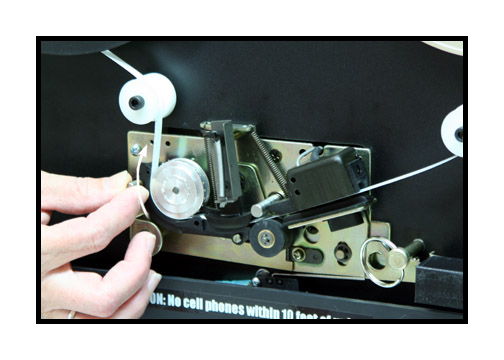
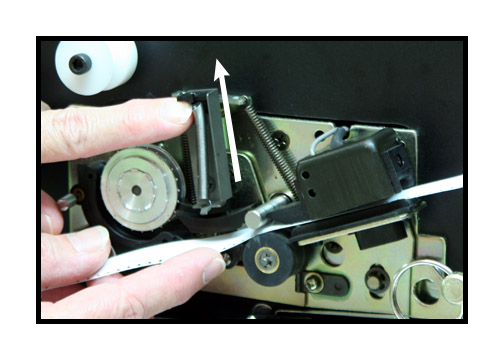
Loop film around rollers and close sprocket film guide.
Screw lightly to hold position.
Film should be threaded as shown.
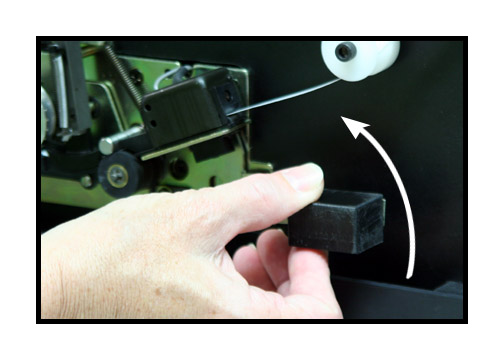
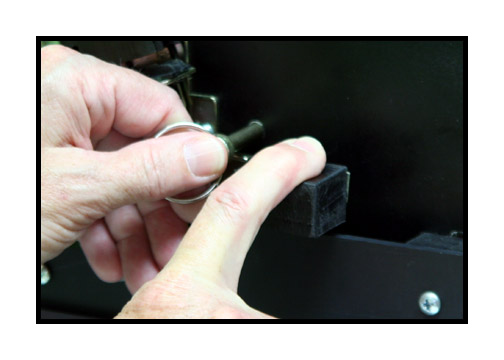
Remove pin and gently raise lever to position shown.
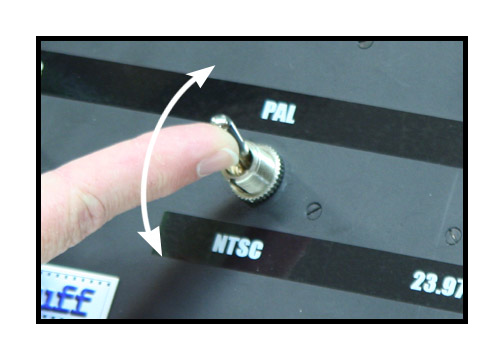
Chose PAL or NTSC.
NTSC is used in North America and Japan.
PAL is used in the UK and Europe.
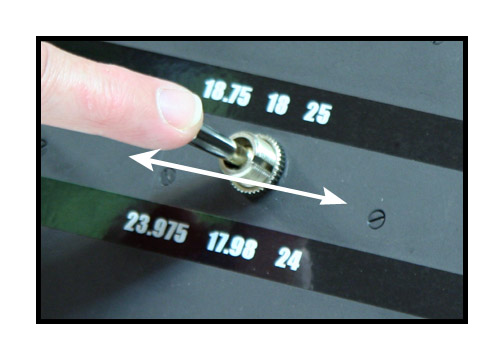
Choose the desire speed.
NOTES ABOUT SPEED.
The numbers listed are in Frames Per Second (FPS).
In theory, the "normal" frame rate for home sound movies
was about 18fps.
However, some films were shot at 24fps for the USA
and 25fps for the UK and Europe.
There is no standard so you might have to run the
film and just listen.
It should be noted that NTSC video does not really
run at exactly 30fps.
Instead, it runs about -.1% slower.
Therefore, audio shot at 18fps would need to run at
about 17.98fps to match your film transfer.
Audio shot at 24fps would need to run at about 23.975fps
to match your film transfer.
The exception to this is if you have a video file
that is a native 24P file.
In that case, you would choose 24fps because that
is the exact frame rate for that file.
PAL video runs pretty much dead-on 25fps (50 fields).
However, because 18 frames will not divide evenly
into a pulldown pattern across 50 fields,
film shot at 18fps is often telecined across only
24 frames and then those 24 frames
are played at 25fps. This allows for smoother motion
but means that any audio
will need to be transferred at 18.75fps to match your
film transfer.
The exception to this would be a file produced for
internet-only
playback that has no pulldown pattern and plays exactly
at 18fps.
In that case, you would choose 18fps because that
is the exact frame rate for that file.
IMPORTANT: Please make sure that your sample rate for recording your audio matches the sample rate for your NLE system. For instance, if you record your audio at 44kH and your NLE sample rate is 48kH, then the audio will fall out of sync with the video when you play it on your NLE timeline.
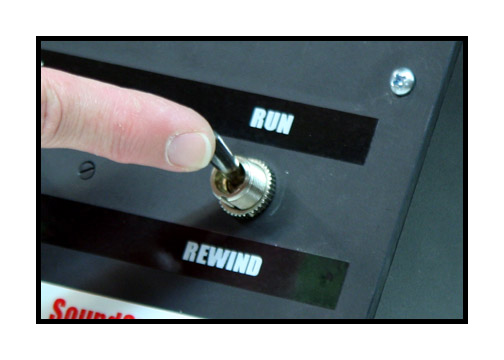
To begin playing the film, flip the switch to
"RUN" as shown. To stop, flip the switch back to the center position.
It should be noted that the unit takes several seconds
to get up to correct speed. To avoid sync errors, and to ensure best sound
quality, do not start recording until the unit has reached top speed.
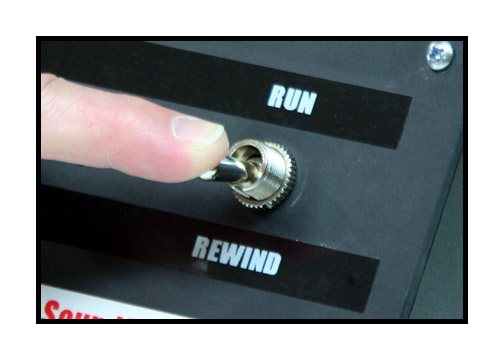
To back the film up a bit (not high speed rewind),
first pulldown on the lever then flip the switch to "RUN".
When you finished reverse operation, return the switch
to the center stop position before releasing the lever.
NOTE: Do NOT pull down the lever while the unit is
in the forward mode.
Always stop the unit before changing to reverse operation.
To rewind, first remove the film from the film
path as shown.
Next, hold the rewind switch down during the
rewind period.
NOTE: This is a spring loaded switch and will not
stay down by itself.
Do not attempt to high speed rewind film while it
is still threaded in the unit.
If you have any questions, please feel free to
call me at 830-966-4664
Roger Evans