Retro-16 Pro Set Up
Click HERE to return to general Retro Instructions and Links page.
If you have any issues or questions, please contact us at
retrofix@swtexas.net or call us at 830-966-4664.
For RetroScan-HD Pro software instructions, please click HERE.
NOTE: All instructions are for RetroScan-HD version 3.0.4 or above.
If you are using a previous version, please get your free update HERE.
NOTE: Please unpack carefully and keep the shipping box and internal packing materials for warranty shipping, if necessary. This is a precision optical device and the warranty does not cover repairs of return shipping damage if unit is not packaged appropriately using the original box and internal packing materials we have provided for safe transport.
Unit is designed to be stored and used in climate controlled
environment of 68-75 degrees F or 20-32 degrees C with minimum humidity.
Also, after unpacking, please let the unit set for about an hour at room temperature before attempting to use.
This is necessary as changes in humidity can alter the precision alignment on components within the unit.
Attempting to use the unit without letting it stabilize will not hurt anything but performance
may be affected until stabilization is complete.
After unpacking, please set unit on smooth, level surface.
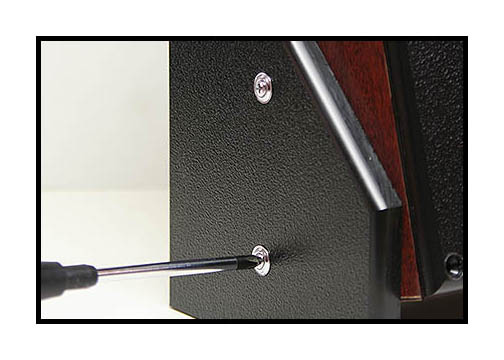
If the unit rocks, adjust the leveling by loosening the screws on one of the plastic legs, pressing down on the unit from the top lightly, then gently tighten the screws. However, for proper operation, do not remove the plastic legs from the unit.
NOTE: Do not loosen or adjust any screws on this unit other than as outlined in these instructions.
All components are calibrated for optimal performance.
Making unauthorized adjustments to the gate or other components can affect performance and void your warranty.
Attach the provided USB cable to the back of the unit but DO NOT plug USB cable into the PC.
You will be notified during installation of the software when to connect the USB cable to the PC.
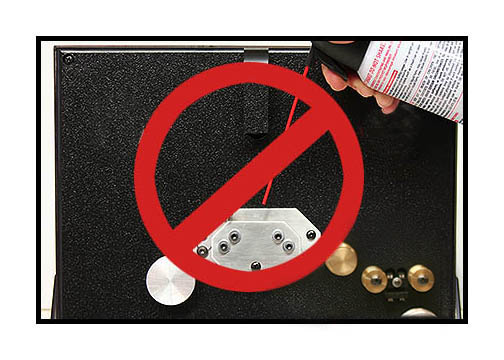
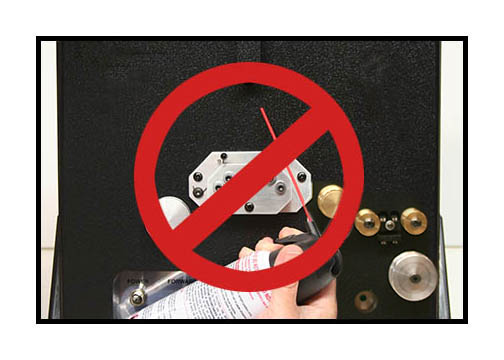
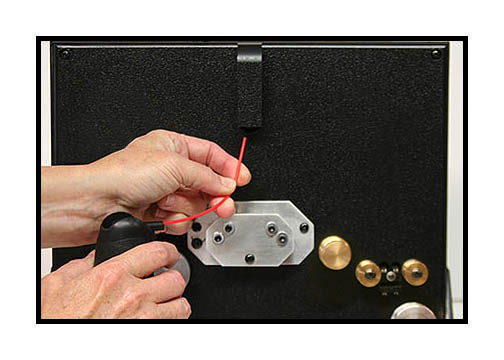
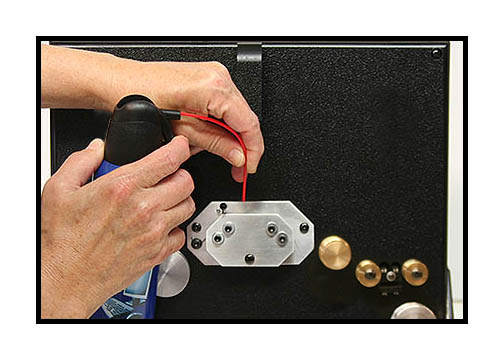
To dust off the unit, use a can of compressed air but do not invert the can nor turn it sideways.
Clear the nozzle first with a short blast and then bend then can's tube as shown to clear dust and debris
from the mirror above and the gate below. Do not touch the mirror and do not use any type of
liquid cleaner on its surface. If necessary, use a cotton swab to gently wipe the surface
and then follow up with a soft puff of compressed air to blow away cotton fibers.
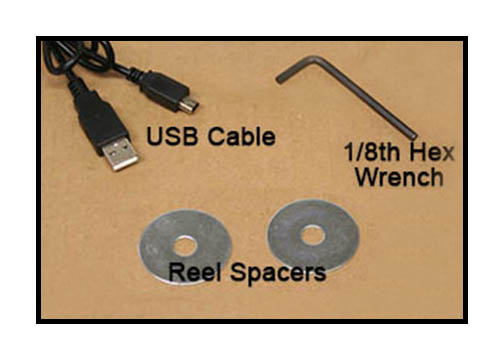
Remove the accessories from the cardboard insert and locate all the parts shown above.

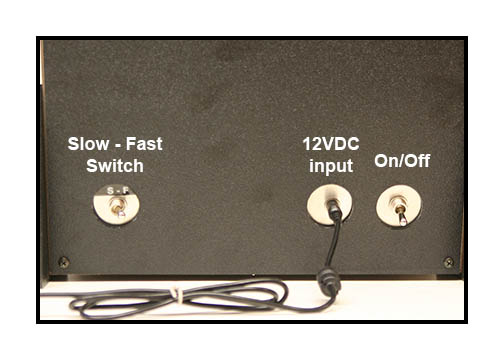
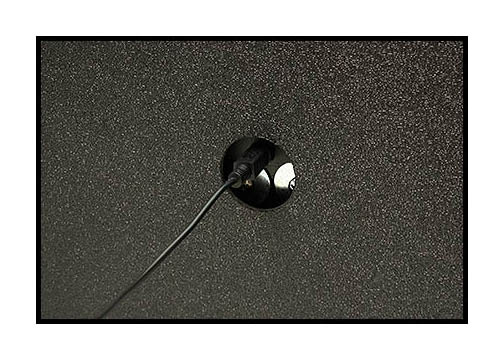
Locate included power supply and plug into back panel as shown.
NOTE: This is a universal DC power supply. No transformer is required for international use. The AC power
cord included is for North America but you can safely replace it with a power cord to match
your local power mains requirements.
Also, please note the "Slow - Fast" switch located on the rear of the unit.
The normal operational speed of the unit is about 15fps in the "Fast" switch position.
This speed is fine for compressed transfers on typical laptop and desktop PCs.
The "Slow" switch position will reduce the speed to about 10fps.
This is recommended when transferring on slower PCs or when scanning uncompressed due
to the inherently larger file size for each frame. You will need to experiment for desired results.
Selecting either 15fps or 10fps transfer speed makes no alteration to the playback speed of your film,
which will be determined by settings in the RetroScan-HD Pro software.
Also, please note that if you are running old commercial movies with a clear edge around
the sprocket holes, you will need to run the film at high speed or the image will be
unstable and jump around in the capture window. For this reason, you may not be able
to capture these old movies uncompressed unless you have a really fast Raid-0 array
that can keep up with the higher data rate of 15fps capture speed.
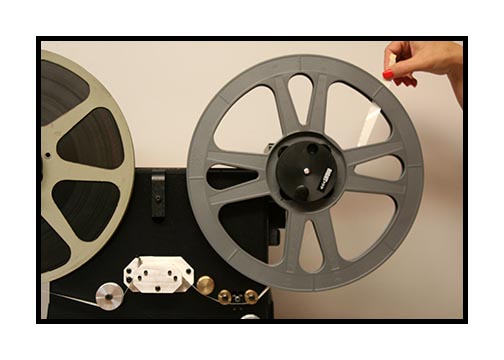
Place the take up reel on the right spindle and turn reel retainer until tight and then loosen a bit so the reel turns freely.
At this point, do not continue until software has been installed. Unit does not have to be turned on for installation.
Please make sure that all screen savers, sleep mode functions and antivirus are turned off during operation of this software.
Leaving these active can cause instability on some systems. Also, make sure that the font size of your Windows OS
is set to "default" or "100%". Using a larger font size, such as 125%, etc, can cause malfunctions in the software.
To download the latest RetroScan-HD Pro software, please click HERE.
Make sure that your BIN registration key is on your desktop.
You will not be able to load the RetroScan-HD Pro software without the BIN registration key.
For RetroScan-HD Pro software instructions, please click HERE.
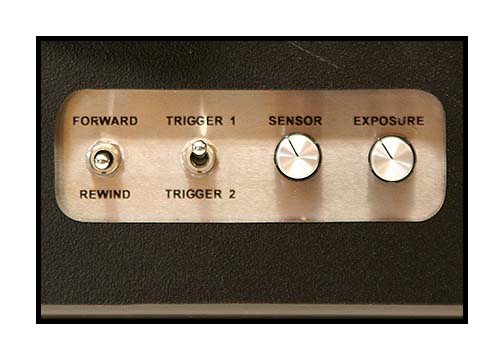
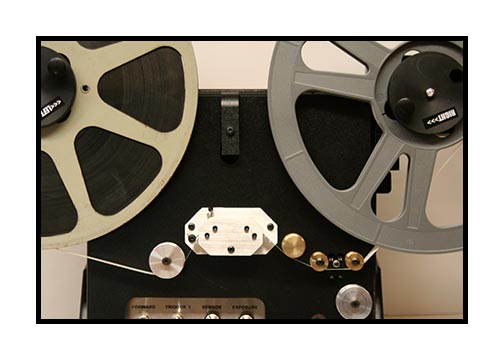
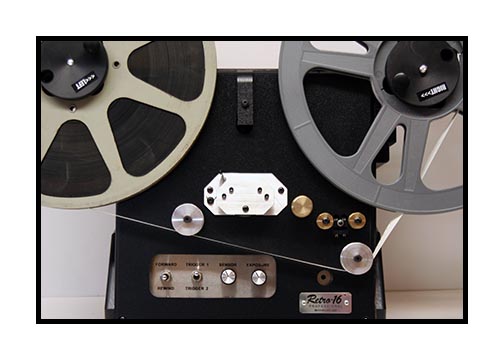
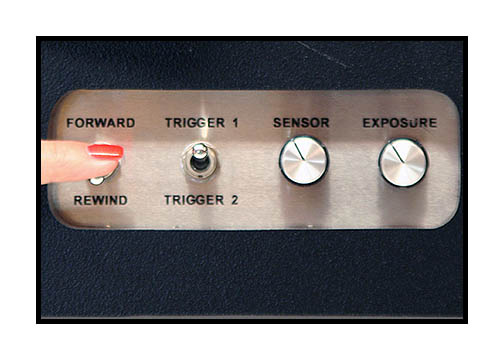
Before you proceed, please note the various controls of the unit.
The "Forward" and "Rewind" switch has a center-off position.
The "Trigger 1" and "Trigger 2" switch chooses between the two BluePoint sensors to the right of the unit.
Due to film shrinkage, you may find during calibration that one sensor position works better than the other.
The Exposure knob controls the amount of light that illuminates the film.
The Sensor knob controls the sensitivity of the BluePoint sensors.
(NOTE: The Sensor knob actually requires a full 10 turns to reach each end of travel, so don't think it's broken.)
Typically, most film will transfer fine with both knobs at the 11:00 o'clock position as shown.
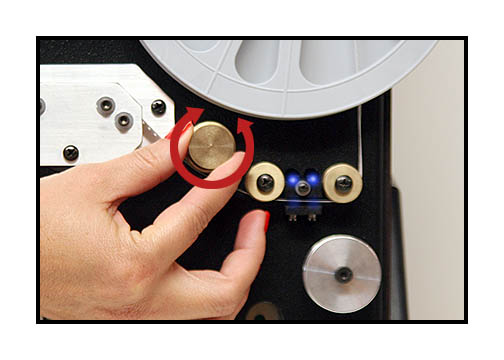
The brass framer knob is used to align the film vertically. This knob will turn 360 degrees
in either direction with no "stops" at either end of travel. This knob adjusts the position of the frame by increasing
or decreasing the amount of film that exists between the gate (where the camera is) and the sensor block
(where the BluePoint sensors trigger the capture of each frame.)
It should be noted that, because the sensors are a number of inches from the gate, good splices
and good sprocket holes are important for best performance. This is because each target frame that
is captured at the gate depends on a trigger frame that is passing the sensor several inches ahead of
the target frame. For example, if you have a piece of tape covering the sprocket hole of a trigger frame,
that hole will not "trigger" the capture of a target frame that is still at the gate.
Also, changes in film thickness can alter the calibration of the unit. For this reason, it is best
to calibrate the unit using the actual footage and not the leader, which is thicker.
There are two sensors. The sensor on the left is for Trigger 1 and the sensor on the right is for Trigger 2.
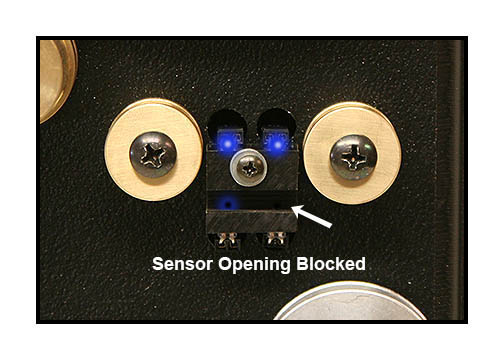
When you turn on the power, you should clearly see the light from the BluePoint sensors
shining down on the lower surface of the sensor block. If the light is not present or diminished,
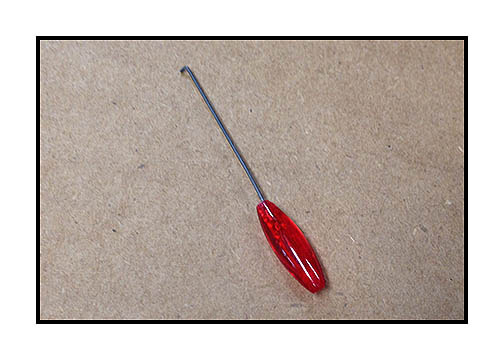
then the tiny pin hole in the sensor block is clogged and will need to be cleared. You can try
compressed air but, if that doesn't work, then you will need to manually clear the tiny hole.
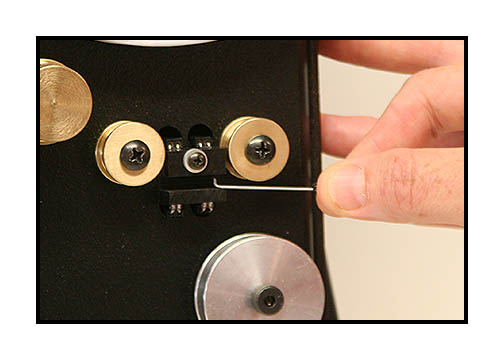
Use the sensor pick provided to gently clear the opening.
After launching the RetroScan-HD Pro software, you will need to calibrate your unit before you can transfer.

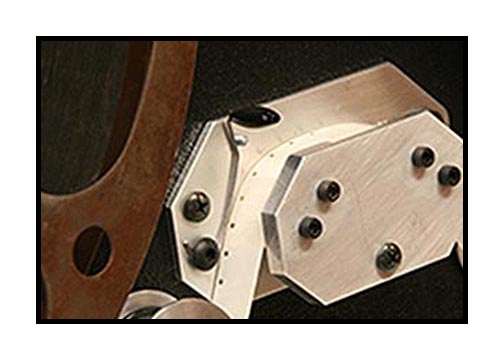
Gently move the film tension clip from the "closed" position to the "open" position as shown.
The purpose of the film tension clip is to keep the film pulled flat as it spans the open gate during transfer.
It is normal that this clip may lose tension over time. See bottom of this page about adjusting tension on this clip.
It is best to calibrate the unit at the beginning of each work day.
Put your reel of film on the source (left) spindle of the unit.
In practice, there is no need to use the black source reel retainer during a transfer as the reel will easily stay on the spindle.
The retainer only needs to be used during rewind. But you can put it in place during transfer, if you wish.
As with the take up reel, tighten the retainer slightly and then loosen a bit so that the reel turns freely.
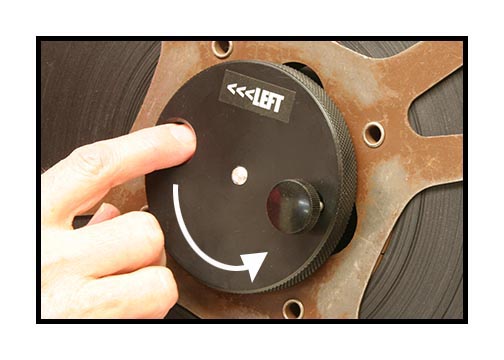
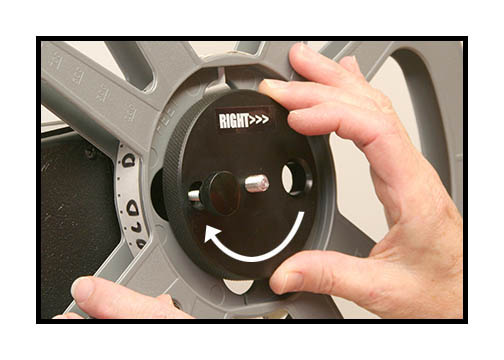
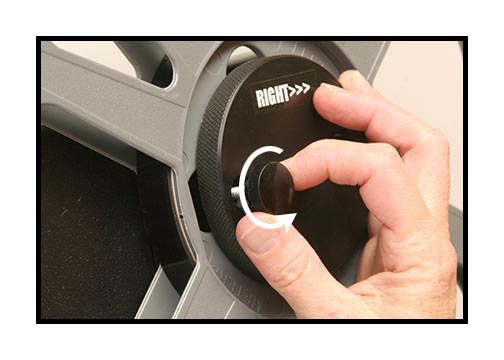
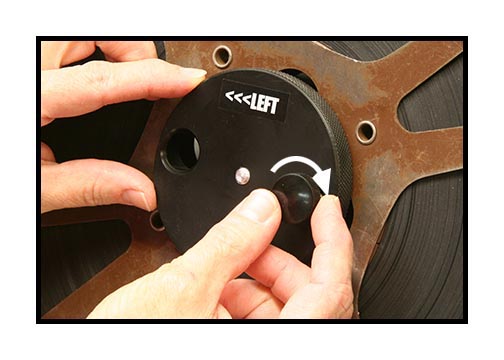
NOTE: Unlike the other Retro units, the Retro-16 Pro has reverse threads on the source side.
So, turning the retainer to the left will tighten the retainer against the reel.
Turning the retainer to the right will loosen it.
Pull film under rollers and then thread into take up reel.
Manually turn the take up reel a few times to get a good wrap and secure film.
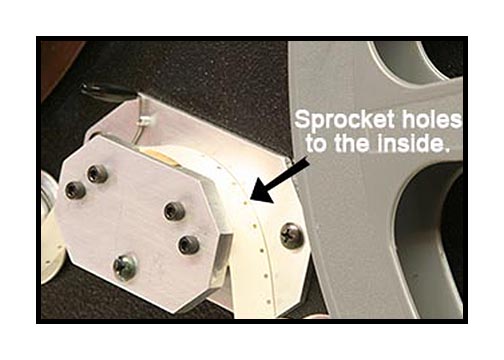
Thread film leader onto the gate as shown. Note that the sprocket holes are to the inside.
Make sure that the sprocket hole edge is under the tension clip.
Gently move the tension clip from the "open" position to the "closed" position as shown.
Your film is now threaded properly into the Retro-16 Pro scanner.
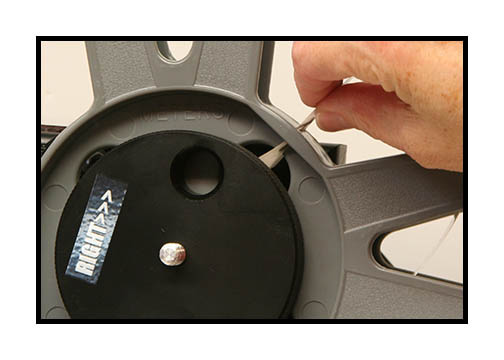
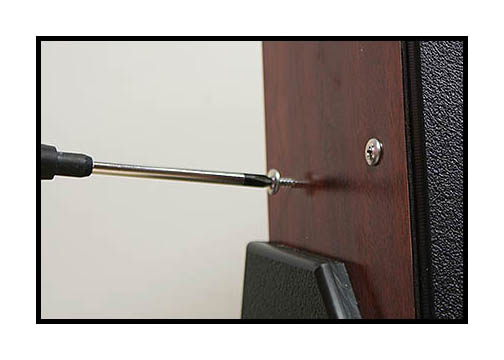
It should be noted that the take up reel is the only thing that pulls the film through the scanner. Normally, you can lock the reel to the hub by just holding the reel and tightening the black retainer against the reel firmly. But for longer runs, it is probably a good idea to also use the locking screw as shown. If using the locking screw, it is important to make sure the end of the screw aligns with one of the many open spaces in the reel hub to prevent damage to the take up reel. Loosen the retainer and turn the reel to new position, if necessary. Always loosen this retainer or remove completely when rewinding.
(NOTE: Do NOT tighten the locking screw on the source retainer during transfer).
After launching the software, let it sit for a moment while the drivers finish loading.
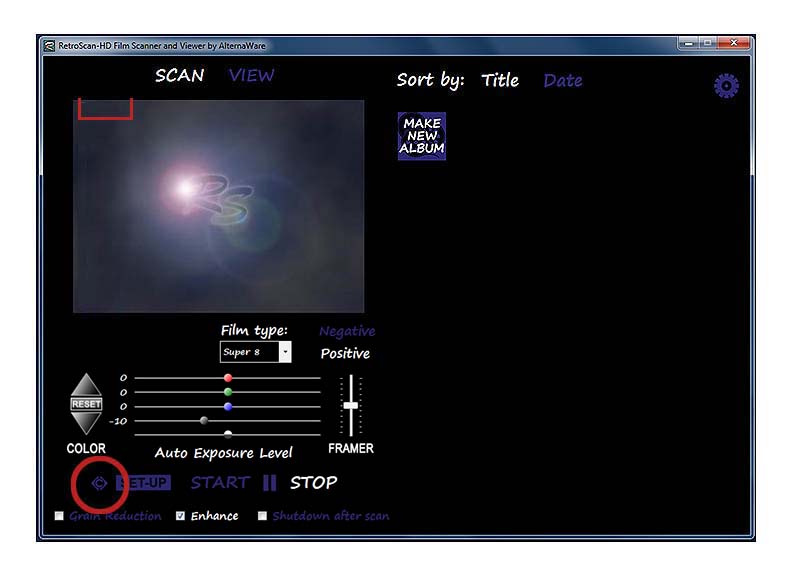
Select the film type from the drop down menu and click the "C" calibration symbol
in the lower left hand corner of the software. A red box will appear to the upper left of the
capture window.
NOTE: All 16mm calibration should be done under "Regular 16", even if transferring Super 16 film.
Once calibration is achieved, you can then switch the format to Super-16 for the transfer.
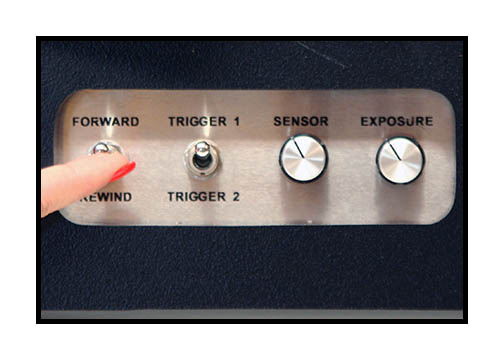
Select Trigger 1 or Trigger 2 and then start the unit running by switching to "Forward".
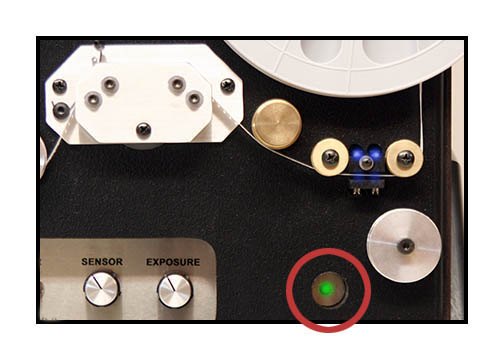
Once the film starts moving, the LED will come on that illuminates the film.
WARNING: It should be noted that the LED is very, very bright.
Do not look directly into the gate with the LED on. Doing so runs the risk of damage to your eyes.
After the film starts to move, the unit will take a second or so to find sync speed.
You will know that the film is triggering the sensor properly by the blinking green tally light.
If the light is not blinking then adjust the sensor knob until the tally light blinks.
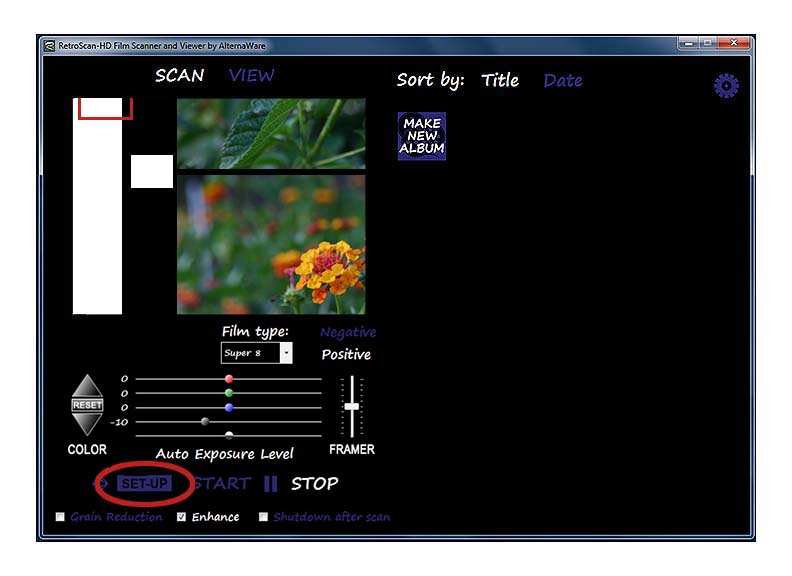
Press the "Set Up" button on the software.
Let any leader pass and then you will see the film in the capture window.
The film may be too low or too high and may also not be in the correct position
left to right. The goal is to calibrate the unit until the sprocket hole is parked
in the middle of the red box as best as possible.
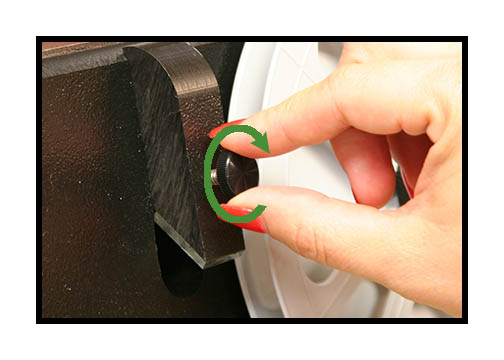
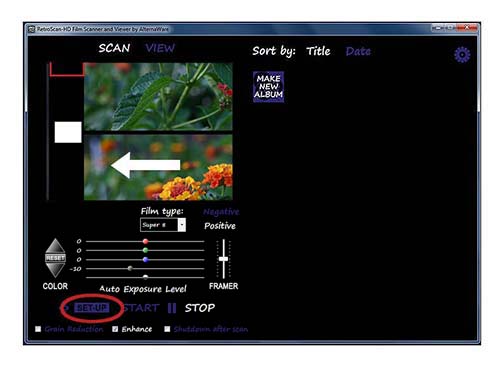
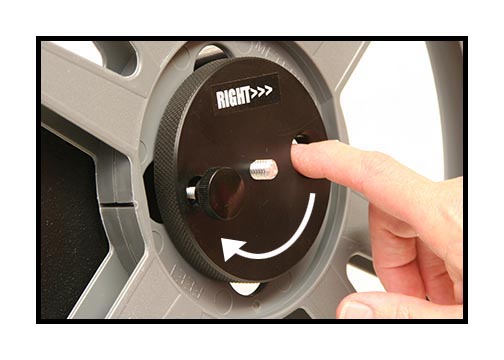
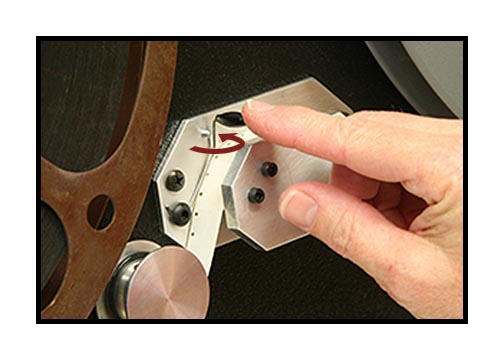
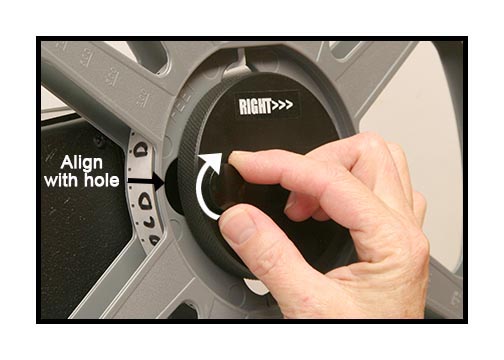
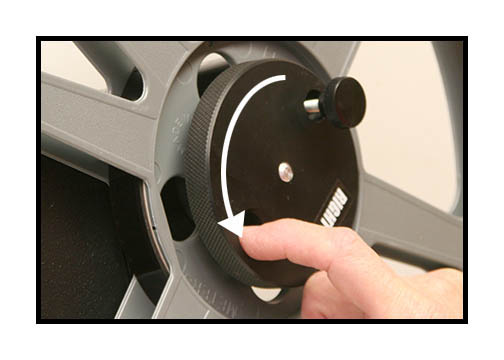
To adjust the horizontal position of the image, turn the calibration knob as shown.
As you slowly turn the knob clockwise, the sprocket hole will move to the left.
Depending on the start position of the knob, it may take several turns before
you see any results but don't turn too fast!
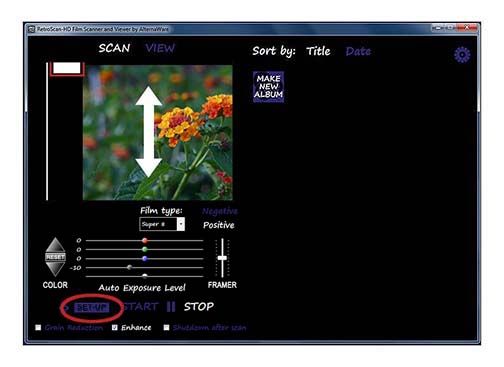
Turn the brass framer knob to move the image up and down. Again, there is no right or wrong
direction when turning this knob. You will need to check calibration at the beginning of each roll to be transferred.
When finished, click "Set Up" once to stop the calibration and then click
the "Calibration" symbol again to remove the red box.
The Retro-16 Pro unit has now been calibrated for both Regular 16 and Super 16 film!
It should be noted that the RetroScan-HD Pro software must be able to "see" the sprocket holes or the frames will not be captured properly. If the sensor is set too high or too low, the unit will not trigger properly during capture. This can result in instability or, in extreme cases, loss of capture.
To capture, again put the unit in the "Forward" mode and then click "start" on the RetroScan-HD Pro software. When you finish your scan, click "stop" on the software and then stop the unit. If you let the entire reel transfer unattended, the Retro-16 Pro unit and the RetroScan-HD Pro software will stop automatically about one minute after the reel ends or in the event of a film jam.
To rewind your film, loosen the locking screw until the tip is again flush on the back side and also loosen the take up retainer a few turns.
Tighten the source reel retainer firmly and move tension clip to the "open" position.
If the film was stopped before the tail end left the path, remove the film from the Retro-8 and loop under guide rollers as shown. Do not rewind directly between reels or you risk the film rubbing against the overhead mirror assembly. This can damage both the film and the mirror assembly.
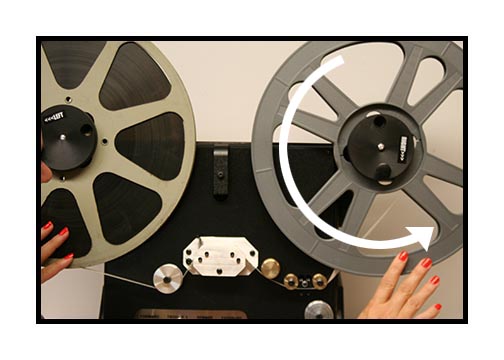
Put the Retro-16 Pro unit in the "rewind" mode. It is advisable to hold your hand lightly on the reel on the right
to provide back tension during rewind.
Congratulations! You have completed your first RetroScan-HD Pro transfer!
Useful tips on your Retro-16 Pro scanner.
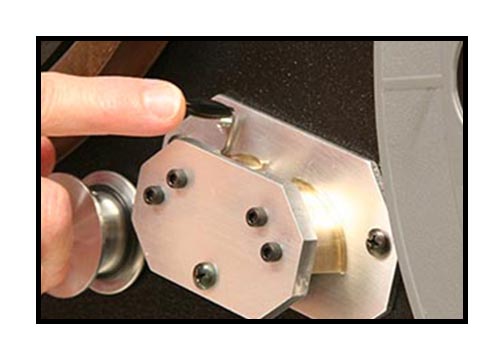
Though the unit itself has no wet-gate nor any kind of built-in film cleaner, we anticipate Retro-16 Pro users being inventive enough to experiment with devices of their own design. To accommodate that, we have added some user accessory screws on the left side of the unit. These are wood screws and have no nut on the back side so they can be removed safely. These screws can be used to hold user-designed or aftermarket attachments in the future. Also, some older source reels may be warped. If you find they rub on the front of the unit, you can use the provided spacer to offset the reel.
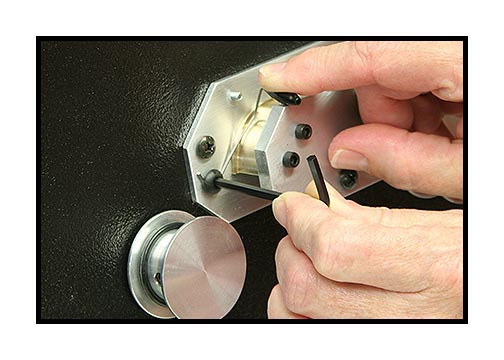
It is recommended to re-tension the clip at the beginning of each day of transfers.
Use the provided 1/8th" hex wrench to loosen the screw out about 1/8th of an inch or about 4mm, pull the clip forward and down into the middle of the gate slightly as shown. Make sure that the bottom "hook" of the clip is firmly and completely against the screw shaft, then tighten the screw.

After resetting the tension, put some film on the unit and thread it under the clip
like normal. Pull on the film with your hand. It should be firm enough to keep the film flat at the gate but not so tight that it is hard to pull.
If the tension is too hard, it will deform the reel and/or possible break the film so adjust accordingly.
To extend the life of the tension, always return the tension clip to the "closed" position when not transferring film.
NOTE: Do not loosen or adjust any screws on this unit other than as outlined in these instructions.
All components are calibrated for optimal performance.
Making unauthorized adjustments to the gate or other components can affect performance and void your warranty.
If you have any issues or questions, please contact us at
retrofix@swtexas.net or call us at 830-966-4664.
All information and imagery copyright 2014 MovieStuff, LLC
All right reserved.