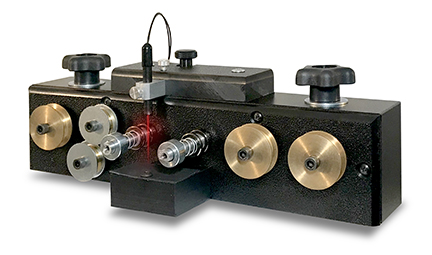
MovieStuff LightPin Gate Instructions
Carefully unpack the gate, taking care not to damage the fiber optic cable that feeds the sensor.
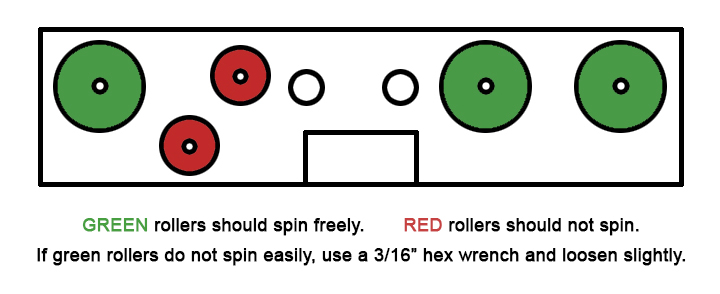
Please check the guides to make sure that appropriate rollers are free to turn.
Mount the gate on the Universal and secure like normal.
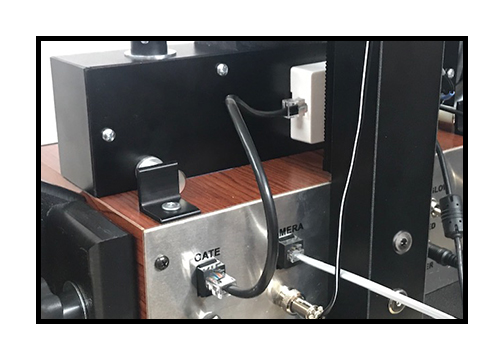
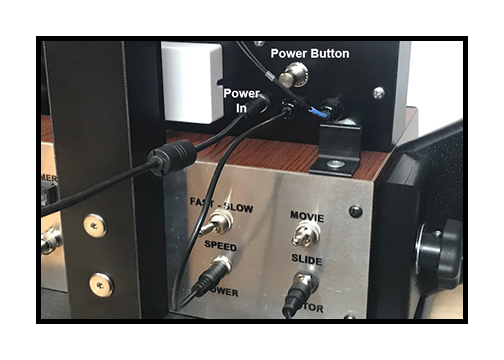
Connect the black sync cable as normal. Plug the main power cord into the back of the gate as shown above and then plug the short power cord coming out of the gate into the power input of the Universal. Please note that you now have an ON/OFF power button on the back of the gate. This will turn the power to the entire unit on and off. Always turn the power button off when the Universal is not in use to protect the life of the LightPin sensor module.
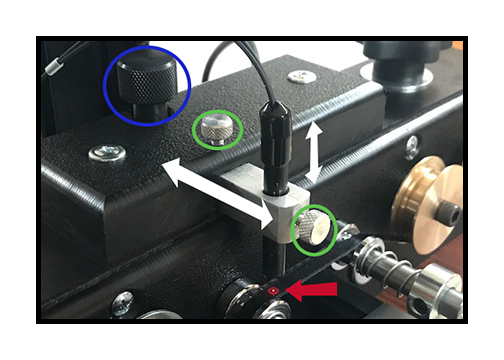
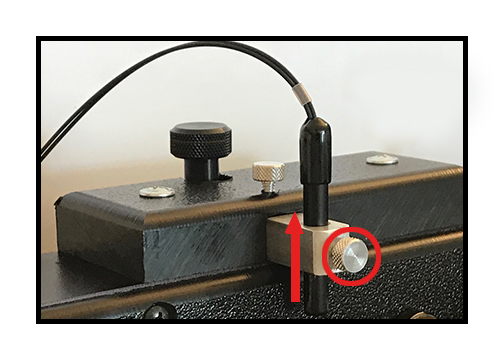
Loosen the thumb screw circled in red and slide the LightPin Sensor up slightly and out of the film path before attempting to thread any film into the gate.
Threading the LightPin Gate
Depending on the amount of tension you might need, there are a variety of ways the gate can be threaded.
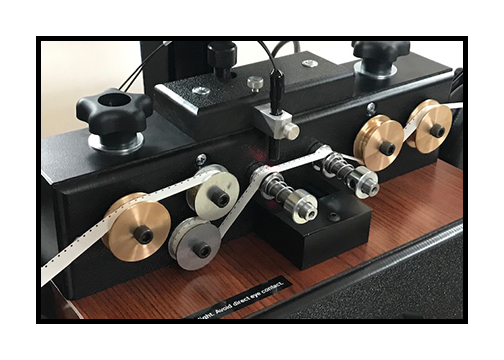
The above path shows the threading with the greatest tension. This is useful for film that has a lot of curl. This path also works for normal film and typically results in the best registration as it flattens the film the most. Rewinding through this path should be avoided.
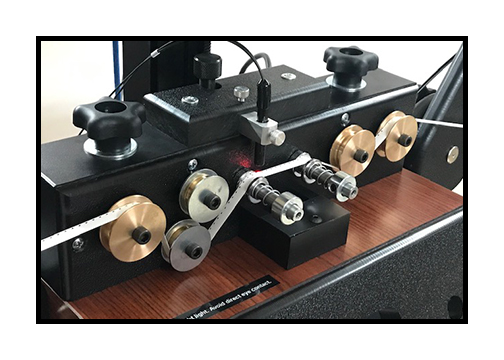
The above path shows the threading with medium tension. This is useful for most all normal film and results in decent registration. You can also rewind easily without having to un-thread the film.
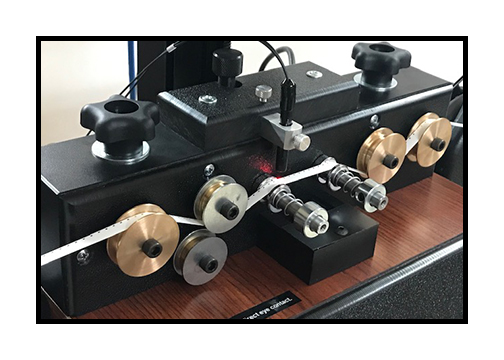
The above path has the least tension and is useful for delicate film that should avoid bends. Registration will be dependent on the condition of the film. You can easily rewind in this configuration without having to un-thread the film.
Adjusting the LightPin Sensor
The old LED and sensor combination could be affected by the density of the film. Thus adjustments to the sensor knob had to be made to take into account clear edge film or film that had clear patches around the sprocket holes. The new LightPin Sensor is reflective. It shines a narrow red beam of light (NOT A LASER) onto the surface of the film. That light then bounces back into the sensor by way of the fiber optic. As the sprocket holes pass by, they create an interruption in the light beam and that is what triggers the camera. Because the light is bouncing off the surface of the film and not passing through it, the LightPin Sensor is not affected by the density of the film. Clear edges do not affect it and the registration on clear edge film is no different than film with a black edge.
NOTE: In the following steps do not use clear film nor plastic leader to focus the sensor on. Clear film will make focusing difficult and plastic leader is typically much thicker than film, which will affect the fine focus of the sensor, plus the white surface will actually make the focused dot harder to see, compared to regular film. Thread your film onto the gate and move the film past the leader to an area that is fairly dark, as shown in the photo above. Loosen the THUMB SCREWS and use the HANDLE at the back to PUSH and PULL the sensor bar in and out. Do not attempt to turn the HANDLE. Just use it to slide the bar in and out until the beam is centered on the film. Hold back-tension on the film to keep it flat and gently slide the LightPin Sensor up and down until the red dot has a fine focus. (This is much like focusing the sun using a magnifying glass as a kid.) Once you have the red dot focused, gently tighten the front THUMB SCREW on the end of the sensor bar until snug. Do not over-tighten or you might damage the LightPin Sensor housing tube. Once you focus the red dot, you should never have to focus it again, even if you remove the gate and then put the gate back in place. However, it is easy to loosen the front THUMB SCREW and recheck your focus of the red dot at any time to ensure optimum performance.
NOTE: Ambient room light will not affect the LightPin Sensor in any way.
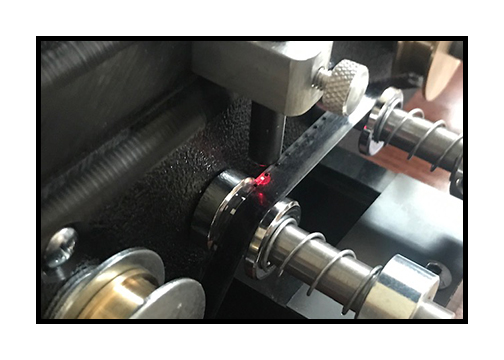
Next, use the HANDLE at the back and carefully slide the sensor bar in and out until the red dot is centered on the sprocket hole path as shown above then tighten the top THUMB SCREW to hold the sensor bar in place. Please note that the placement of the dot for the Super 8 format and the Regular 8 format are different. However, once you set the placement of the red dot for a particular format, you will not have to adjust it again unless you change formats.
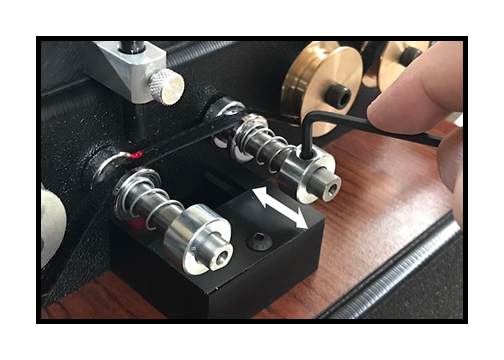
The front side springs have been pre-tensioned in our shop. However, the tension can be easily adjusted using an American 1/8th inch hex wrench to loosen the set screw in the collar, which can then be slid in and out to loosen or tighten the springs. This can be useful if you have old regular 8 film that was incorrectly split and too wide or film that is very thin and wants to cup easily due to any side pressure. But, typically, no adjustment is required.
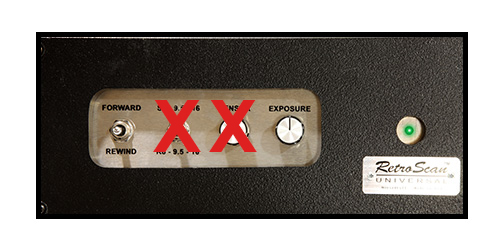
Now you can run the Universal like normal. However, you will find that the format selection switch up front as well as the sensor knob no longer have any functionality when using the LightPin Sensor. Neither the selection switch nor the sensor knob require adjustment when using the LightPin Sensor gate.